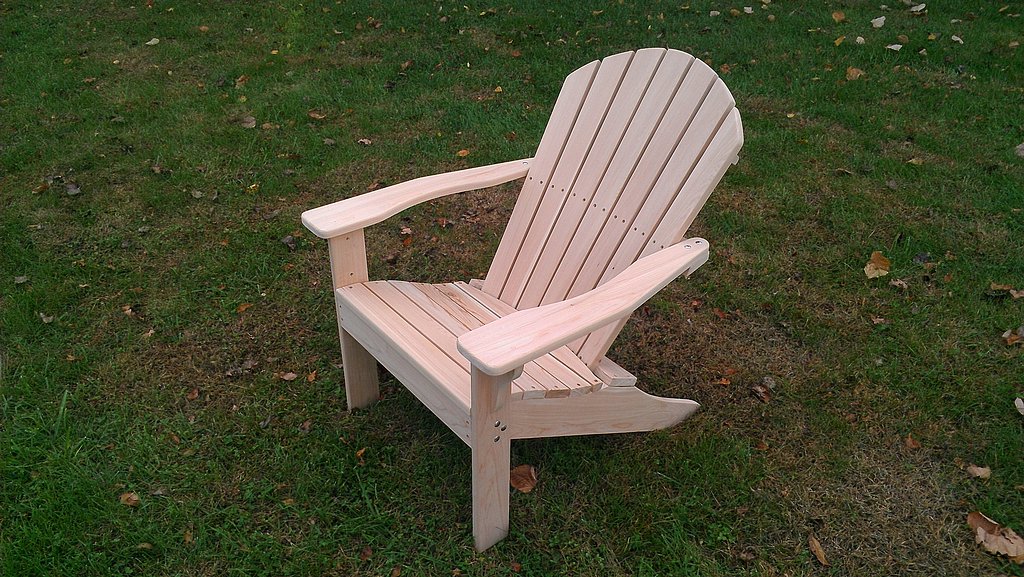
What could be better on a hot summer day than a cold drink, a good book, and a quiet, shady spot to read? How about a comfortable Adirondack chair? Exactly. After mulling it over for a number of years, I finally got around to building some Adirondack chairs this past Fall. Yes, a bit late for this lounging season but I’ll be in fine shape for next summer.
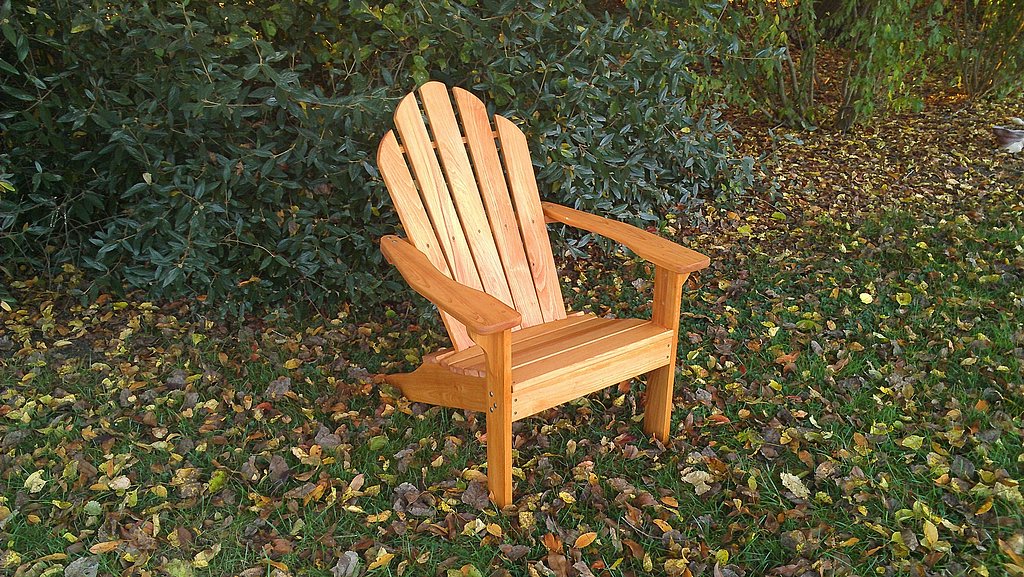
All season Adirondack chair made from cypress
I built four chairs – two with the traditional 5-slat back and two with a 7-slat shell back. Except for the backs, the basic design of the chairs is the same. They are based on Norm Abram’s Adirondack Chair plans that are freely available online from Popular Woodworking magazine. There are plenty of Adirondack chair plans online but I liked the simplistic appeal of Norm’s design, not to mention the Norm seal of approval. He claims the design was based on one his father used many years ago so that was good enough for me.
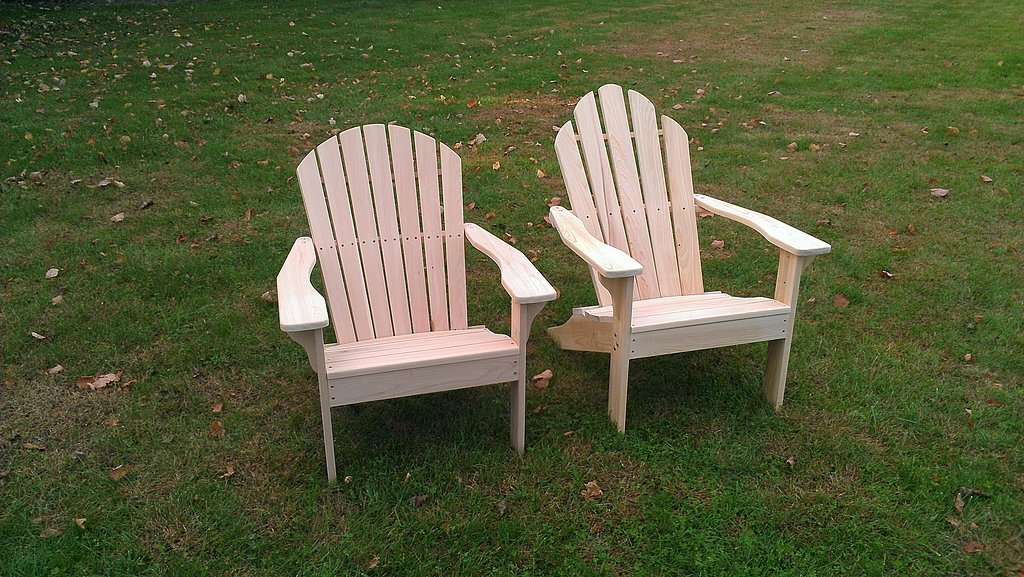
Adirondack chair variations: shell back and traditional back
Each chair required just under 20 board feet of lumber. I made the 5-slat chairs from cypress and the 7-slat ones from white cedar. The Tabulator lumber list for the 5-slat chair is shown below.
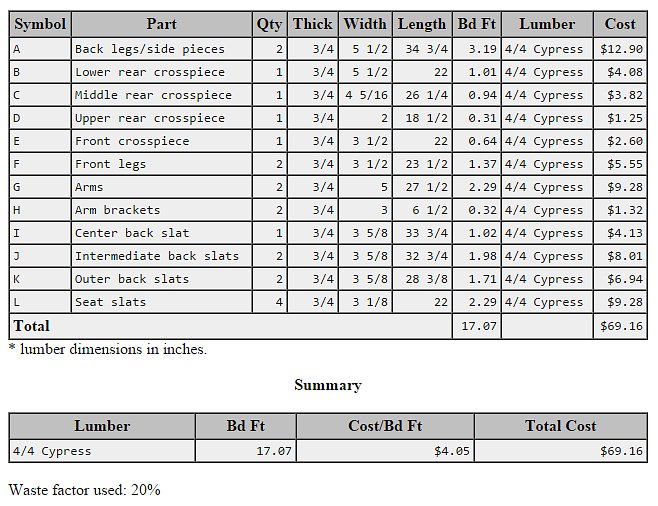
Parts list for Adirondack chair with traditional 5-slat back
I haven’t worked much with cypress or cedar in the past but I must say I was impressed with the quality of the wood and the ease of working. The boards had minimal warp and very few knot holes as can be seen in the photo below.
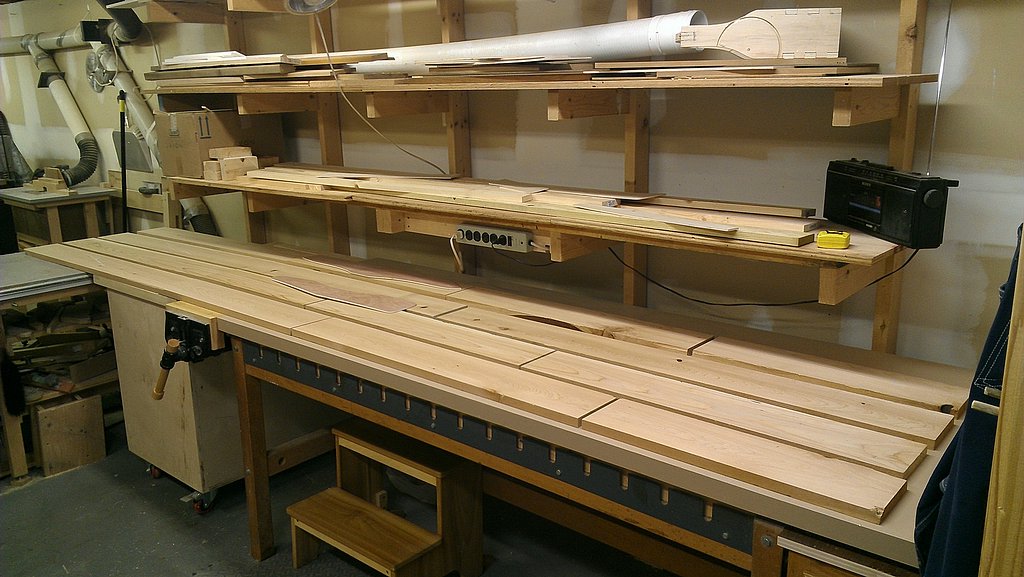
Laying out the chair parts
Given the number of curved parts, a set of templates is very helpful if building more than one chair, which most people likely will (have you ever only seen one Adirondack chair by itself?) I made my templates from some scrap 3/16″ ply material. This involved laying out 1 inch grid lines, transferring the cut lines from the smaller scale drawings, band-sawing along the lines, and then sanding the edges smooth. This was a fairly lengthy process. In hindsight, I probably should have spent $25 on a set of plans with pre-cut templates that I found online.
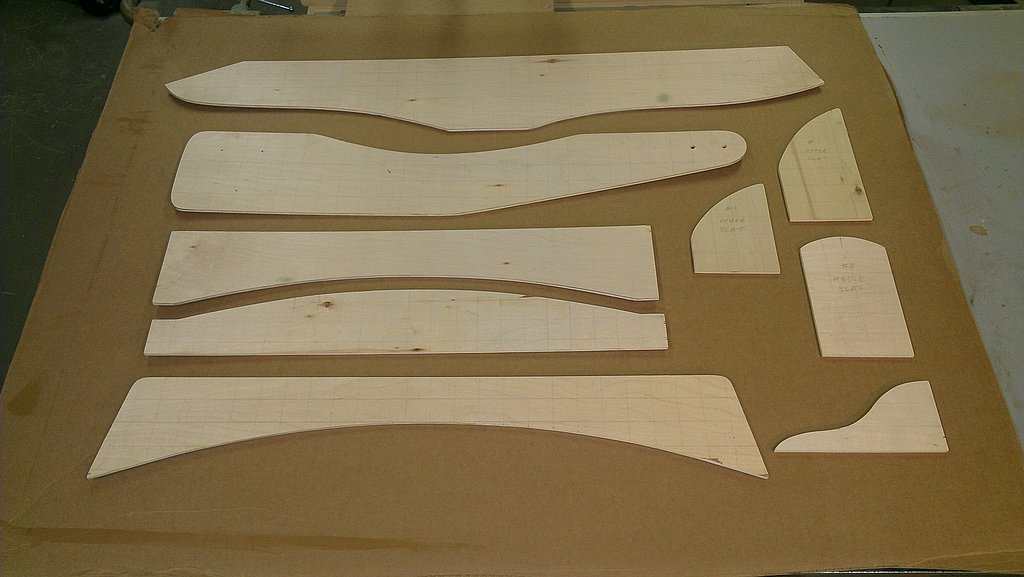
Templates are essential for laying out the curved parts of the Adirondack chair
I won’t go into the step-by-step process used to build the chairs since that’s covered in the plans but there are a few aspects of the construction that are worthy of mention. Tips if you will. One of these was cutting the ends of the back leg/side piece at the proper angle. I found the easiest way to do this was to lay the board against the miter saw fence and cut the upper end at a 24.5 degree angle. Then without changing the cut angle of the saw, place the other end of the board so it butts against the fence – using a scrap piece for additional support – and cut the other end. If doesn’t matter if the first cut isn’t exactly 24.5 degrees; the complimentary “butt cut” will ensure that the two ends form a 90 degree angle relative to each other.
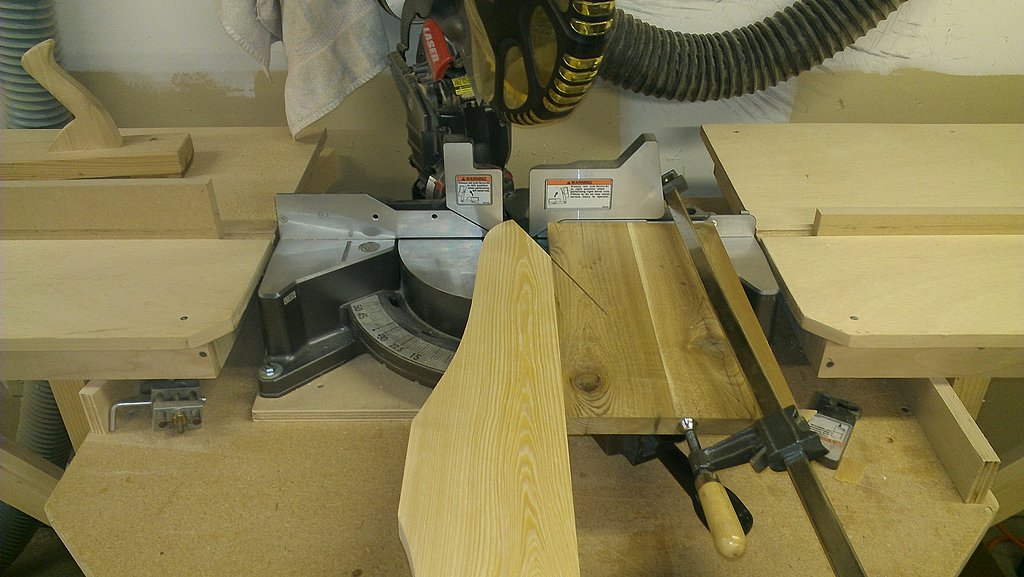
Simple jig to cut the rear leg at the correct angle
To help keep the back slats in place during layout and assembly, a temporary ledge was formed by screwing a piece of scrap wood to the underside of the bottom slat support piece. I found myself experimenting with different slat spacings so it was helpful not having to deal with the boards slipping down.
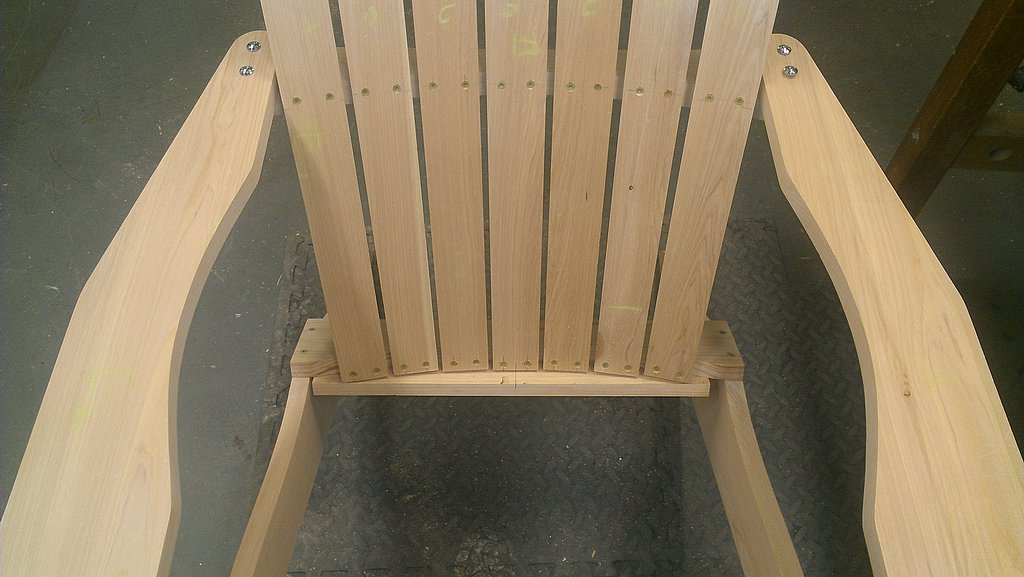
A temporary ledge was screwed in place to help align back slats
The arm rests of the chair overhang the inside of the front legs by 3/4″ and 1-1/8″ in front. To help with the alignment, I clamped a 3/4″ thick piece of scrap to the inside of the front leg that extends forward by 1-1/8″. This piece also supports and aligns the rear portion of the arm rest, which simplifies installing the rear crosspiece (which is initially bolted to the arm rests without the slats in place).
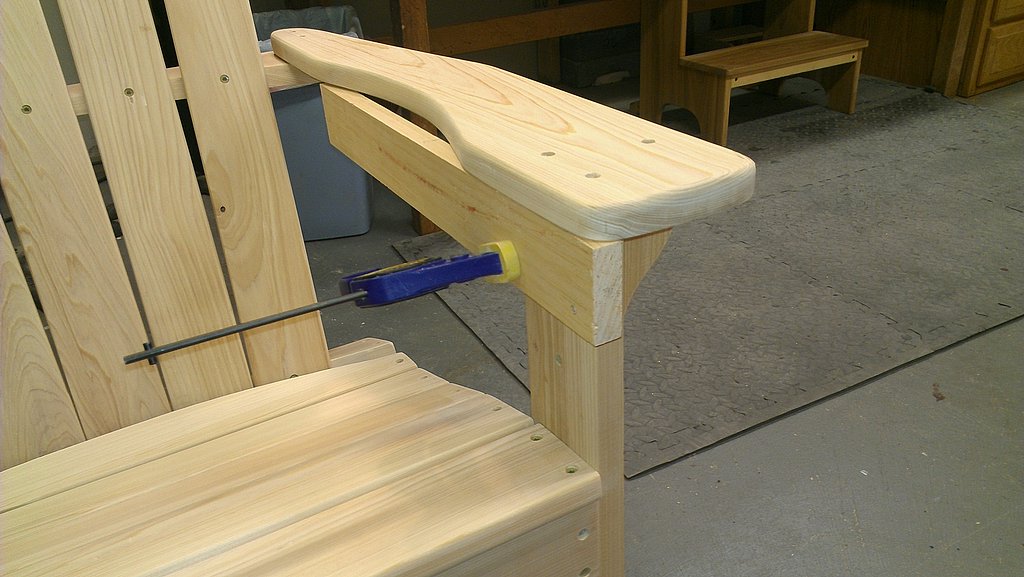
Scrap piece of wood used to align front and inner side of chair arms
For the 5-slat back chairs, I laid out the curves according to Norm’s plans but made the slats 3 inches longer so my head would lie more comfortably against them. For taller people, I recommend this additional height. I also tapered the slats (2-1/4″ to 3″) to give the chair a slightly more refined look. To better stabilize the slats, I added a horizontal support piece that attaches to the rear of the slats about 7-1/2″ down from the center slat.
A 1/2″ spacer block was used to evenly space back slats
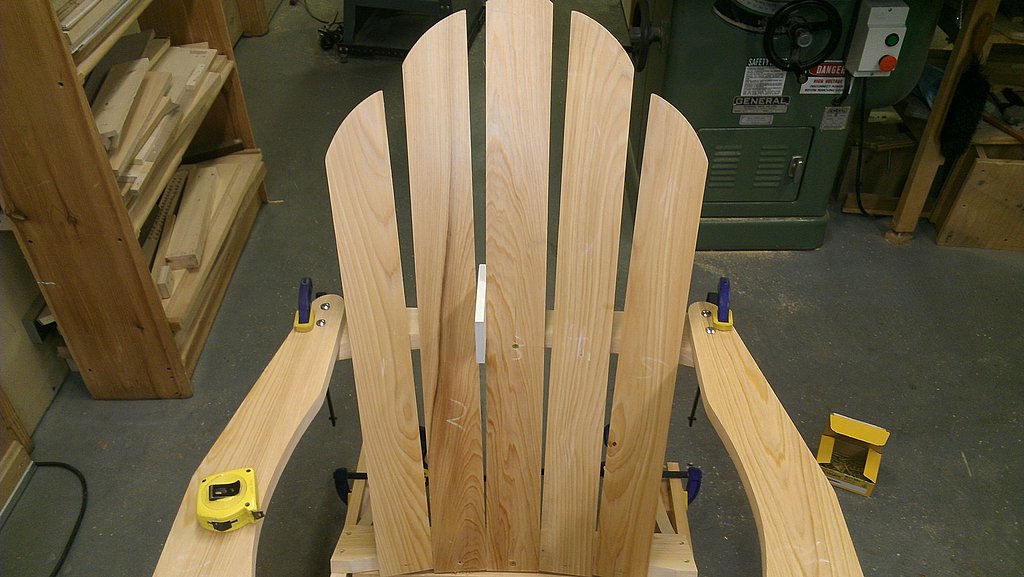
I opted to go with the shorter Norm-spec slats on the shell back chairs to accommodate the shorter chair dwellers out there. These slats were also tapered. To layout the curve, I first screwed the untrimmed tapered slats into position, allowing 1/4″ spacing on the bottom and 1/2″ on top. I marked off the height of the center slat (30-3/4″) and then used a thin piece of wood to scribe a graceful arc in which the outer edges of the outer slats are 6″ shorter than the center.
Shell back Adirondack chair made from white cedar
The chair hardware consists of 1/4″ stainless steel bolts for the main structural members and laminated deck screws for the other components. Most of the pieces were glued using Titebond III outdoor glue. I sure hope it holds up, especially where the front legs are joined to the back legs. This joint is subject to a lot of stress. To finish the chairs, I applied an oil stain followed by coat of Thompson’s Water Seal. I suspect I’ll be adding a more permanent sealer coat in the future – perhaps spar varnish – but I’m not too concerned since both cedar and cypress are naturally decay-resistant and don’t really require a finish.
Bring on the summer!
I have a chair with a rotten spot on the arm. could I get a replacement for the arms. I am not a carpenter, but love my chair.