
It sure is a downer to build a piece of furniture and realize when it’s finished that is doesn’t quite look right. Maybe the piece is too bulky for the space, or doesn’t quite match the rest of the furniture. Perhaps the proportions are off. Or maybe it’s just plain ugly.
To minimize the chances of this situation from occurring, I like to first build a mock-up before embarking on the real deal. This is especially the case when the furniture is built from scratch, is somewhat complex, and is made from expensive materials. If ergonomics are involved, I consider a mock-up to be essential. Consider a dining room chair. Who wants to sit in a chair that doesn’t conform to the shape of your back or digs into the back of your knees?
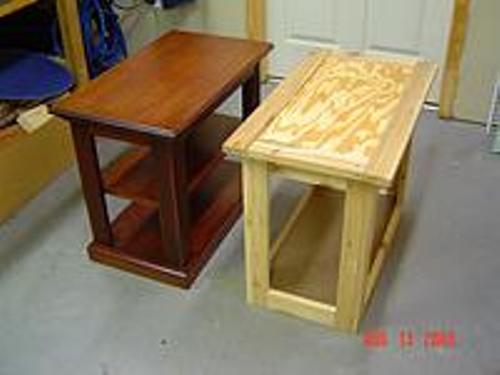
Completed cherry table and mock-up
Think of a mock-up as a rough approximation of the real thing. It can be full size or a scale model but the important thing is that it adequately represents the finished piece. A concept sketch is fine and dandy but a mock-up allows you to see the item in 3D and really get a much better feel as to whether the design works or not. Another advantage of a mock-up is that it can help you figure out how to build the piece in terms of joinery and assembly sequences.
By its very nature, a mock-up is something that you should be able to build quickly and cheaply. Commonly used materials include cardboard, poster board, foam board, or scrap wood. For the end table project shown here, I used scrap wood lying around the shop: cedar from an old deck, plywood, and a piece of MDF. A variety of fasteners can be used to hold the parts together: tape, hot-melt glue, screws, brads, dowels, etc. If making a mock-up from cardboard or foam board, pins can also be used.
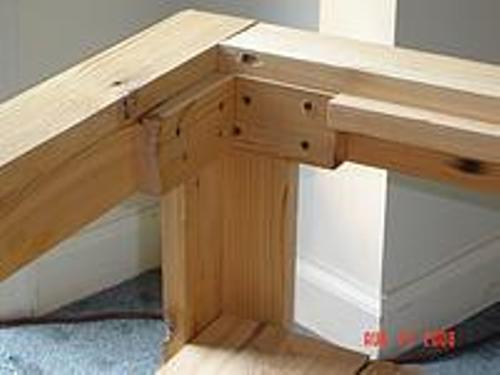
Inside corner detail of mock-up
I used drywall screws to hold the end table mock-up together. This allowed for later disassembly in case I wanted to reuse the materials plus the mock-up served duty for a month or so as a functioning table while the real one was being built. Crude but effective. To make the legs in the mockup, two pieces of wood were simply screwed together along their edge. The rails were connected to the legs by screwing small blocks of wood to each piece. The table top frame was held together by toe-screwing the boards together in the corner.
One of the questions I sought to answer with the mockup: were the overall dimensions – height, width, length – appropriate for the intended living area? The table was destined for the basement big screen TV room next to a large wrap-around couch. Not only did the table need to be at a comfortable height relative to the couch but it’s footprint had to be compatible – not too big and not too small. In fact, after slapping together the first iteration of the mock-up, I decided to scale the width back by a few inches. This is the kind of detail I would not have been able to derive from the concept sketch alone.
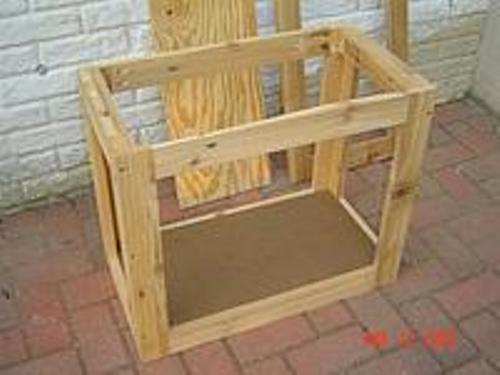
Side table mock-up
The table mockup was also used to experiment with different widths for the rails and legs. I started with a relatively wide top rail (the apron) but after seeing it in the mock-up, I decided to scale back the width a bit. This created a sleeker, more modern look. Something that I didn’t bother with on the mockup was the detailing on the legs. One of the early design decisions was that the finished piece would have fluted grooves on the legs to match the detailing on a nearby entertainment center. With the mockup, I was mostly concerned with getting the right proportions for the legs.
I did create a few test legs in the shop to establish the fluting detail. This included number of grooves per leg side, spacing between grooves, offset of first groove from the leg corner, and groove depth. These test legs were essentially mock-ups – they just weren’t connected to the main mock-up. Mini mock-ups if you will…
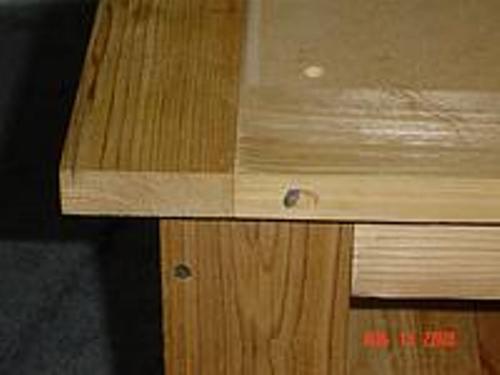
Outside corner detail of mock-up
Because mock-ups can save you so much angst down the road, I think they’re well worth the time and effort. They’re also fun to build and deliver immediate gratification. The end table mock-up described here took less than 2 hours to construct whereas the finished piece required several weeks to complete (working part-time). When I was ready to retire the mock-up, it took all of 5 minutes to disassemble it and store the pieces on the wood rack, ready to go for the next project.