
While building several sets of cornhole boards, I needed a way to create an evenly-spaced painted ring around the hole. That’s when I decided to build this “compass cutter”, which is essentially an over-sized compass with a blade in place of a pencil. It’s used like a normal compass but instead of drawing a line, it’s used to create a circular cut-out. For my cornhole boards, the compass cutter was used to score masking tape to form the outer edge of the ring around each hole, in preparation for painting.
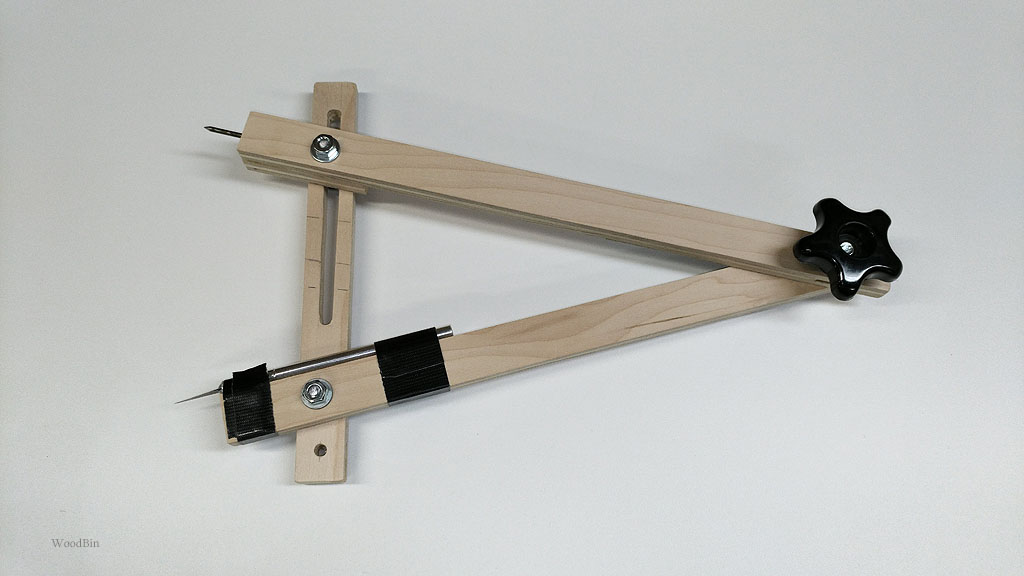
I made the compass from three pieces of 1/2″ thick x 1″ wide plywood, held together with 5/16″ bolts. The two legs are 14″ long and the cross bar is 9″ long. Using the scrollsaw, I cut a 5″ long slot in the cross bar making it just wide enough to accommodate the square recess of the carriage bolt that is used to secure the adjustable leg in place. A star knob is used at the pivot point to simplify loosening or tightening the apparatus. (I would have also used a star knob for the adjustable cross bar but I only had one lying around).
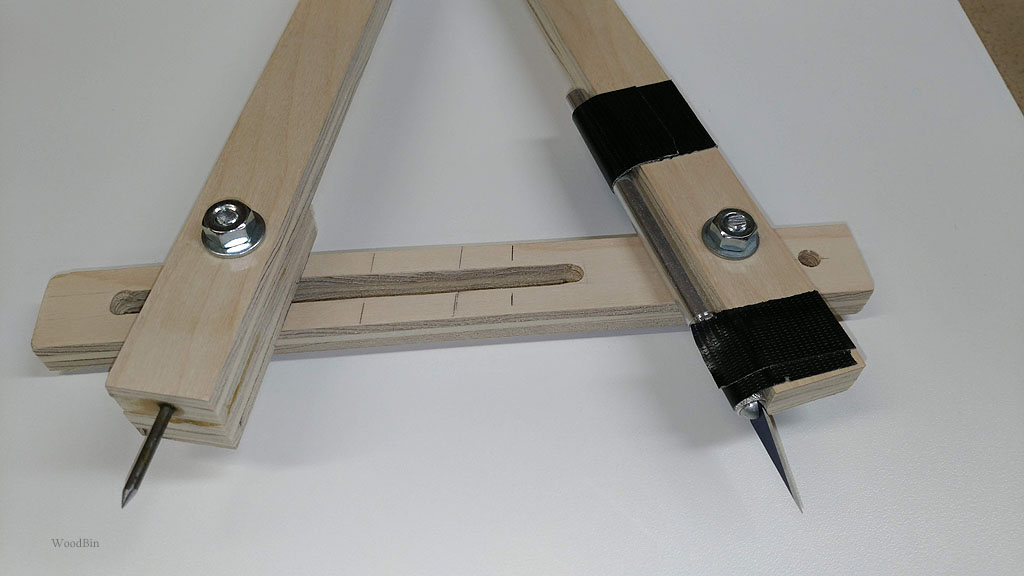
The compass “spike” was made from a common nail in which the head was cut off and then the cut end tapped into a hole drilled in the end of one of the legs – with a little glue to keep it from sliding out. I also sharpened it up a bit on the belt sander. For the other leg that holds the cutting blade, I went high-tech: an X-acto knife duct taped in place. It wasn’t pretty but it got the job done.
The photo below shows the compass cutter being used to lay out the ring on a corn hole board. This required positioning the compass spike at the center of the hole, which was a little bit of a trial and error process: setting the compass to match the radius of the opening, placing the spike in the approximate center, and then making minute adjustments to the center location so the blade just touches the edge of the hole when the compass is rotated. To simplify this task, I took the north-south/east-west approach: position blade anywhere against hole (call this north), rotate 360 degrees to the south and adjust center as necessary so blade touches edge. Rotate 90 degrees to east and adjust center point – only in the east-west plane – so blade contacts edge. Then check west, north, and south points and tweak as necessary.
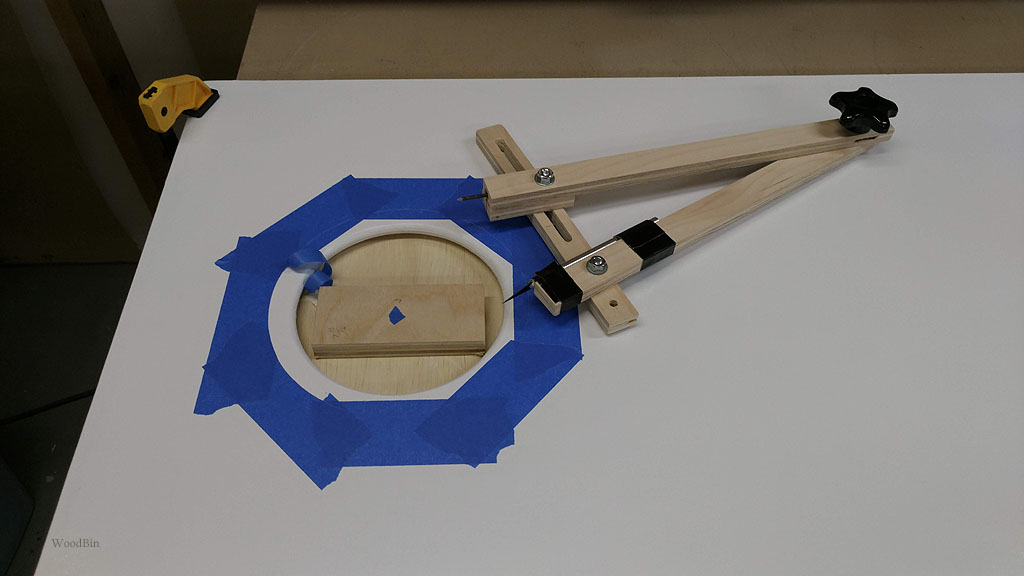
Once the center is established, I applied pressure to the spike leg to form an indent for the center hole to keep the compass from wandering. The compass was then adjusted to the appropriate radius to form a ring of the desired width, which was 1″ in this case. For the 6″ opening, I set the compass radius to 3-1/2″ to define the outer edge of a 7″ diameter ring. To cut the outline of the ring, I maintained downward pressure on the compass leg holding the center spike, and slowly rotated the compass to lightly score the tape. You don’t want to cut too deeply because the blade will tend to follow the wood grain, resulting in a less than perfect circle (which I learned the hard way). Better to make several light cuts with the blade just barely contacting the wood surface.
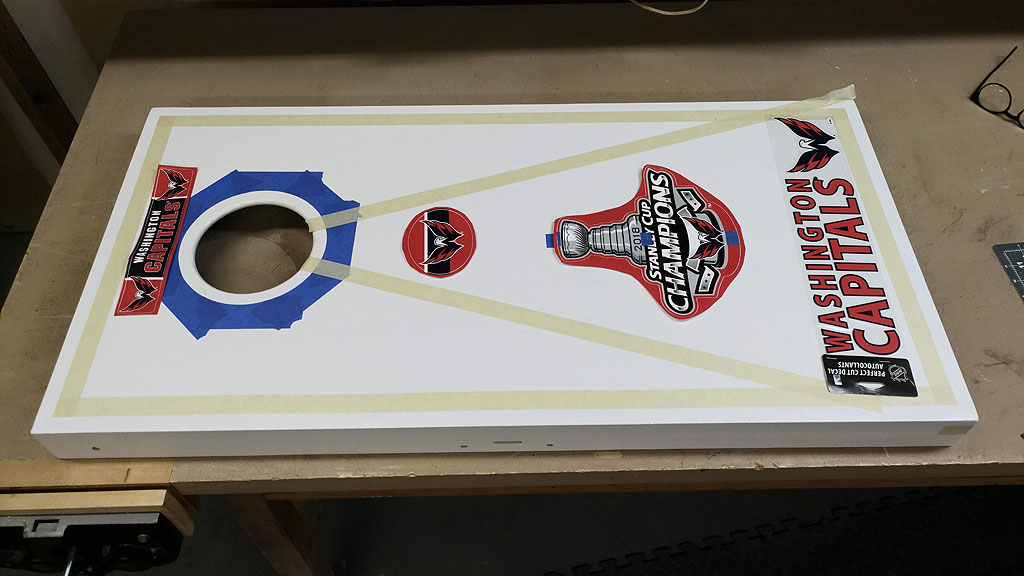
After the masking tape is scored, it’s a simple matter of peeling away the tape inside the cut line to form a nice ring, ready for painting with a contrasting color. For this Washington Capitals themed cornhole board, I painted the ring red to match red stripes on the board. But that’s a story for another article…