
Introducing table saw outfeed table v2, a slimmed down, simplified version of its predecessor. It features a relatively small footprint (24″ x 32″), miter slots, and the ability to fold down when the removable legs are removed. It also provides clearance for the back support mechanism of the rip fence.
The version one outfeed table was not directly attached to the saw but rather to a separate rolling cabinet that housed a planer and an oscillating sander. With the outfeed table extended, this multi-purpose cabinet turned out to be too large and unwieldy for my shop. Furthermore, it took a bit of effort to get the miter slots in the outfeed table to line up with the slots in the table saw. And there was about a 5″ gap between the outfeed table and the back edge of the saw to allow clearance for the back support of the fence so boards would often catch on the lip of the outfeed table during cutting. Although well-intentioned, this design proved to be annoying and unpractical.
So I decided to reinvent the outfeed table to overcome some of these shortcomings. At a minimum, the new table had to connect directly to the table saw. This would ensure that its miter slots would always be in alignment with those on the table saw and that its height would also match that of the table saw. I also wanted the option to fold it down out the way while still keeping it attached to the saw. Although the outfeed table will be deployed 99% of the time, there are times when I need some extra work space in my relatively small woodshop. That’s when the fold-down feature will be appreciated.
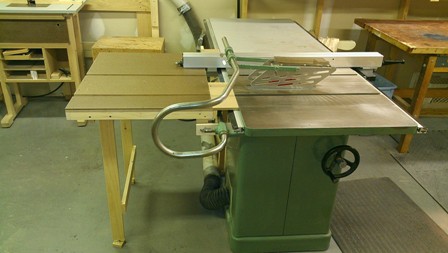
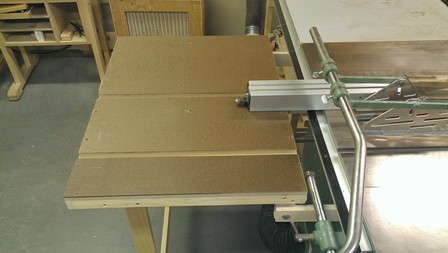
Outfeed table and saw.
In order to fold down the table, the back end of the table is lifted a few inches which allows the legs to slip down and be moved out of the way. The table is then free to fold down. Because of how the saw guard is attached, the outfeed table could not be extended to the full width of the table saw surface.
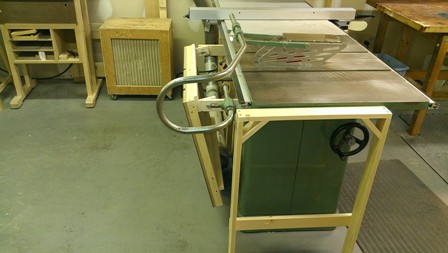
The legs are moved out of the way which allows the table to be folded down.
The table legs fit into a 2-1/2″ wide slot built into the underside of the table. The weight of the table and the friction fit of the slot does a pretty good job of keeping the legs in place. I made levelers for the legs using 5/16″ carriage bolts attached to small squares of plywood. These thread into pronged T-nuts tapped into holes drilled in the bottom of the legs.
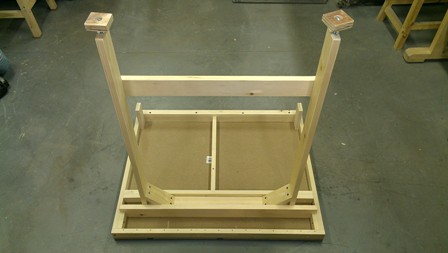
Table legs fit into a slot built into the underside of the table.
The pivot mechanism consists of carriage bolts on the left and right side of the table. The bolts pass through the table saw supports to pivot blocks screwed to the underside of the table. To get the bolt holes properly aligned, I first raised the table to it’s approximate height and clamped it to temporary support boards to hold it upright. I then placed it in approximate position relative to the saw using 4-1/2″ wide spacer blocks between the outfeed table and the saw. These spacers provide clearance for the rip fence.
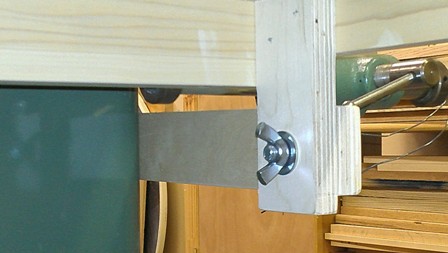
Pivot bolt
I then placed a long, straight board edge down on one end of the table saw surface, raised that side of the outfeed table to be flush against the board and clamped the pivot block to its mating table support. I repeated the process for the other pivot point. Once both sides were at the proper height, it was a simple matter of drilling holes for the pivot bolts.
Outfeed table
The pivot blocks of the outfeed table connect to the table saw via horizontal support boards that are bolted in place. (Actually, the support piece on the one side connects to the extension table rather than the saw itself). I slotted the bolt holes in the support pieces to simplify alignment of the left and right table pivots.
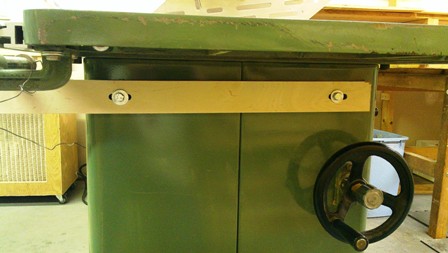
Horizontal support boards.
To allow clearance for the rear support of the table fence, the table sits back from the rear edge of the saw by about 4-1/2″. I rigged up 1/2″ thick MDF filler panels to fit into this gap to prevent downward-curving boards from catching on the leading edge of the outfeed table. These panels sit atop the rear fence support and a lip screwed to the underside of the outfeed table.
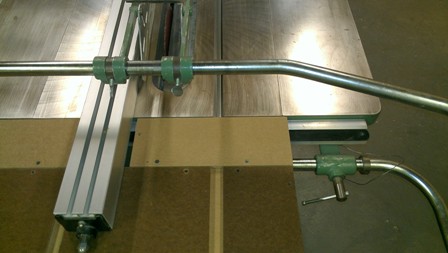
Panels slide freely so they do not hinder the positioning of the rip fence.
The back side of the panels have a 1-1/2″ riser to make them flush with the outfeed table. The panels slide freely back and forth so as not to hinder the positioning of the rip fence. They can also be easily removed or slid out of the way of the slots when using a cutting sled. As a further measure to minimize the chances of an aberrant board from catching on the leading edge of the outfeed table, I beveled the edge with a bevel router bit.

Bevel router bit
a great innovation, I can think of is you made it look like, really you are very ingenious and clever. Good job.