
Looking for a little diversion from a typical woodworking project? Well, why not give marquetry a shot? If you’re not familiar with this ancient art, marquetry is all about creating a design or picture using wood veneers of varying colors and grain patterns. For example, a nature scene might use sycamore for the sky, holly for snow, walnut or ash for mountains, wenge for trees and shadows, and maple burr for a swirly water body. By orienting the grain of the veneer in specific directions, you can create the effect of water flowing, layered feathers, soil profiles, leaf veins, shadows, etc. It’s quite amazing actually.
I’ve tried my hand at marquetry a few times over the years but not really seriously enough to advance beyond a beginner. But that doesn’t mean I’ve given up… In fact, after a 15 year hiatus, I decided to dust off my marquetry skills with the thought of creating an eye-catching background for a small display case made from Sycamore wood. You know, a couple birds flying around, perhaps a few trees on a hill, a windmill, some flowers or leaves, maybe a sunset. Something. But first I thought it would be prudent to warm up with a simple project using relatively inexpensive veneers before tackling the shelf background.
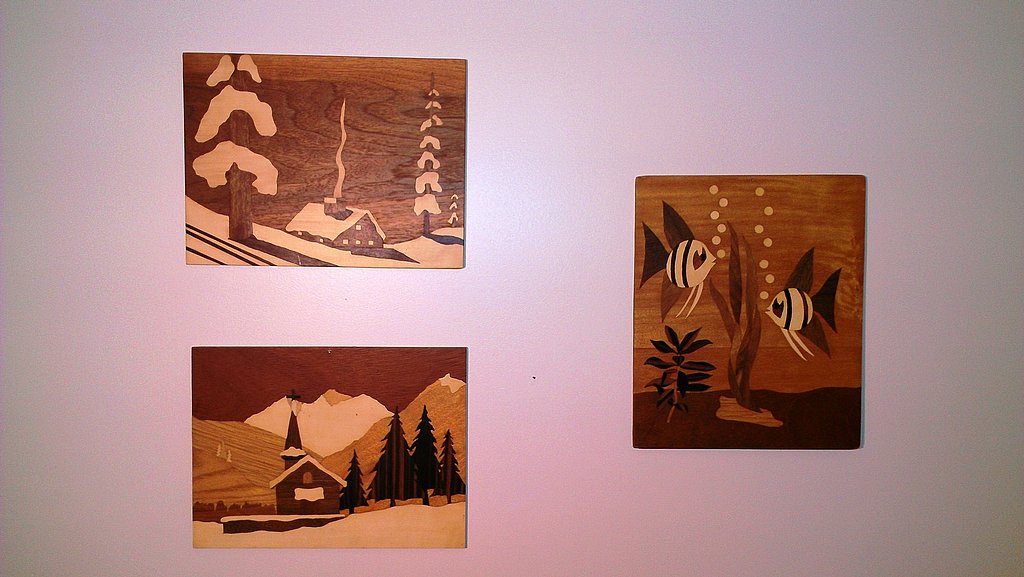
My marquetry artwork collection
For my warm-up project, I chose a simple landscape scene from the Modern Marquetry Handbook that is called “Swiss Lake”. It features a lake and a clump of trees in the foreground, mountains in the background, and a small cluster of buildings in the middle area. (To me, it looks like more a desert southwest landscape rather than a Swiss scene but that’s besides the point).
The first step was to create a black and white pattern containing the outline of all the items in the scene. The marquetry handbook didn’t have a full-size pattern but I managed to find a photo of the Swiss Lake scene online which I printed out to the desired 8.5″ x 11″ size. This is a convenient size for a marquetry pattern because it fits on a standard sheet of paper and simplifies making copies. With the photo laid on top of a piece of plain white paper with carbon paper in between, I traced the outline of the landscape components to create the pattern. I then made multiple copies of the pattern on my handy-dandy printer/copier machine.
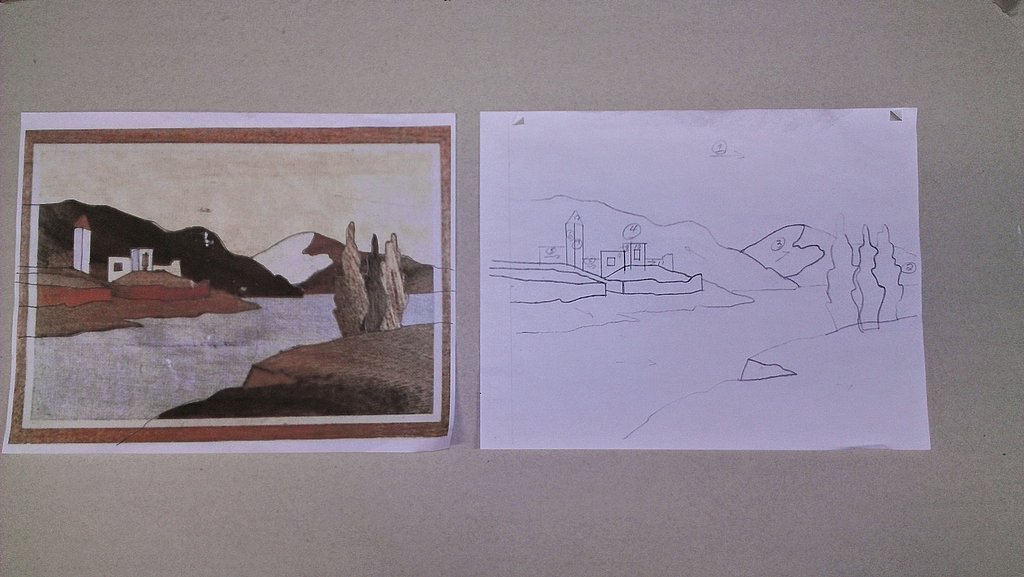
Swiss Lake marquetry pattern
The next step was to transfer the pattern onto a background piece of veneer called the “waster”. The easiest way to do this is to glue the pattern in place using rubber cement – it does a good job keeping the pattern in place during cutting and the residue can easily be removed when the cutting is complete. Once the pattern is glued to the waster, another copy of the pattern is temporarily placed on top of it and triangular-shaped registration marks are cut into two of the corners so the two patterns can easily be lined up at any time. The second pattern will be used to trace features onto the veneer as the glued on pattern gradually gets eaten away during the cutting process.
With the pattern glued onto the waster it was time to get down to business. I like to start a marquetry project by cutting out a large background component which in this case is the sky. The sky veneer was taped onto the backside of the waster making sure it adequately overlapped the boundary between the sky and the mountains. The veneer package was positioned with the pattern facing up and the sky background cut out using the double bevel cutting technique. This technique involves cutting two overlapping pieces of the veneer simultaneously with the blade oriented at a roughly 15° angle rather than straight up down so the mating pieces fit tightly together with no visible, or a barely visible, joint line between them. Think of a wedge-shaped piece fitting inside a wedge-shaped outline.
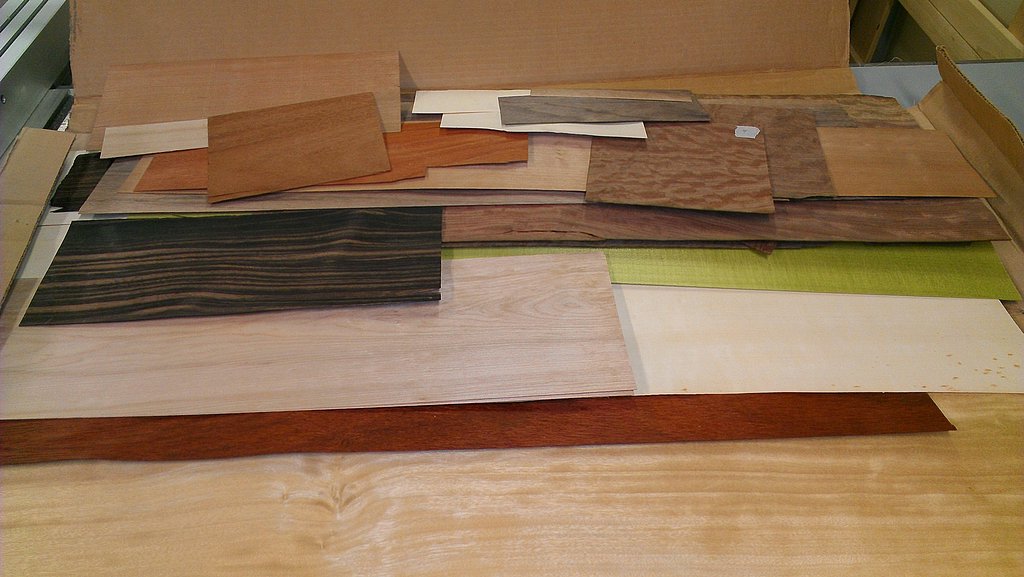
Assortment of marquetry veneers
A piece of wood with a V-notch cut into one end, known as a bird’s mouth, was tilted at the appropriate angle using a spacer block and clamped onto the workbench. The idea is to lay the veneer pad on top of the tilted bird’s mouth and cut along the pattern lines using a fine toothed fret saw with the saw held straight up and down. With a counter clockwise cutting direction, the taped-on piece of veneer will be slightly larger than the matching cutout in the waster veneer, resulting in a tight fit when the two pieces are mated together.
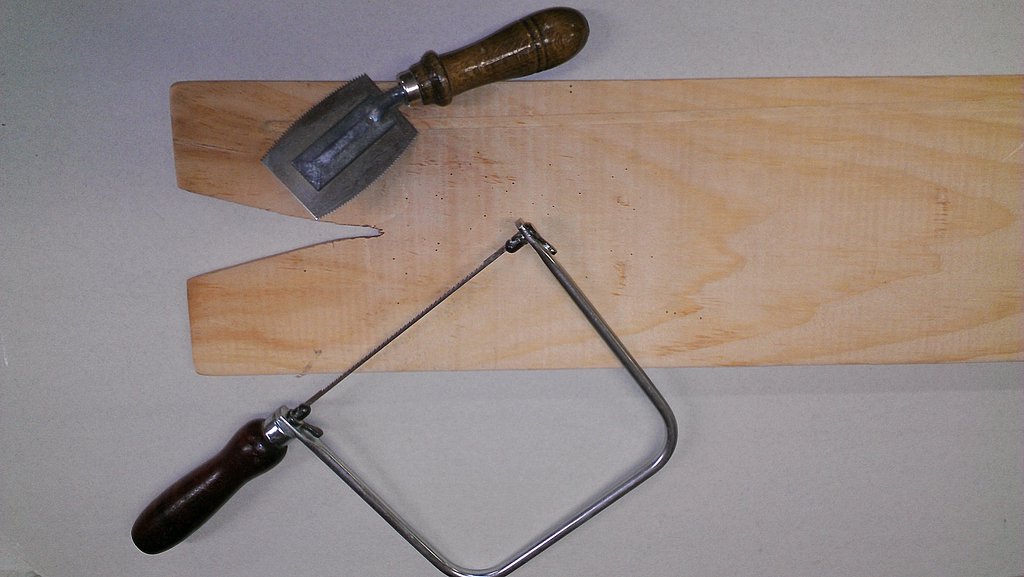
Marquetry tools of the trade
Veneer cutting can be performed using a sharp knife such as an X-Acto knife or a fine-bladed fret saw or scroll saw. I use a hand operated fret saw but many professionals favor the electric scroll saw. Perhaps some day I’ll graduate to a scroll saw if I ever get really serious about marquetry, but for the tinkering around that I do, an inexpensive fret saw is certainly adequate. There’s also something hypnotically satisfying about using a fret saw… maybe that’s just me.
Once the sky veneer was cut out, the corresponding waster piece was removed and replaced with the sky veneer. To keep it in place, white glue was spread along the edges and masking tape applied to the back side. Then the veneer for the mountain furthest in the background was cut and inserted. Followed by, in order: the snow field on this mountain, the mountain that overlaps the first mountain, the lake, the gently sloping foothills where the buildings are situated, the trees in the foreground, the near shore of the lake, the buildings and grassy areas near them.
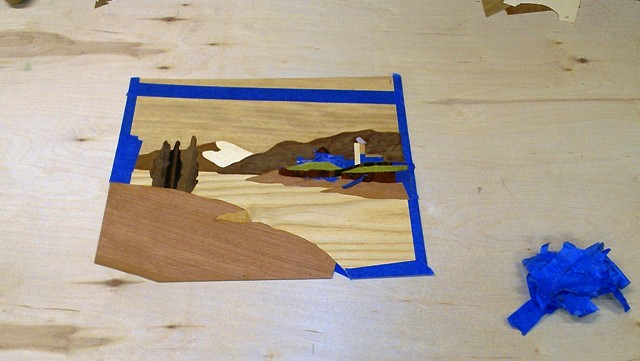
Marquetry in progress
Without getting too bogged down in the details, the basic strategy was to cut out larger background pieces first followed by smaller pieces that overlap their background piece. Of course, it gets a bit tricky when multiple pieces overlap – look at the snow field for an example. It’s a relatively small piece but it has to be in place before the large mountain to its left is inserted because the large mountain overlaps the snow with the mountain being closer to the foreground. For me, figuring out the correct cutting sequence is one of the more challenging aspects of marquetry although presumably this is something that one gets better at with practice
Once all the pieces were cut and glue-taped together, the tape was *carefully* removed especially in areas where the veneer tends to be brittle or crumbly – one quickly discovers which veneers fall into these categories. After the tape is removed, a filler composed of sawdust and wood glue was spread across the back with a putty knife to fill in any cut lines with visible gaps and to level out the surface.
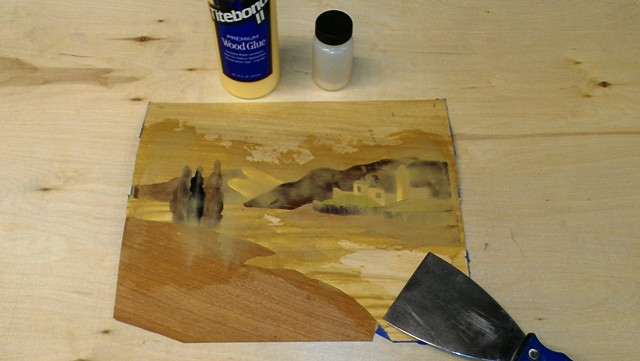
Filling marquetry joints
Once the filler dried, I attached the masterpiece to a piece of 3/16″ thick Masonite using contact cement. A waster piece of veneer was then glued to the opposite side of the Masonite to balance out the moisture-related stresses and keep the project from warping over time. This is a very important step. The veneer for the face and back were trimmed to exactly fit the Masonite using a veneer saw and a sharp utility knife.
The final step was to level out the front using a sheet sander and a scraper. Care must be taken not to tear out veneer. But a bigger challenge is to prevent darker colored woods from bleeding over into lighter colored woods such as the dark-colored windows surrounded by white walls in this scene. My approach here was to avoid sanding such areas if at all possible – better to have the surface be slightly uneven than have the colors bleed together. A light coat of shellac can sometimes help with color bleeding but be careful using it with dyed veneer because it may make the dye run – an issue I encountered with the grassy areas in this scene. For a protective clear-coat finish, I sprayed on a few coats of Minwax polyurethane followed by a light buffing with a nylon pad. To maintain moisture exchange balance, the back was also coated.
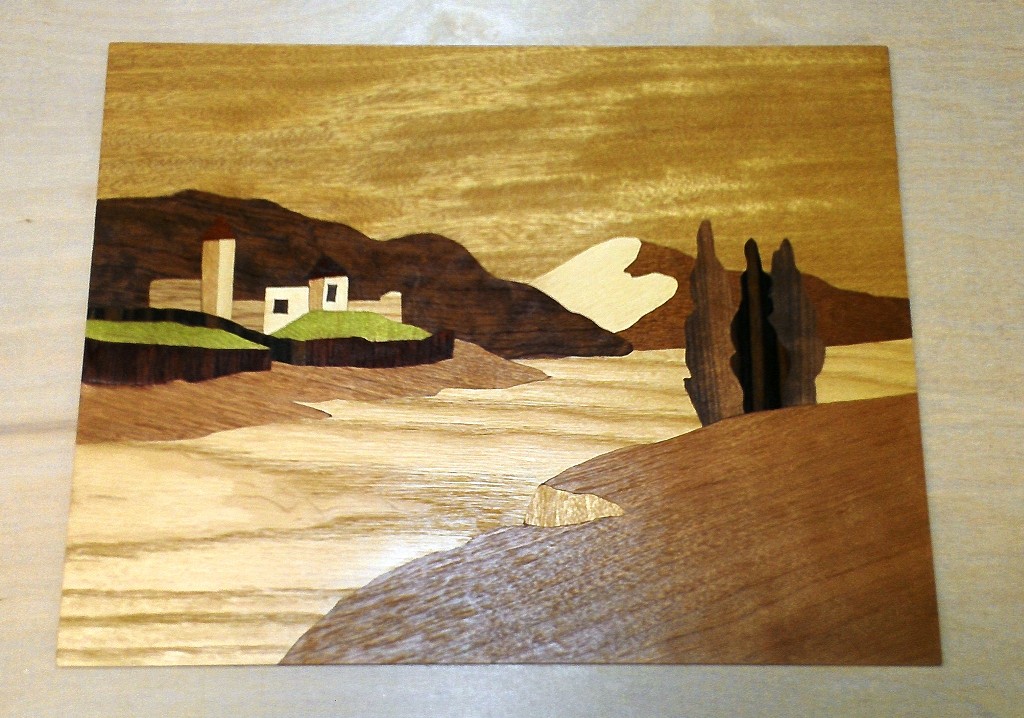
Swiss lake marquetry scene
If you’re interested in taking the plunge into marquetry, there are several marquetry related web sites with tutorials that are worth checking out. These include the sites for the Marquetry Society and the Redbridge Marquetry Group. These sites offer lots of great material (although I wish they would provide more details/examples of using the fretsaw and the double-bevel cutting technique that I used for this project).
There’s a rather limited selection of marquetry-related Youtube videos, some of which are marginal at best. One watch-worthy video is by master craftsman Silas Kopf in which he demonstrates how to create amazingly life-like flowers. This video gives you an appreciation for the power of marquetry although it’s not the best instructional tool for a beginner. For that, I recommend the tutorials on the afore-mentioned web sites and picking up a marquetry reference book – last time I checked, there were several on Amazon that had decent user reviews.