I’ve been dabbling with intarsia for the last few months and it’s been quite the learning experience. If you’re not familiar with intarsia, it refers to a woodworking technique/art form that involves inlaying different pieces of wood to create a pseudo 3-D picture. It relies on the natural variations in wood grain and color to create the illusion of depth and texture. My interest in intarsia began many years ago when I came across an article in Wood Magazine that featured Judy Gale Roberts. Judy is often credited with the modern revival of intarsia in the U.S. and she has produced some amazing works of art going back to the 1970s. Since reading that article, I considered taking a stab at intarsia several times but never got around to it until recently.
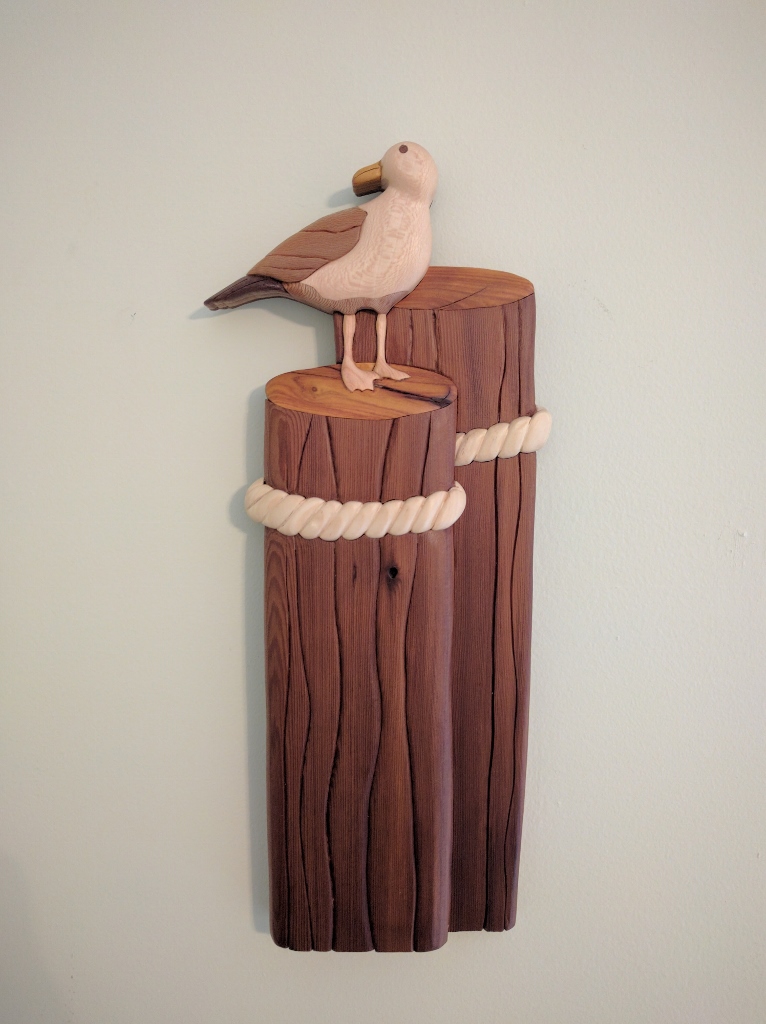
Seagull on pier intarsia
My first intarsia project was leaping dolphins, a featured beginners project in Easy To Make Intarsia, a classic intarsia reference book by Judy Gale Roberts. The book provides several chapters of instruction covering layout, cutting and fitting the parts, shaping, and finishing. With only 14 parts and fairly simple detail, this is a good starter project. One of Judy’s suggestions, especially when starting out, is to use soft, easy-to-cut woods (her favorite is Western red cedar). I used stained white pine and poplar for my dolphins. Note that some intarsia purists would never stain or paint wood to achieve a desired color. As a pure novice, I wasn’t too concerned about being a purist. For my subsequent projects, I refrained from staining the wood and just went with the natural colors.
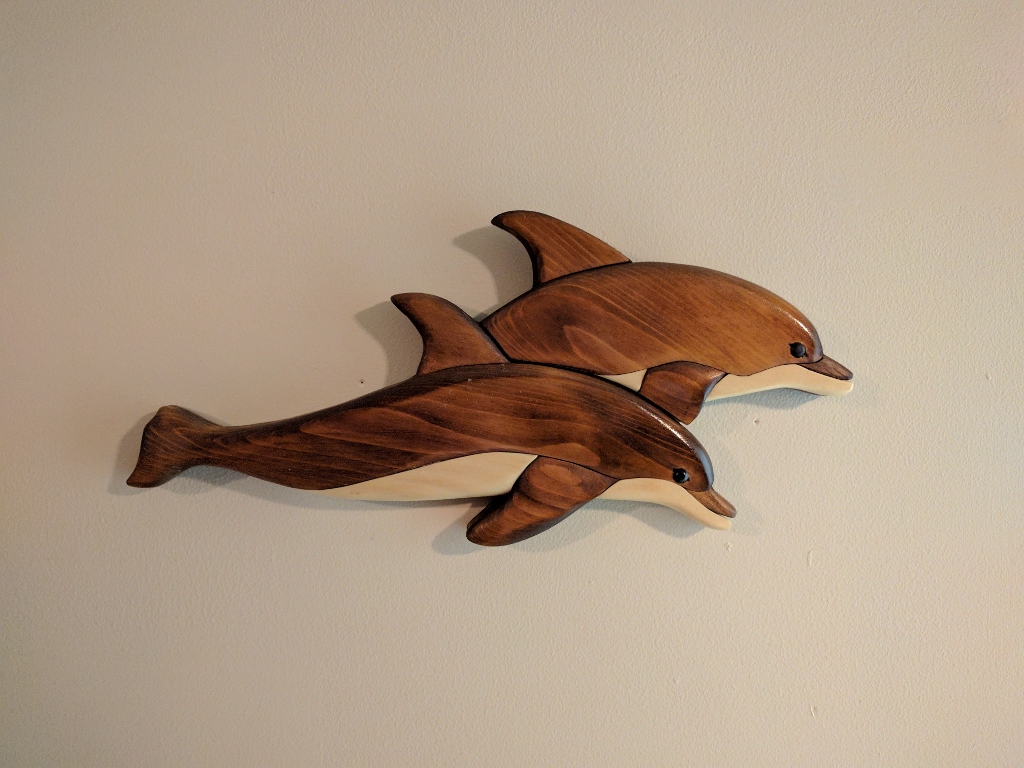
Leaping dolphins – my first intarsia project
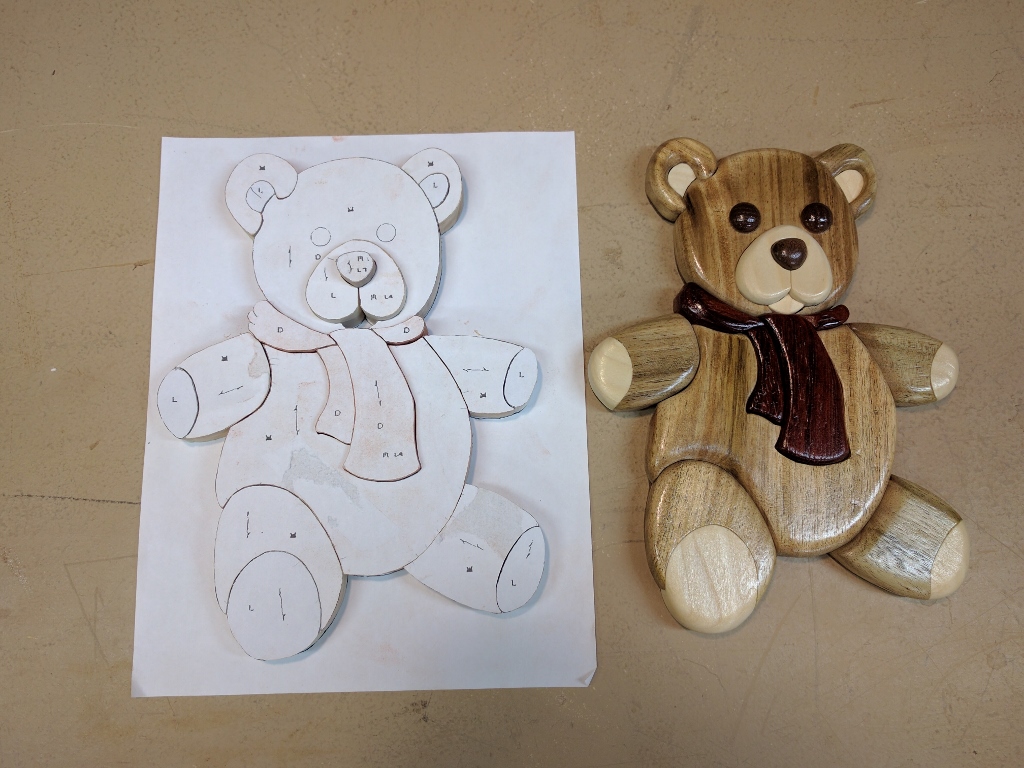
My next intarsia project was a teddy bear. I chose this project because I found an online intarsia tutorial that featured the bear complete with a pattern and detailed steps for cutting, shaping, and assembling. It seemed like a good beginners project. For Teddy, I started out by making several copies of the pattern (it’s not uncommon with intarsia to make a 4-5 or more copies). I then cut out the individual parts from the paper copies and glued them to different species of wood that were planed to a thickness of 3/4″. The species used were Australian Blackwood, Padauk, Black walnut, and plain ole Poplar. One of the challenges and more enjoyable aspects of intarsia is selecting woods of the appropriate color and grain orientation. For a basic project like Teddy that only has 20 pieces and four different types of wood, this process was fairly straightforward.
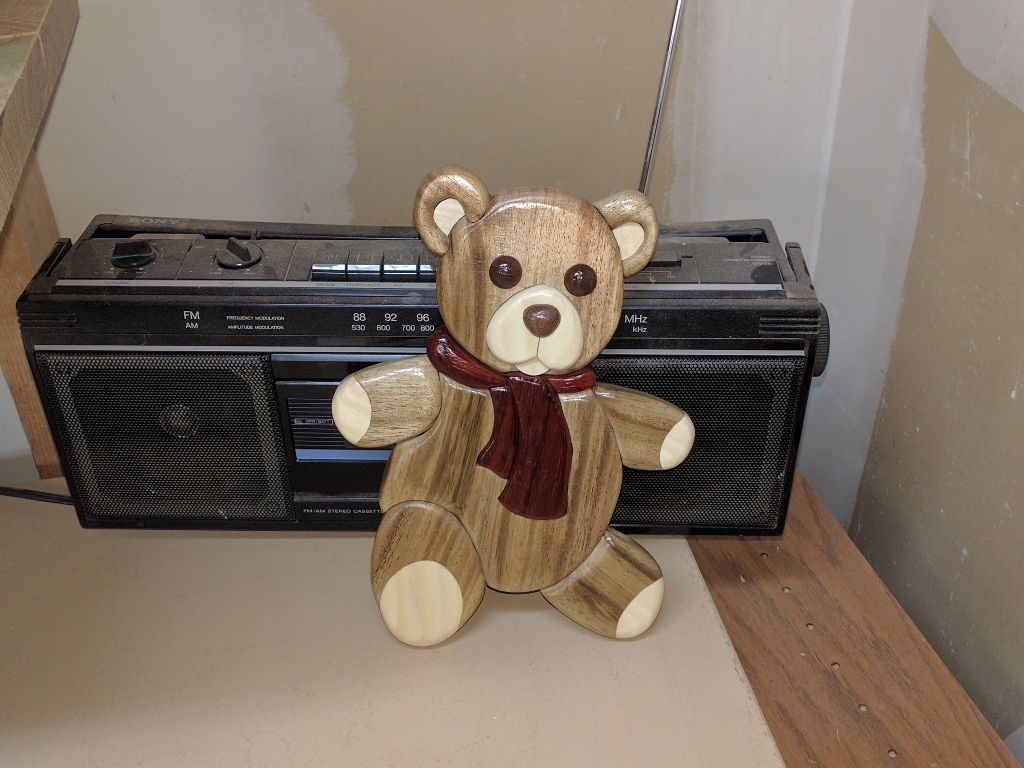
Intarsia teddy rocking out
With the patterns glued to the wood, the wood parts were cut on the scroll saw. This took a couple hours. I then positioned the parts together to check their fit. Any pieces that were ill-fitting were touched up with the scroll saw or the oscillating spindle sander. A particularly bad fit can be rectified by holding the two pieces together and re-cutting both at the same time – but that’s the topic of a future article. In this case, I just had to trim a few pieces on the spindle sander (which has the advantage of maintaining the vertical edges).
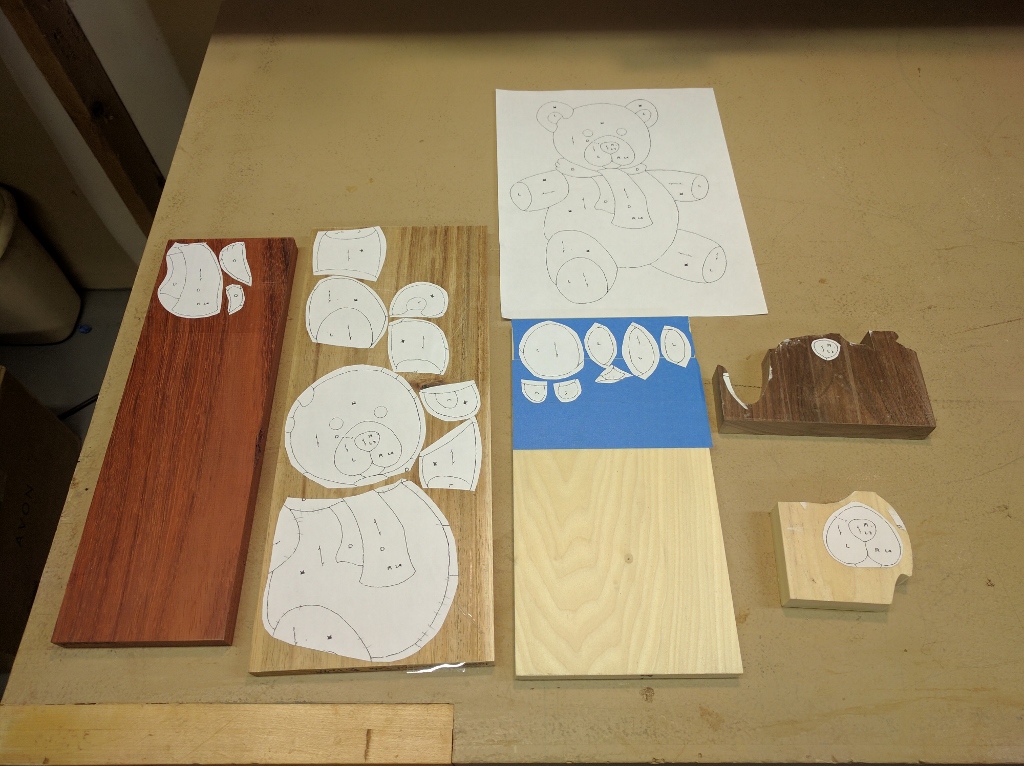
Laying out the parts for intarsia Teddy
Then it was onto shaping each piece to create the 3-D effect. One of the things you quickly learn about intarsia is that it involves a lot of shaping, primarily via sanding. In fact, that’s probably the most time consuming part of the whole operation. For this task, I have an arsenal of sanding tools including a flex drum sander, a stationary belt sander, a flap-sander mounted on a drill press, Dremel-mounted drum sanders, a palm sander, and hand sanding. For Teddy, I used all these tools to round the edges, create contours where needed, and to thin recessed pieces such as the inside of the ears. To get certain parts such as the nose to project above the rest of the body, I inserted 1/4″ luan spacers on the underside.
One Teddy finished, another one underway
The wooden parts of the Teddys (I made two as holiday gifts) were glued together using fast-drying super glue applied sparingly to the sides of each piece. I then glued the assembled bear to a 1/4″ luan backer panel that was cut slightly smaller than the bear itself. The backer was made by tracing the bear’s outline and cutting along the inside of the trace line. The final step was to spray on a few coats of fast-drying water-based polyurethane.
I also made a few intarsia projects as holiday gifts. These included a snowman and tree ornaments. The patterns for these projects came from Intarsia Woodworking Projects, a book by Kathy Wise. This book is another good reference source for aspiring intarsia-ists (?) and highly recommended. The included plans alone make booth books a good deal.
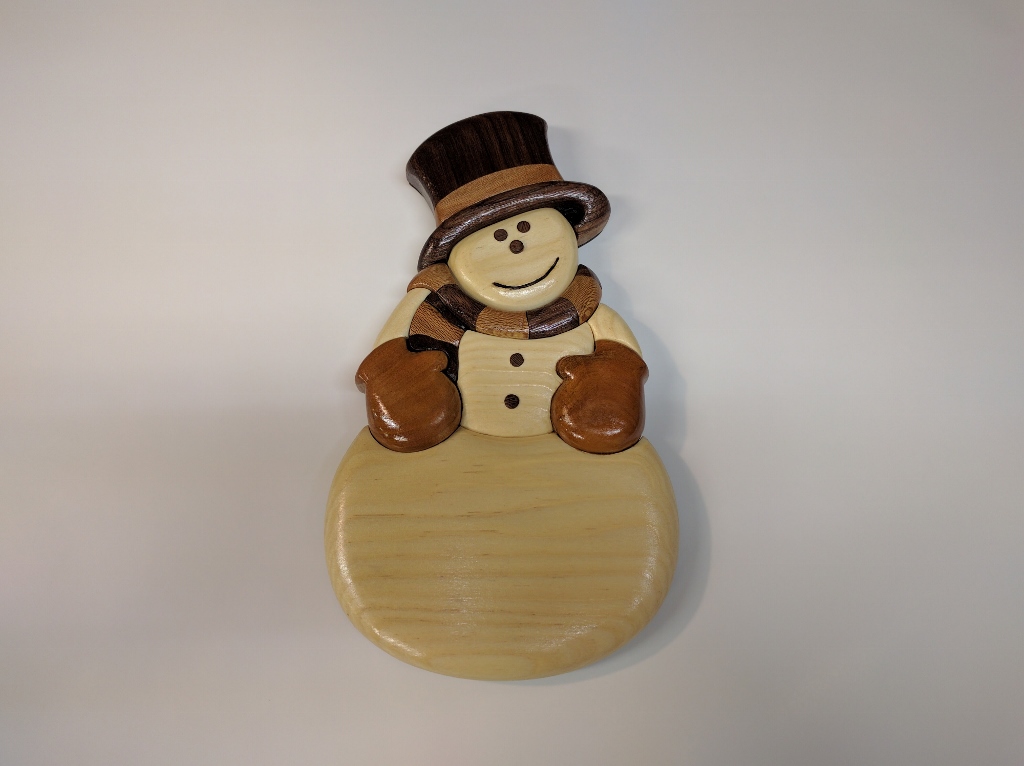
Intarsia snowman
The seagull on piling intarsia, which is also based on a design by Judy Gale Roberts, was a bit more challenging. Although there is a downloadable pattern for sale, I opted to create the pattern from a photo of the artwork that I found online. This involved some Photoshop filtering and other trickery to create a line drawing version of the photo. This took a bit of effort but if one aspires to seriously pursue intarsia, the ability to generate patterns from photos is a very handy skill to master.
The woods used for this project were Sycamore, Black walnut (bird’s body), Osage-orange (the bird’s beak and top surface of the piling), Western red cedar (piling), and Poplar (the rope). I spent a fair amount of time figuring out how to shape the various parts to achieve a somewhat realistic 3-D look. If I had a do-over, I would have first created a rough-cut prototype out of softer woods (the Sycamore and Osage-orange are quite dense) to practice on.
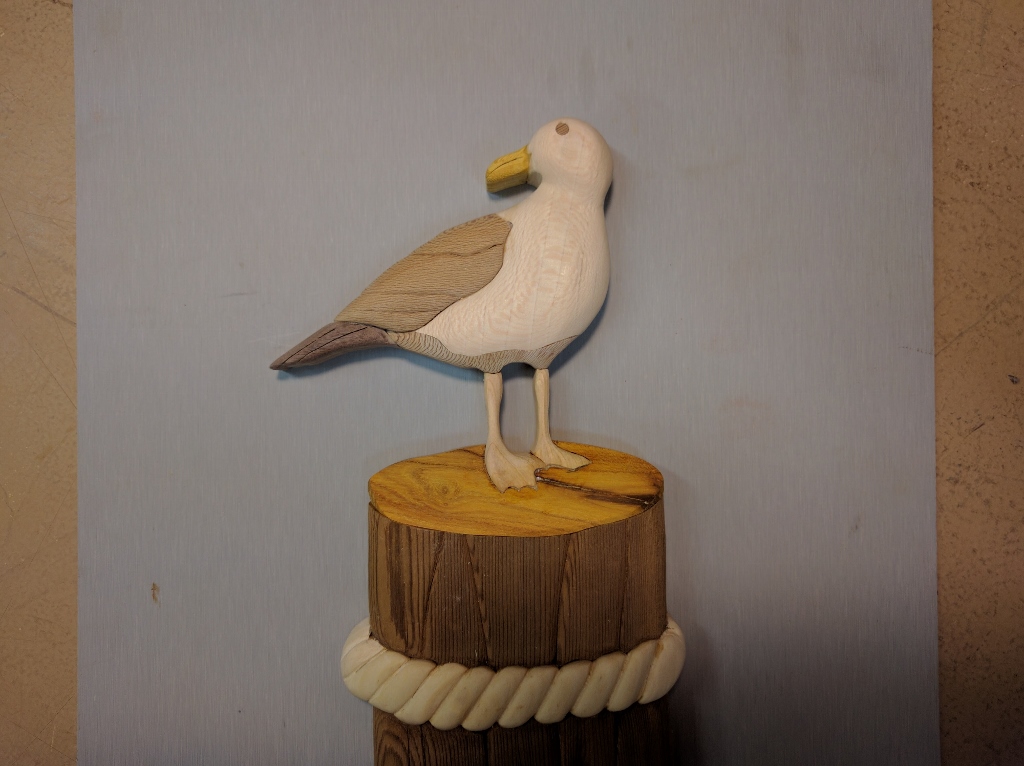
The seagull’s body is made from sycamore and walnut
Final thoughts:
In summary, I enjoyed trying out a new type of woodworking and I was quite proud of the end result. However, I was a bit dismayed at how long it took to perform seemingly simple tasks such as shaping and fitting. Many hours went into these projects. For example, I put about 24 hours into the seagull intarsia. I’m hopeful that I’ll be able to drastically reduce the cutting/shaping/fitting time on future projects as I gain more experience and get the hang of this intarsia thing. Only time will tell.