
A hollow chisel mortiser offers several advantages over other mortising technologies: it cuts a square hole so there’s no need to round tenons, it’s faster than cutting mortises by hand, it’s much quieter than a router, and it’s a dedicated machine whose sole job is to crank out mortises. This last point is a big one in my book because it means no fiddling around with router and drill press jigs, freeing these machines for other tasks. Implied in all this is that you: a) have sufficient workshop space for a tool that likely won’t be used as often as many other stationary tools, and b) know how to setup and use the tool.
While there’s not much I can do to help with the shop space issue, here are a few tips and techniques for making your hollow chisel mortising experience a more rewarding one.
Keep it secure
It requires quite a bit of oomph to plunge the chisel into the wood when using a hollow chisel mortiser. If your mortiser is a bench top model, clamp or bolt it to the workbench. Otherwise, there’s a tendency for it to tip when you’re hogging out mortises.It’s also important to secure the work piece. The hold-down fork should prevent the work piece from pulling up when you retract the chisel but you don’t want it so tight that it’s difficult to slide the piece. Using a piece of cardboard or other shim material, try to leave about a 1/32″ to 1/16″ gap between the fork and the work piece.
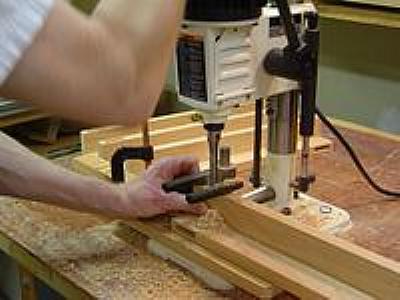
Bearing down on the cut works best with a rock-solid work platform
Keep it sharp
Once a mortising chisel becomes dull it will fight you all the way during the cut. Good it you want an arm workout, not so good otherwise. To keep your chisels cutting smoothly, hone them occasionally using a flat stone for the outside and a cone-shaped stone for the inside (inserted into a drill turning at low speed). The auger bit can also be sharpened using a file, focusing on the leading edges and flutes of the bit.
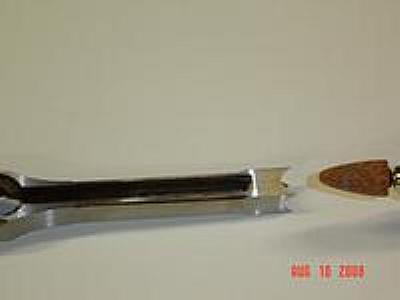
A cone-shaped stone is used to sharpen the inside cutting edges of the chisel.
Keep it square
If the chisel is not square to the fence, you’ll end up with a zigzag cut pattern. This not only looks crappy but results in a weaker joint because of reduced glue surface. To align the chisel square (or parallel) to the fence, slide the fence against one of the flats of the chisel and tweak the rotation of the chisel as needed until the chisel is flat against the fence.
While you’re at it, this is a good time to check the clearance between the chisel and bit. The bit should protrude 1/16″ to 3/16″ beyond the chisel. This clearance is important for proper “chip evacuation”. Your owner’s manual should describe the process for setting the bit clearance. A nickel can be used in a pinch as a spacer.
Know your mortise and tenon anatomy
Regardless of the tools used to cut mortise and tenon joints, there are guidelines to follow when it comes to dimensioning:
Thickness: The thickness of the tenon (and hence of the mortise) should be one-third to one-half the thickness of the stock. Many woodworkers opt for the rule of thirds; for 3/4″ stock, make a 1/4″ thick tenon. For greater strength, some woodworkers like to make the tenon equal to the combined thickness of the two cheeks. So, if the wood is 3/4″ thick, the tenon is 3/8″ thick and each mortise cheek 3/16″ thick.
Rule of thirds: the mortise is 1/3 the board thickness
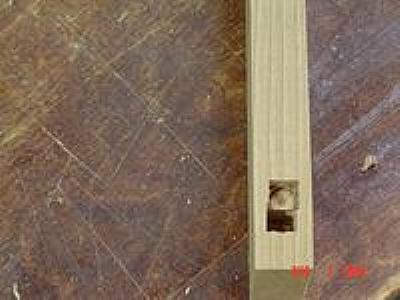
Depth: With a blind mortise and tenon joint, the mortise depth is typically 1/2 to 2/3 the width of the board. Note that if the tenon is too long, the joint will be under greater stress due to seasonal wood movement. If too short, you lose glue surface and mechanical strength. A 2/3 depth mortise is appropriate for narrow stiles (say, 2″ or less).
Width: The tenon width should be no more than 5 times its thickness, with 4″ to 6″ the maximum. If you have really wide stock, multiple tenons may be required.

The depth of this mortise is between 1/2 and 2/3 the board width
Setback: The end of the mortise should be at least 1/4″ from the end of the stile.
Centering the mortise
When joining pieces that are the same width, it is important to center the mortise so that the pieces line up to form a flush joint. If the mortise is wider than your largest mortising chisel, an easy way to center the mortise is to cut it from both sides of the stock. This is essentially a two-pass operation that involves overlapping cuts with each side of the stock placed against the fence.
For mortises that are the same width as the chisel, it’s a matter of sneaking up on the cut until the mortise is centered. Start by marking the center of the stock and then adjust the fence so the chisel looks approximately centered. Lock the fence and make a test cut. Then flip the board so the other side is against the fence and lower the chisel close to the hole you just cut. If you lucked out, the chisel will fit exactly into the hole. More likely, it will be off slightly. If so, adjust the fence and make another test cut. Flip the board and check if the chisel is centered. Repeat this process until the cuts line up from both sides of the stock.
You can also use a spacer block to center the mortise. This block fits between the chisel and fence to establish the distance of the mortise from the fence. For example, a 1/4″ spacer block would be used to center mortises on 3/4″ material.
Misaligned cuts indicate the mortise is not centered
Stop blocks are your friend
Instead of measuring and marking every piece to be mortised, use stop blocks to establish the position of the mortise. This also makes for more accurate joints. If you find it difficult to attach stop blocks to the mortise fence – perhaps the back side of the fence is at an angle or the fence itself is not long enough – you have to get a little creative. One possibility is to create auxiliary tables that can be clamped to the workbench and then the stop blocks clamp onto the tables. Or you might get by with clamping the stop blocks directly to the workbench. Of course, both options assume the mortiser is firmly attached to the workbench.

Use stop blocks to position the start and end holes
The boring process
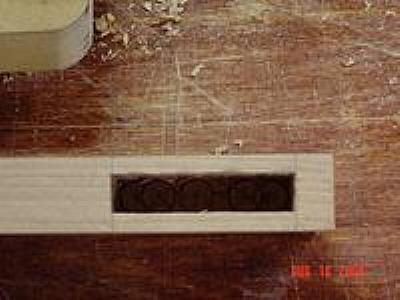
Begin by boring out each end of the mortise and then removing the material in the middle. Don’t overlap successive holes but leave a slight gap between them. You’ll remove these little bridges in a final clean-up pass. If you do overlap, one edge of the chisel will be unsupported – that is, not in contact with the wood – and the auger bit will tend to flex slightly towards this edge. This leads to the screaming chisel phenomenon which is rather annoying to say the least. It’s all about keeping the pressure on the chisel in balance – either all four sides or two opposing sides should be in contact with wood.
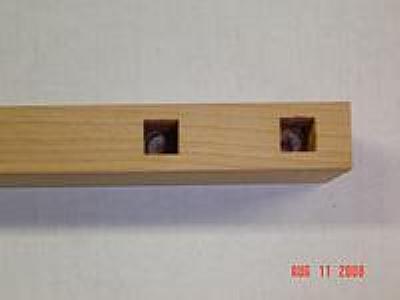
Start by boring out the ends of the mortise
Keep an eye on the chip flow as you’re cutting. If chips start clogging up the works, you’ll overheat the chisel (reducing its effective life) and start burning wood. One thing with a hollow chisel mortiser is that the chips rapidly accumulate and spill all over the work area. Some chips invariably remain in the mortise and will require manual extraction before you can dry fit the joint. If someone has devised an effective dust/chip removal system for a hollow chisel mortiser, I’d like to hear about it…
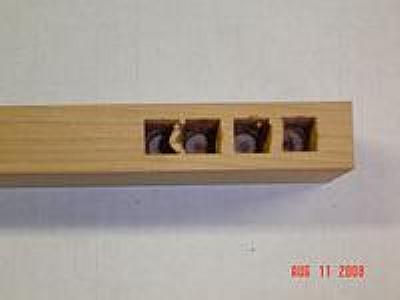
Next remove the interior of the mortise, leaving little bridges between cuts
The sides of the mortise will be somewhat rough – certainly rougher than if a router bit was used. This roughness won’t be a problem as long as the joint is sufficiently snug. Of course, you’ll never see the mortise walls in the assembled joint so who cares if they’re a bit gnarly…
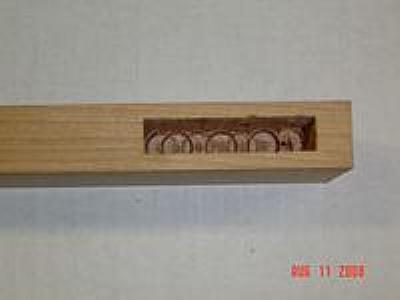
Finish by removing the bridges
A snug joint is a happy joint
The key to a strong mortise and tenon joint is a snug fit — not too loose but not too tight. Aim for a joint that is tight enough so that light tapping (not pounding), or at least a little elbow grease is required to assemble it. The joint should be snug enough to hold together during dry fitting. You want a little bit of friction but not so much that the joint becomes glue starved. Once you’ve cut a few mortise and tenon joints, you develop a feel for the proper level of snugness.
Cutting the tenons is a topic for another article but it is important to do a good job during the mortising phase so there are no surprises later on. This means using stock of uniform thickness, not allowing the stock to wander during mortising, keeping the chisel square to the fence, and maintaining a consistent mortise length. It also helps to assemble the joints the same day they are cut although this isn’t always feasible.
Happy hoggin!