
This is a floor clock, also called a longcase clock, tall-case clock, or grandfather clock (technically, I suppose it’s a grandmother rather than a grandfather clock because it’s just under 6 feet tall). I’ve dubbed this clock the “Pop Clock” in honor of my dad who built the clock many years ago (early 1980’s I think). He didn’t quite finish the clock – the woodwork was complete but there was no clock movement or other hardware and no finish had been applied. After my dad passed away, my brother Joe and I retrieved the clock from a barn where the clock had been stored for 30-ish years and I took it back to my woodshop. Thus began the project to get the clock ticking.
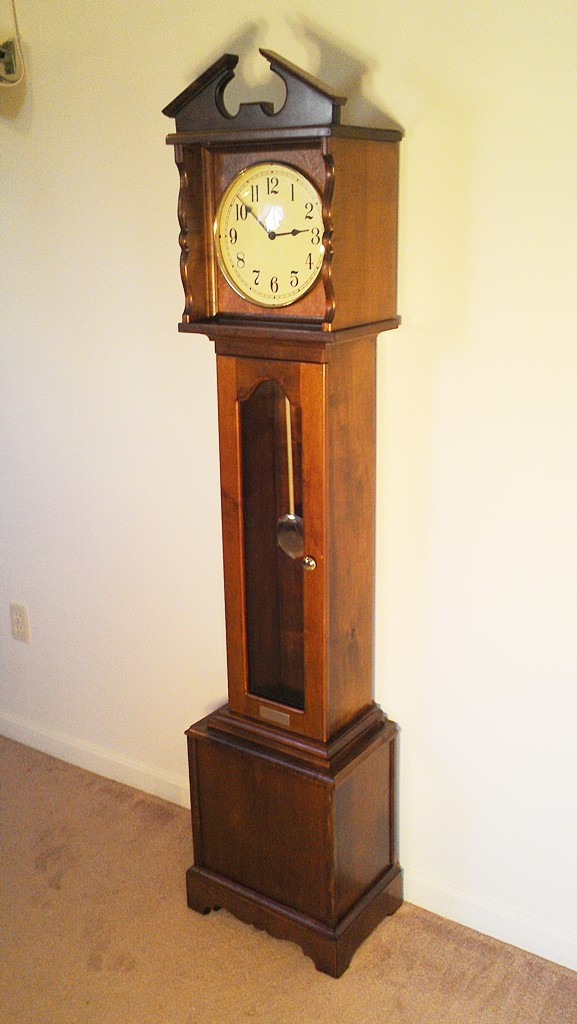
Maple floor clock
The clock is 70″ high, 16″ wide at the base, and 10-1/2″ deep. The clock face is 10″ in diameter. The main trunk of the clock with the arched door is 10″ wide. Speaking of which, I built a new door because the original one had warped over the years. The main challenge here was getting the color of the door to match the rest of the clock – the dark dye definitely helped out in this regard. I routered a recess in the back side of the door and took it to a local glass and mirror shop to have a custom fit piece of glass installed. That ran about $40.
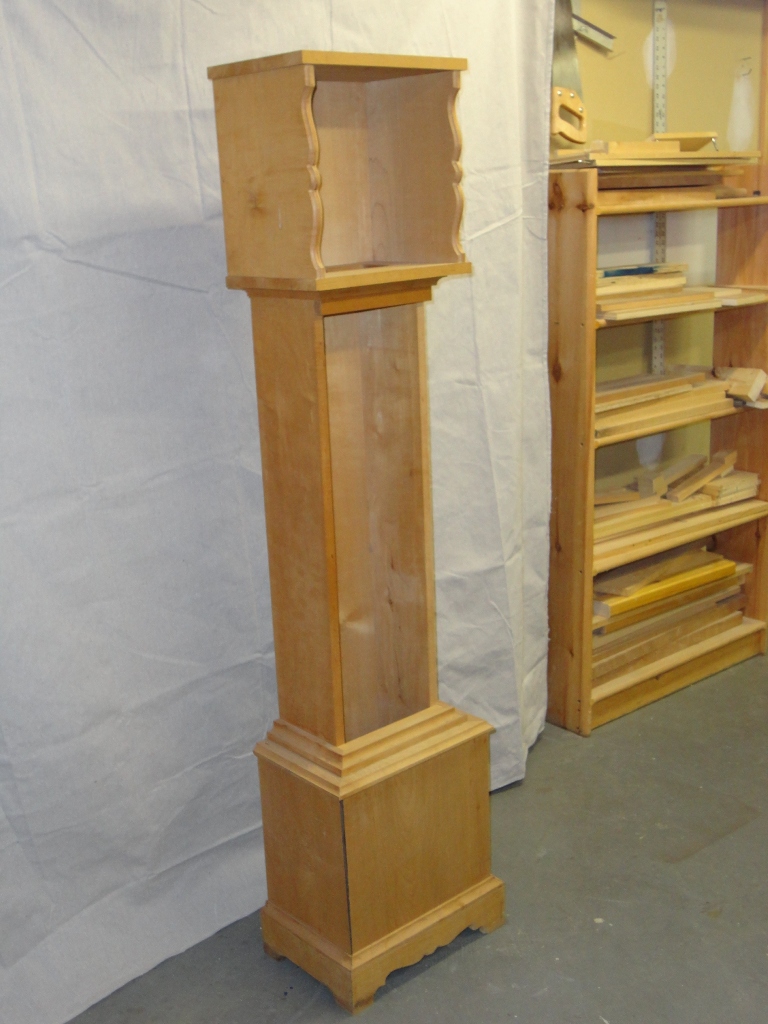
The clock prior to restoration
The clock design had a few flaws as far as not allowing for seasonal wood movement. The most noticeable was the miter joints on the two front corners of the base where the 16″ wide front met the 10″ wide side pieces, all made from solid wood. With the lower humidity during the winter months, there was nearly a 1/4″ gap in these joints caused by wood shrinkage. This was more an aesthetic than a structural issue but something had to be done.
Wide open miter joints posed a bit of a challenge
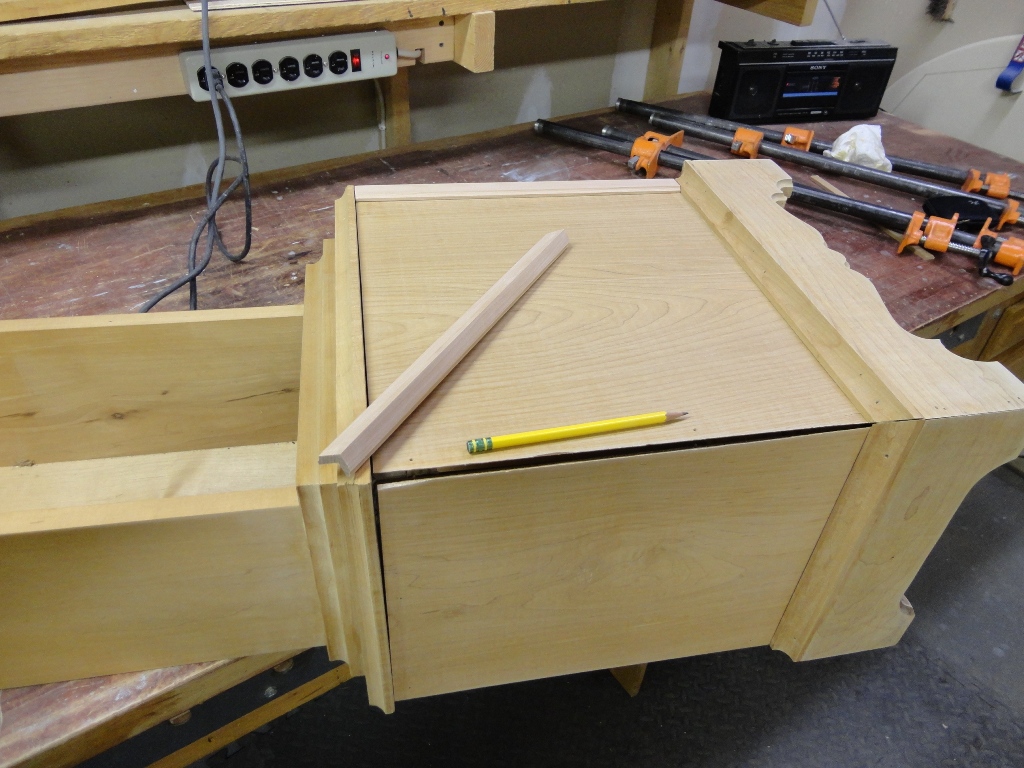
The solution I came up with was to create L-shaped trim to cover each corner. Using a brad gun, the trim was attached only to the front piece of the base and not the sides to allow it to float sideways while still covering the gaps. So far it seems to be getting the job done.
L-shaped trim used to cover open corner joints
The clock movement, pendulum, dial, clock hands, and bezel were purchased from Klockit. The movement was mounted on a piece of 1/4 plywood which was attached to 1-1/2″ wide strips of plywood to keep the clock face flat and to allow mounting in the cabinet. The clock dial was attached to the plywood using spray-on adhesive and then four mounting holes for the pressure-fitted glass bezel were *carefully* measured and drilled along the outer edge of the dial. This task was facilitated by a paper template that was included with the bezel. The whole clock assembly was screwed into the cabinet housing from inside via a rectangular opening cut into the back side. This access hole is also used to change the clock movement settings and replace the batteries.
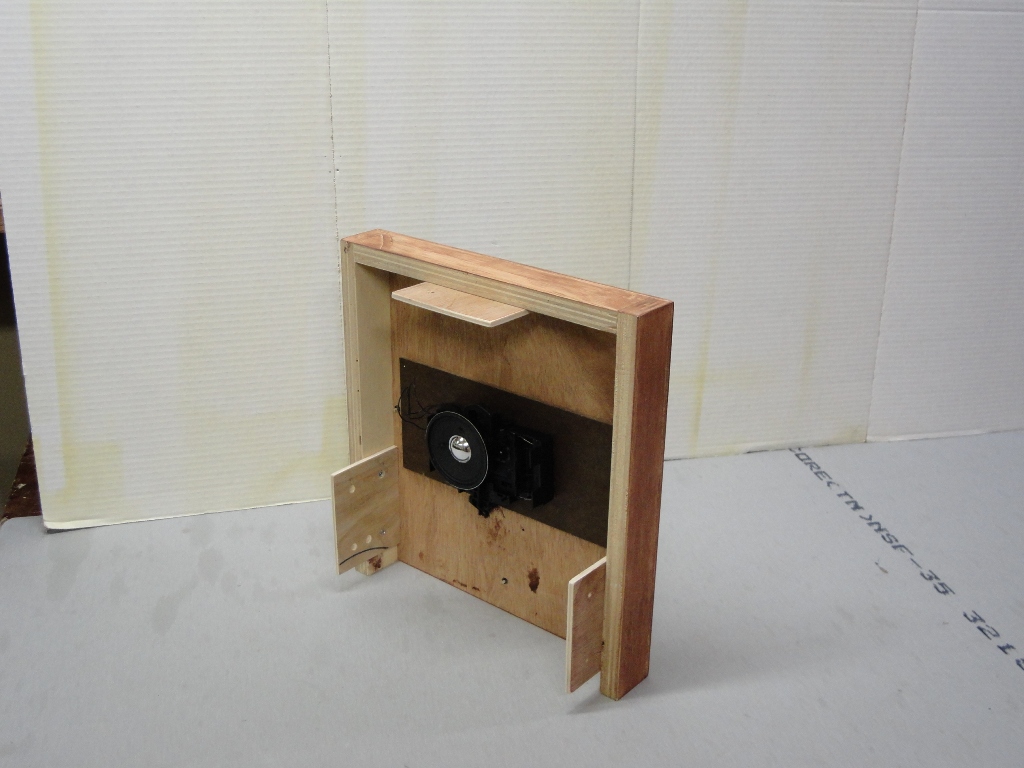
Clock movement mounted to a plywood frame
The clock was made from maple which had darkened unevenly over the years so I decided to apply a dark finish to make the color variation less obvious but also to blend in with some existing cherry furniture. If you’ve ever tried to stain maple with a conventional pigment-based oil stain, you know what a pain it can be because it tends to blotch. To deal with the “blotch factor”, I decided it was time to try out water-based aniline dyes. These come in powder form which you mix with water according to the manufacture specs. I purchased several different colors of Homestead’s Transfast aniline dyes, and after a bit of color testing, went with Cherry Antique Brown. I was quite happy with the results.
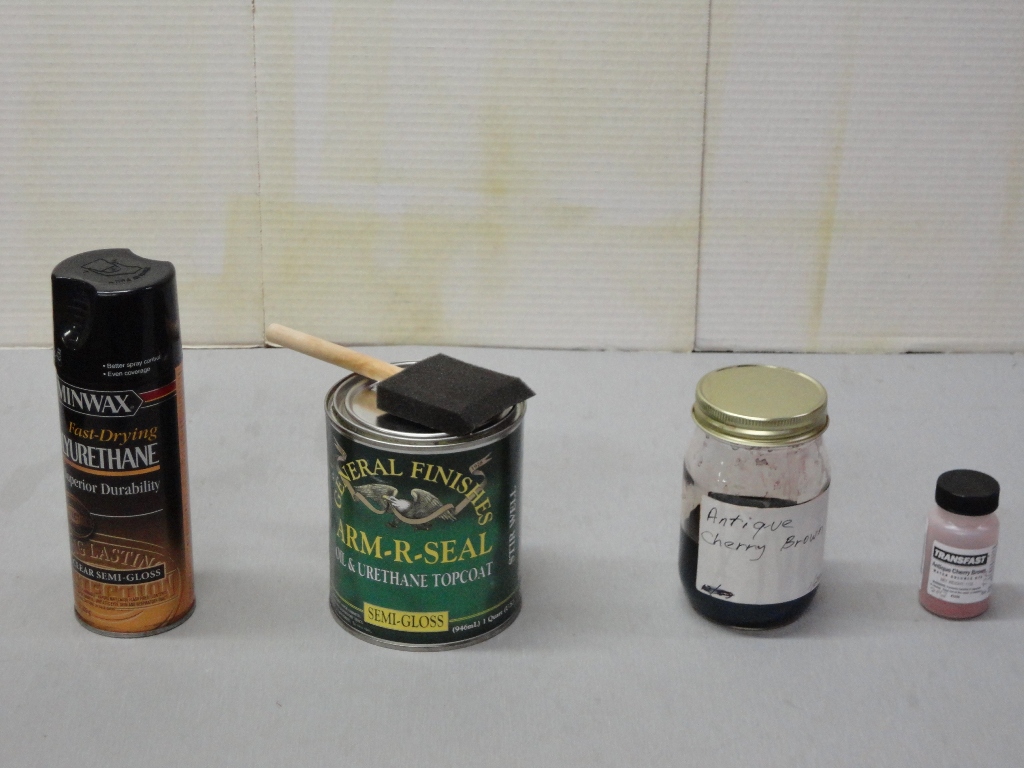
Antique cherry brown aniline dye and urethane finish
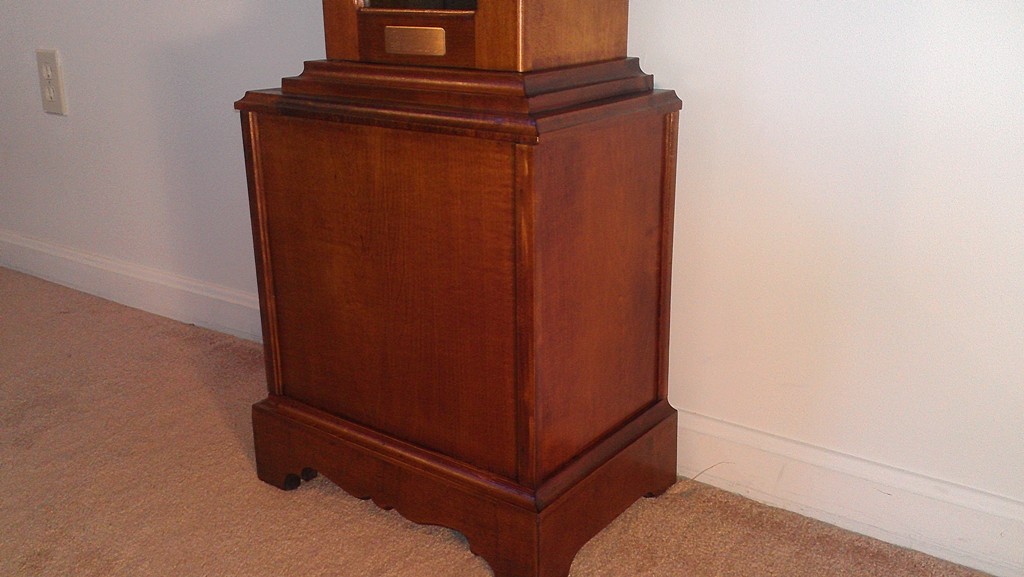
Two coats of dye were applied using a foam sponge followed by wiping with a cotton rag to remove the excess. This was followed by two coats of General Finishes Urethane applied with a foam sponge. This finish appears to have a higher oil content than other polyurethanes I’ve used in the past which made it easier to flow onto the surface without bubbles and easier to wipe off the excess. However, it still had plenty of dust nibs after drying. These nibs were removed by lightly sanding with 320 grit sandpaper and a nylon pad. A final coat of spray-on polyurethane was applied. This coat was a bit lighter than the others but it dried very quickly and didn’t require a final sanding (well, not much of one anyway). I opted for a semi-gloss finish in an attempt to simulate a hand-rubbed oil finish. The richness of the cherry-brown finish really pops out with natural lighting.
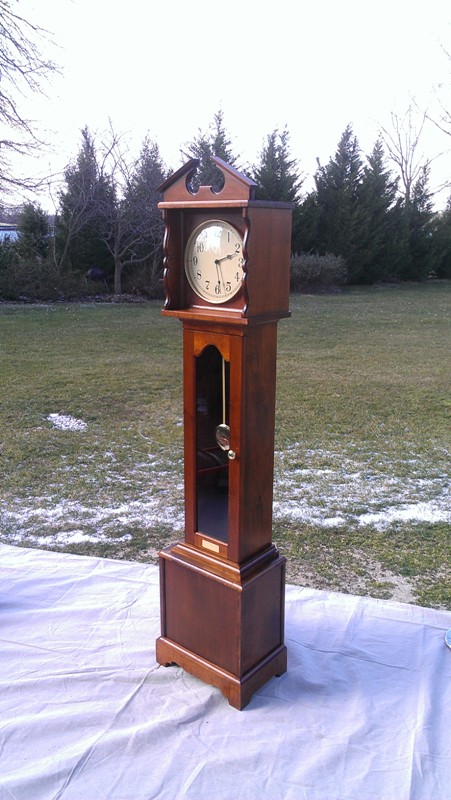
Completed clock with outdoor lighting
For a final touch, I added a brass “Handcrafted By” nameplate with my dad’s name. I like to think that he was up there somewhere smiling with approval as I finished his clock.