
If you’re fond of all your fingers, a good way to help keep them is by using a push stick or push block. This is especially pertinent when milling small pieces on the table saw and jointer but also applies to the router table, shaper, and band saw. A push stick keeps your precious body parts away from the blade and allows for a smoother, more controlled cut. If you ever feel the least bit nervous about making a cut “freehand”, that’s a pretty good indicator that you should be using a push stick. Sacrifice the stick, not your finger!
It’s easy to make push sticks and push blocks and I encourage any beginning woodworker to make at least one push stick for a starter project. I’ve created a number of push devices over the years, ranging from the basic straight stick with a notched end to a fence straddler with an adjustable support end. Most of these were made from scrap pieces of poplar and pine but I’ve also used oak, maple, and Baltic birch plywood. With all of them, the edges are sanded smooth and the handles are rounded so they don’t dig into my hand during use.

My collection of push sticks and push blocks
My go-to push stick is an improved version of the classic straight piece of wood with a notch on the end. It features a curved handle, making for a slightly more comfortable grip, and an elongated snout that helps to hold the wood tight against the table surface. I made the push stick from 3/4″ Baltic birch plywood (12 layers) so I don’t have to worry about it splitting or cracking. It was designed so that the business end at the bottom can be easily cut off when it wears out and replaced with a new glued-on piece. I store the stick on a shelf under the table saw in close proximity to the power switch. This makes it easier to get into the habit of using the stick when I reach down to turn on the saw.
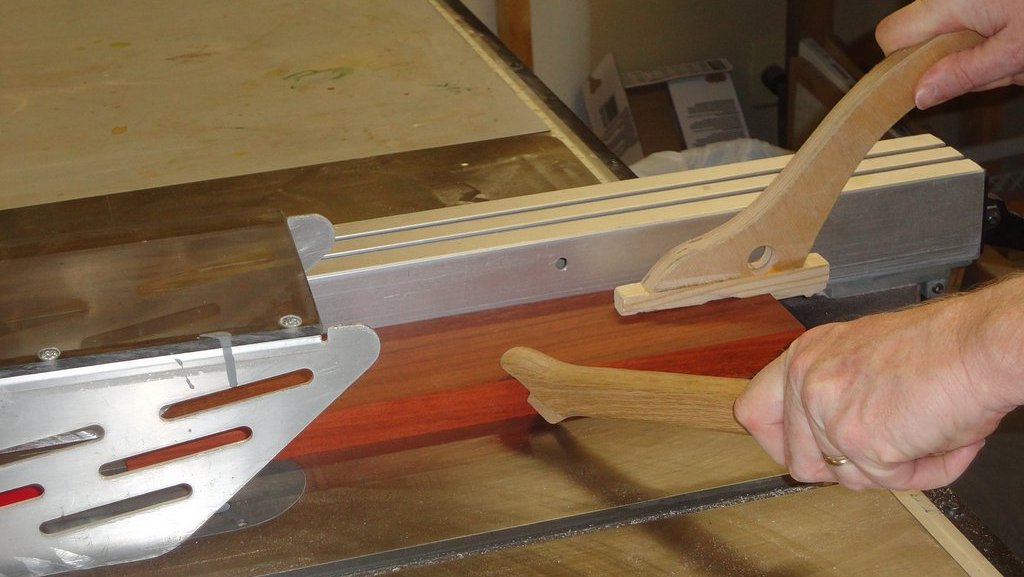
Curved push stick with replaceable base
For ripping thin pieces of stock, I use an adjustable push stick apparatus that straddles the table saw fence. This works well in situations where there is insufficient space between the blade guard and the fence for a conventional push stick. And I like the fact that the handle of the push stick is above the fence, rather than inline with the blade, thereby providing an extra measure of safety. The business end of the stick slides up or down in a notch to accommodate material of varying thicknesses. It pivots on the front bolt and locks in place with a wing nut attached to the rear-most bolt. If I were to build another straddle-style push stick, the only change I would make to this design would be to use plywood for the main body rather than solid wood. With the current design, the push stick sometimes binds during the winter months because the maple body shrinks a tad, as wood is wont to do when the humidity drops.
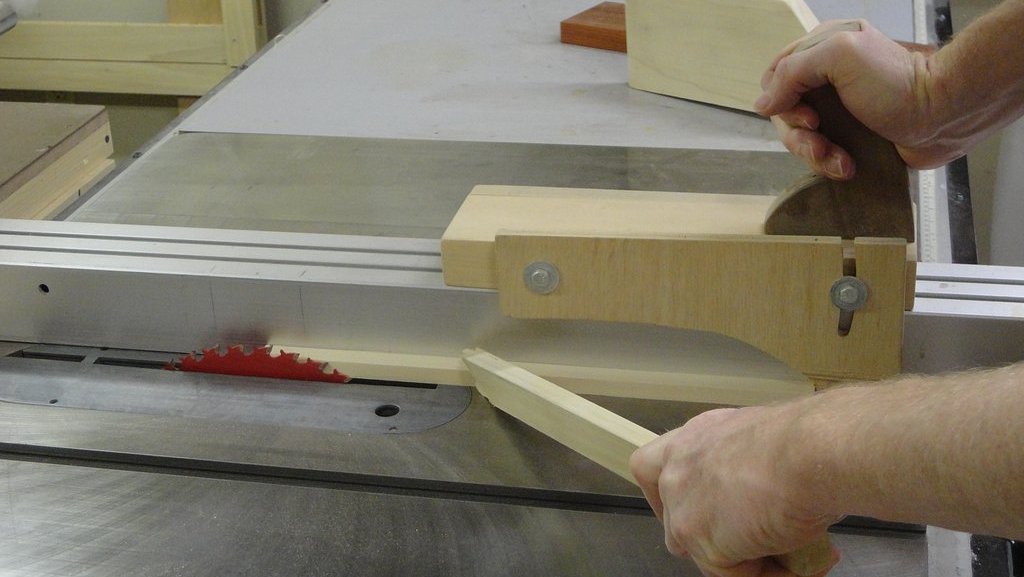
Fence-straddling push jig for thin stock
A close cousin of the push stick is the push block. It allows you to apply greater downward pressure along more of the piece which is helpful when ripping smaller boards because they have a greater tendency to get kicked up by the front of saw blade if not adequately secured. A push block also works well when you need to cut a uniformly deep groove in a board by keeping the board flat against the table saw surface. A simple but effective push block can be made from a piece of wood with one corner cut off at a 45 degree angle and a support cleat glued to the rear corner. I keep a couple “cutoff” push blocks of different sizes close by the table saw.
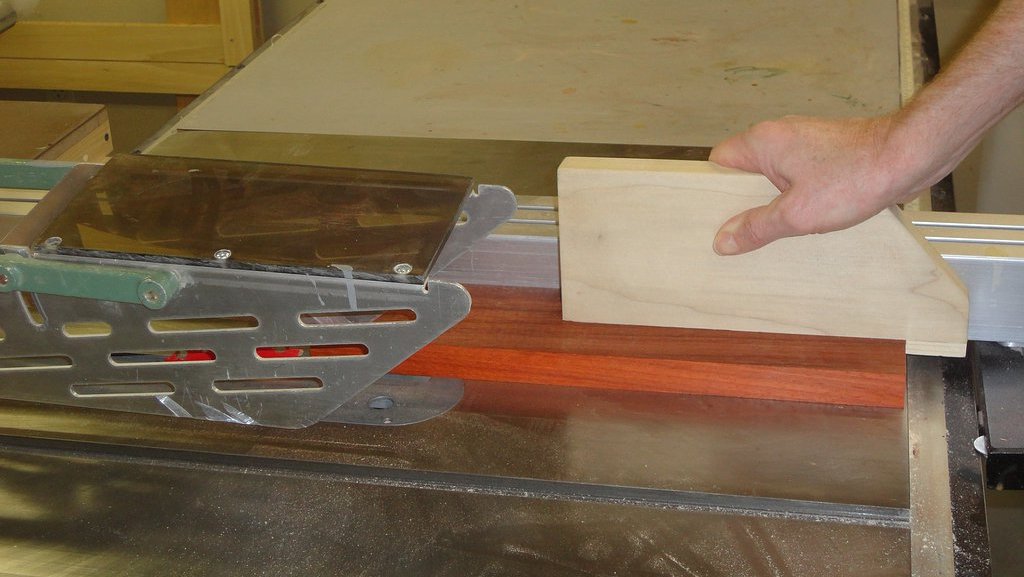
Your basic table saw push block
As I was writing this article, I was a bit surprised to discover how many push blocks I have built over the years. Most of these were designed for specific projects or situations. For example, the push block shown below was created for a project where I had a number of narrow pieces of wood to rip and wanted the extra control and stability afforded by an extra-long block. And because there was insufficient room to use the blade guard, the narrow push block also allowed me to safely make the rip cuts.
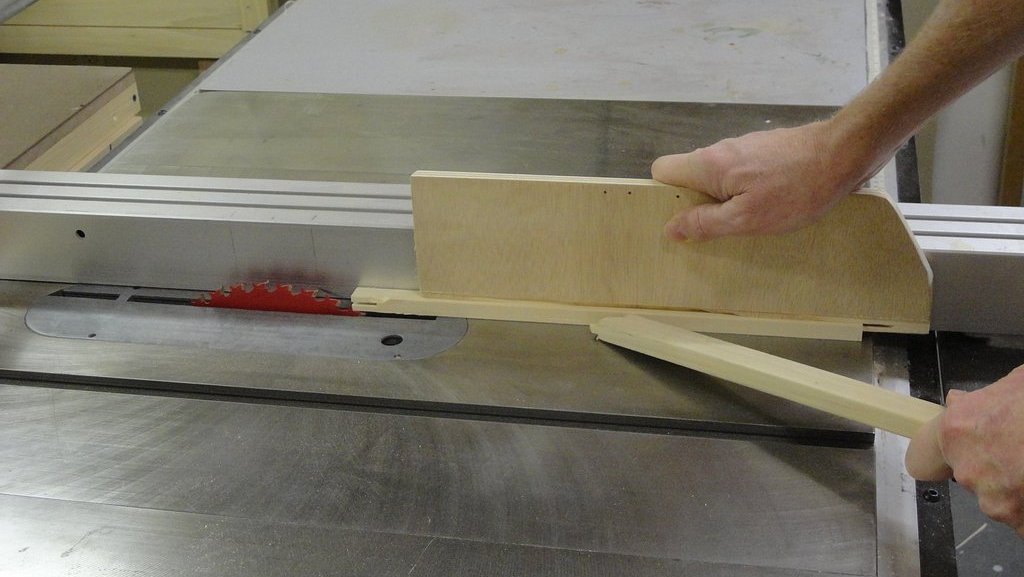
Longer push block works well for small, narrow stock
A hold-down feather board provides an additional measure of safety for certain cutting situations. I use one that fits into the miter gauge slot and tightens in place via a large knob. It keeps the board firmly against the fence and can also help to hold the board flat against the table surface by using the hold-down tab (or whatever it’s called). Sometimes I’ll clamp one or two feather boards to the fence vertically when it is important to keep the piece flat against the table — such as when cutting a groove that needs to be a uniform depth. A push stick can then be used to push the piece forward without having to worry so much about holding it down.

Combination feather board and hold-down
Push blocks for the Jointer
I keep an assortment of push blocks hanging right above my jointer. That way, they’re close at hand and I never have an excuse not to use one in situations where a push block is clearly called for. That includes surfacing operations and jointing smaller pieces of wood. In addition to providing a smoother cut, it’s a comforting feeling to have an extra hunk of wood (i.e., the push block) between your hands and the cutter head. If there’s a mishap, it’s the responsibility of the push block to take one for the team.
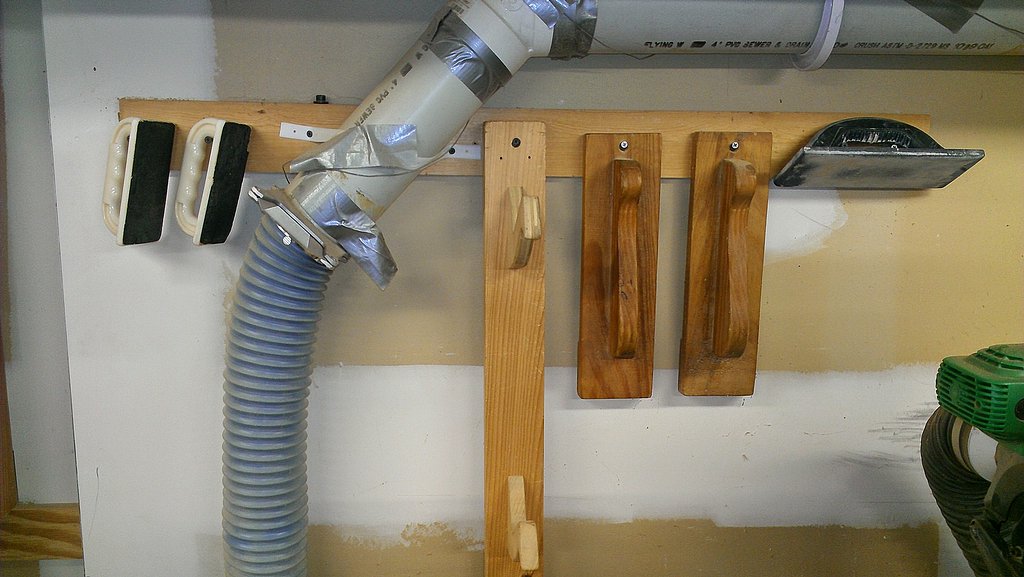
Assortment of jointer push blocks
The push block I use most often is a fairly classic design – a double humped handle sitting atop a flat base with a protruding cleat on the underside. It measures about 14 inches long by 4 inches wide. (I think I may have found the plans for it years ago in one of Tage Frid’s books). With one of these babies supporting the back of the board being joined and one bearing down on the leading end, the board is held very securely and your fingers are kept out of harm’s way. That’s the essence of a push block.
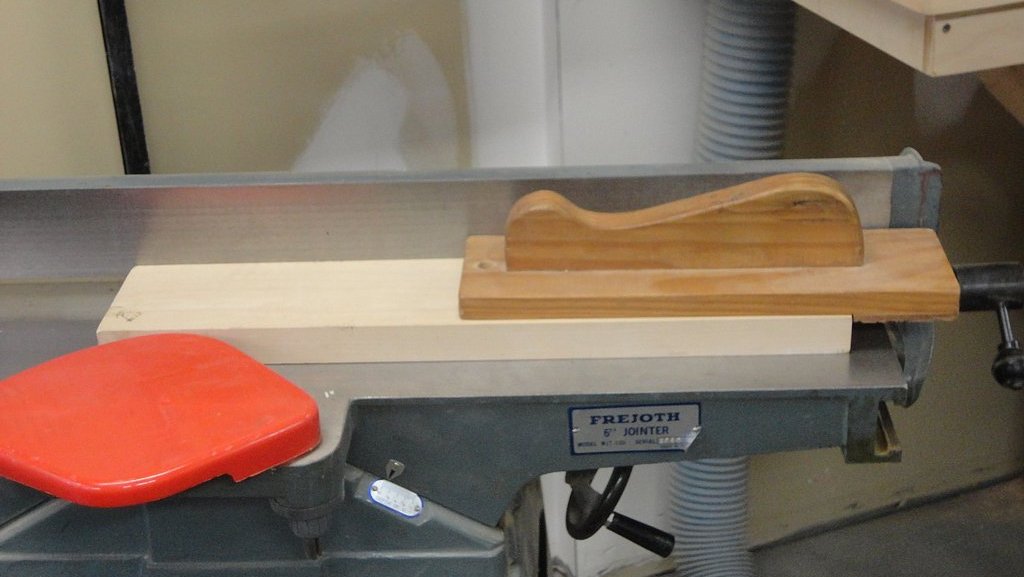
Double hump jointer push block
For longer boards, we have the two-handed push block. I made mine from a 2 foot length of a 2 x 4 with notches cut out for the handles. It works really well because it allows you to really bear down, maintaining solid contact between the wood and jointer surface throughout the entire pass. This makes for a really smooth cut by preventing the mid-board “snipe” that can sometimes occur when you’re using two separate push blocks and have to re-position them in the middle of the operation.
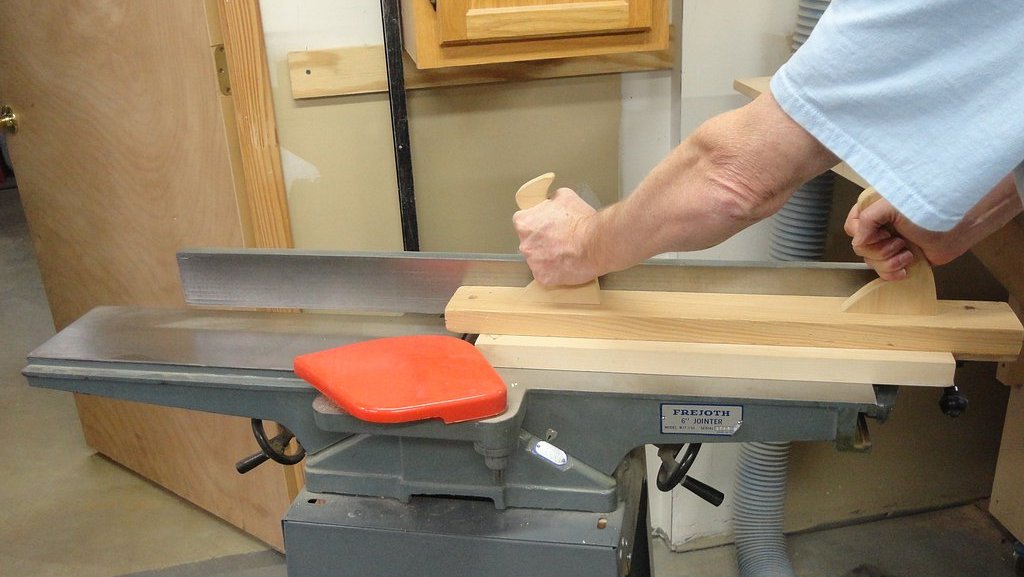
Two-handed jointer push block
I own a couple of those plastic push blocks with rubber pads on the underside. A number of woodworking tool suppliers sell them. I’ll sometimes use them on the jointer by using one in my left hand to hold down the stock and a conventional wooden push block in my right hand to push the board forward. I also use plastic push blocks on the router table to hold and guide a piece of wood past the router bit. They afford a fair amount of control while keeping your fingers safely away from the hungry router bit. Highly recommended.
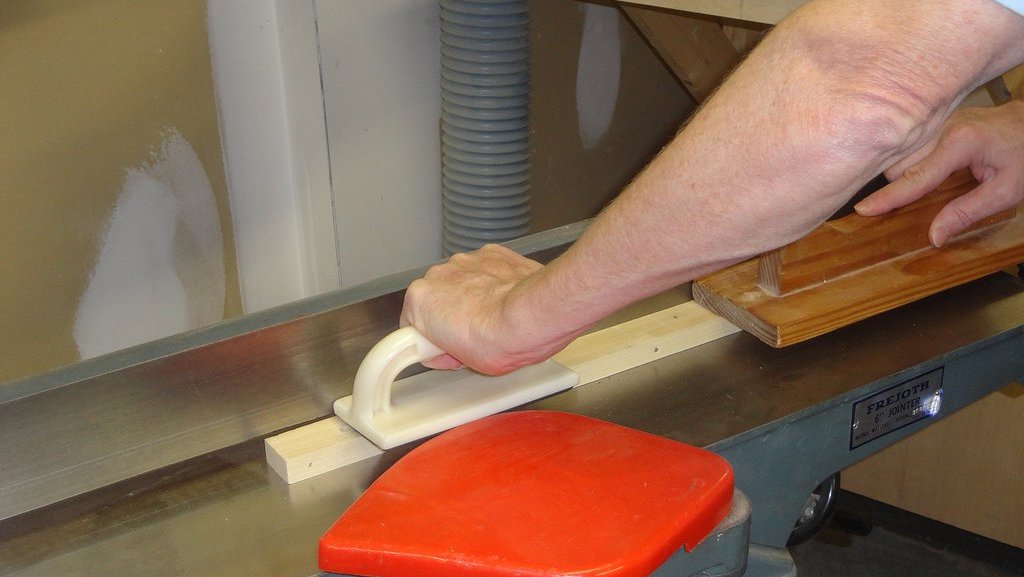
Rubber pad and conventional wood push blocks working together
I like the fence straddler. I just finished a tenon jig similar to it with an adjustable bridge I think I’ll incorporate into mine with a sacrificial push part. I tend to rip into my blocks quite often ripping thin stock. My last one has gotten close to being a finger eater. Time to retire it to the old push block home in the sky..(burn pile)