
I bought this parquet coffee table from some neighbors that were moving and didn’t want to haul their old furniture with them. I got a good deal on the table, especially considering that it had one of those spring-assisted pop-up mechanisms for adjusting the height of the table top. The table was in good condition except for three or four semicircular areas on the top where the finish had worn off and the bare wood was exposed. It was the kind of blemish that resembled a partial outline of a glass. I assume the finish was lacquer which, as you may know, doesn’t hold up well against alcohol. In fact, alcohol will dissolve lacquer.
My initial plan was to sand down the areas immediately around the blemishes, restain, and apply a clear finish. After testing this plan on one of the blemishes, I quickly realized that more drastic action was called for because the touched up area did not blend well with the rest of the table top. I pretty much expected this outcome, but figured, why not give it a try? So, it was time to make a deeper commitment.
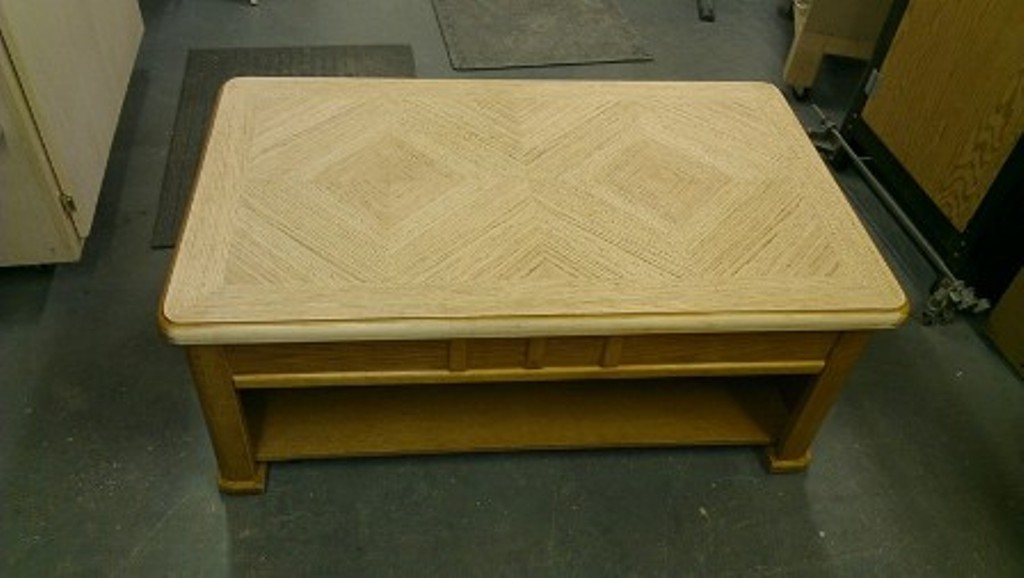
Sheet sander was used to sand off the finish on the entire table.
Using a sheet sander, I sanded off the finish from the entire table top using 150 grit sandpaper, followed by 220 grit paper. The result can be seen in the initial photo. Then the challenge was to come up with a stain that would be a close enough match to the original. I decided to use a light oak aniline dye that was left over from a previous project. Using a cotton cloth, I applied a liberal quantity of dye to the entire tabletop as quickly as possible and then wiped off the excess. If you apply dye in a dainty piecemeal fashion, I learned from hard experience that you’ll end up with a blotchy, uneven coloration. Better to pile it on, saturating the wood pores, and then wipe off the excess as quickly as possible.
After allowing the dye to dry, I noticed several spots were slightly darker than the surrounding areas. I wiped over these spots with a wet cloth to lighten the color. This color adjustability of wood dyes – even after they have dried – is one of their big advantages. As you can see in the middle photo, the wiping process did indeed remove some of the dye.
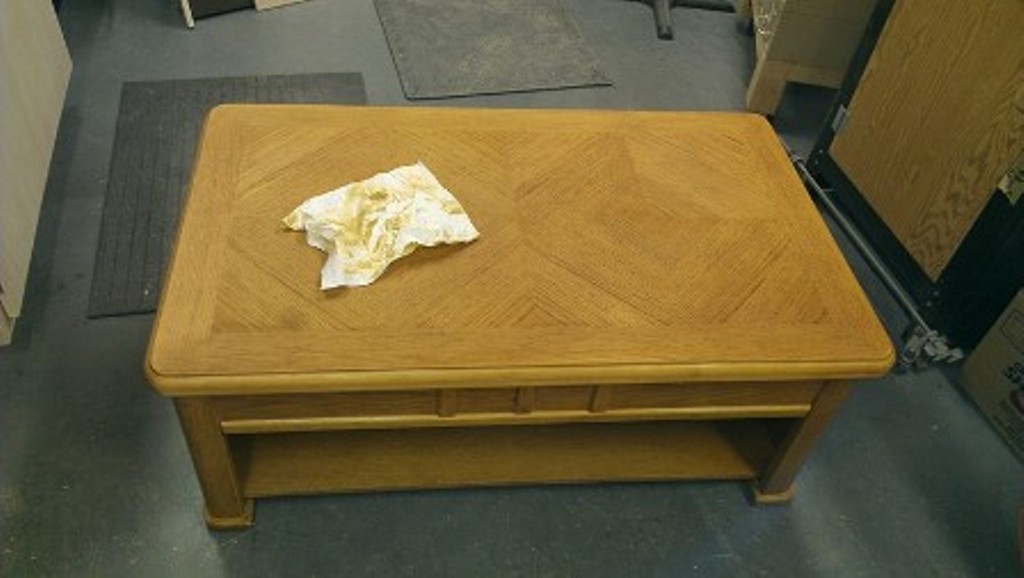
Dye applied to coffee table.
The next challenge was to apply a polyurethane finish. This is my preferred finish for table tops and other heavy-use furniture because of its superior resistance to water, alcohol, and heat compared to an oil or lacquer finish. The downside to polyurethane is it can be a bear at times to produce a smooth, blemish free surface. Some might say that’s the fun part. My first attempt in this case didn’t go so well. I had some left over General Finishes Urethane that I applied with a foam sponge. While applying the finish, it seemed to puddle in places and didn’t flow too well. I attempted to level out the finish using a clean cotton rag dipped in the urethane but unfortunately, this left streaks in the finish.
I realized that the finish was a bit too thick – apparently, some of the oil in the solution had evaporated. It also occurred to me that the problem was compounded by the wiping process which left too little finish on the surface. So, I needed to thin the poly and try again. But first, I had to sand off the streaky coat of finish that was still visible even after applying a second coat. Rats. Fortunately, it didn’t take too long to sand off the flawed finish but I was starting to get annoyed and time was a wasting.
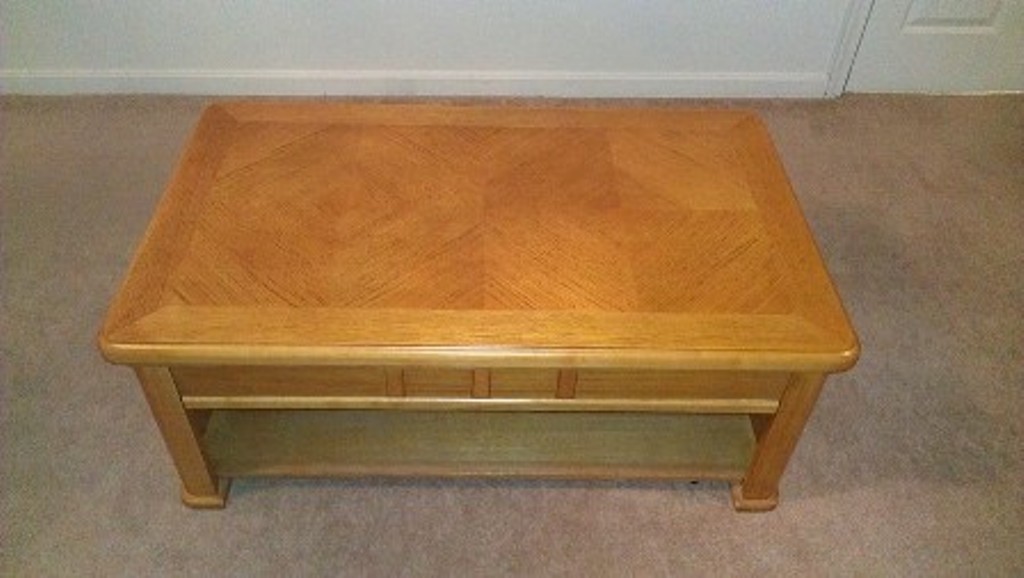
End result of coffee table with new finish.
I thinned the finish by dipping a cotton rag into paint thinner before dipping it into the polyurethane. The finish then flowed on much smoother without the annoying puddling experienced the first time. I dipped the rag into the paint thinner a few more times to keep the finish flowing freely and made sure to overlap successive passes to prevent lap marks. This time the results were much better as there were no visible streaks in the finish. Because of its higher oil content, wipe on polyurethane requires more coats than conventional polyurethane because it contains fewer solids. This is the downside to a wipe-on poly finish. The upside is that the coats dry quicker with fewer dust nibs and additional codes can be applied within a couple hours rather than waiting 4 to 8 hours as with conventional poly.
At this point, the finish looked pretty good and I could have called it a day. But that would have been too easy. Instead, I decided I wanted a glossier finish – the wipe on finish was semi-gloss and I wanted full gloss. So, I picked up a can of Minwax spray-on glossy polyurethane and proceeded to spray on a coat of gloss. This worked reasonably well except that spray overlap marks were slightly visible, mostly on the ends of the table top. I figured this was caused by spraying onto a horizontal surface with the can tilted downward, rather than spraying with the can in a vertical position, which made it difficult to apply an even, wet coat. So, I placed the coffee table sideways on a work surface with the top oriented vertically and sprayed again, making sure to spray slightly past the ends. This time the finish went on nice and evenly with no spray marks. The world was a good place again.