
While restoring an antique parlor table, I ran into a situation in which a couple of the tenons holding the leg assembly together split during disassembly. I tried being careful – I brushed a liberal amount of denatured alcohol on the joint to soften up the old hide glue followed by gentle tapping with a mallet – but two of the tenons on the leg stretchers just weren’t cooperative. I suspect the tenons were partially split before I started the disassembly but I’ll never know for sure. What I did know was that the table was old enough and ornate enough that replacing the damaged pieces wasn’t feasible so our man was left with the task of repairing the broken tenons. Here is how I went about it.
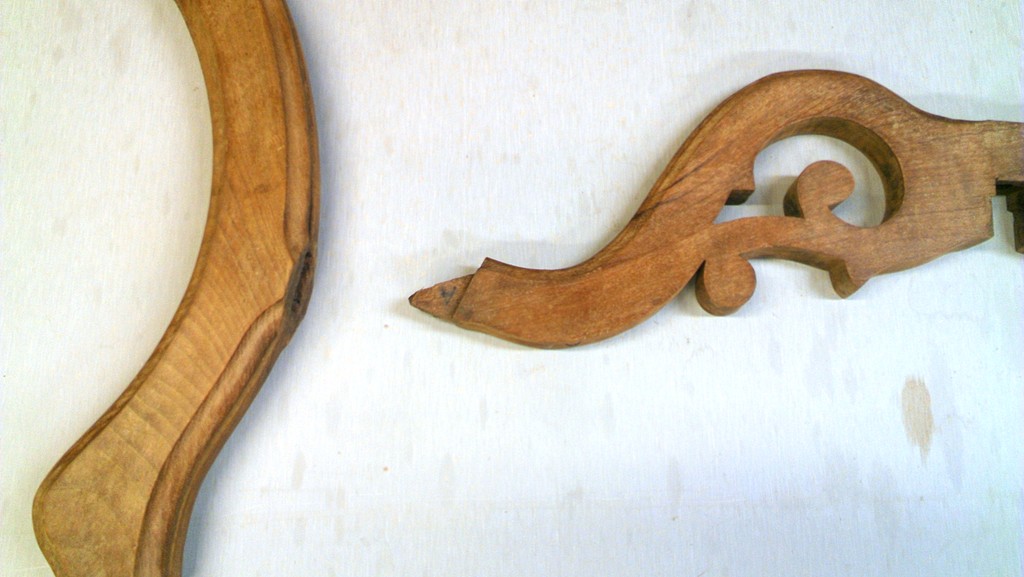
Side view of damaged tenon
First, I cut off the damaged tenon flush with the shoulders (i.e., cut off the whole tenon) using the band saw. Fortunately, I didn’t need to cut it exactly flush, which can be a little tricky with curved pieces such as this, because any remaining tenon stub was removed in the next step.
The next step was to rout out a slot to accommodate a new tenon. The tenon-less work piece was temporarily attached to a piece of plywood using double-sided tape. The piece was positioned so the tenon shoulder lay flush with the router table surface. With the plywood jig held against the router fence, the fence was adjusted so the router bit lined up with one edge of the tenon. Using a 5/16″ straight router bit, material was progressively removed to form a slot of the desired depth (1-1/4″). Approximately 1/4″ was removed with each pass.
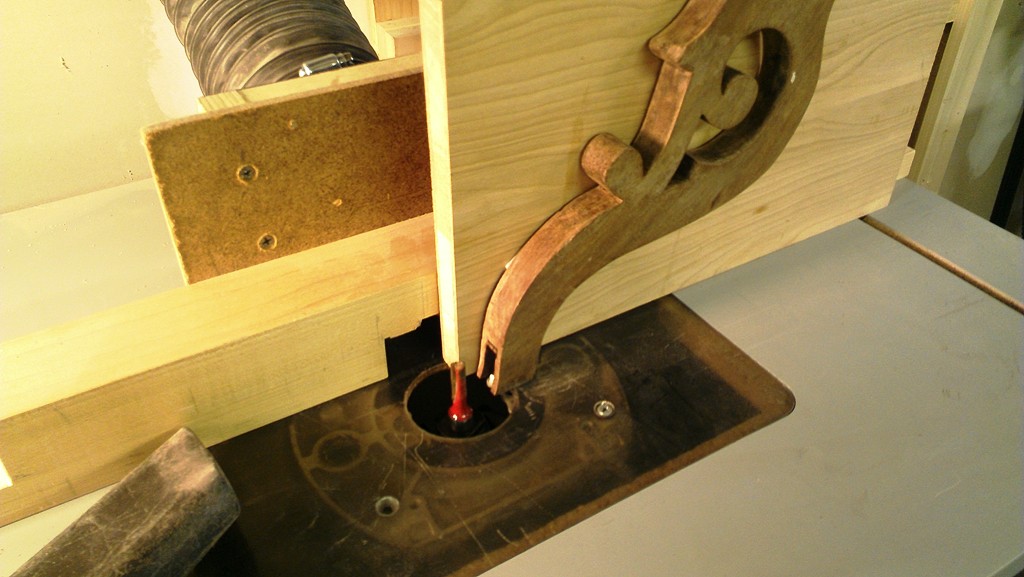
Routing a slot for the replacement tenon
Once a slot of the desired depth was created, the fence was shifted slightly so the bit lined up with the other edge of the tenon and the nibbling process was repeated to create a slot with the same thickness as the tenon (about 3/8″). Although not shown in the photo, a stop was clamped to the fence to prevent the bit from cutting all the way through the piece – the tenon was only about 2/3 the width of the work piece. A tenon spanning the full width of the work piece was not an option here because the top of the leg assembly was visible from above.
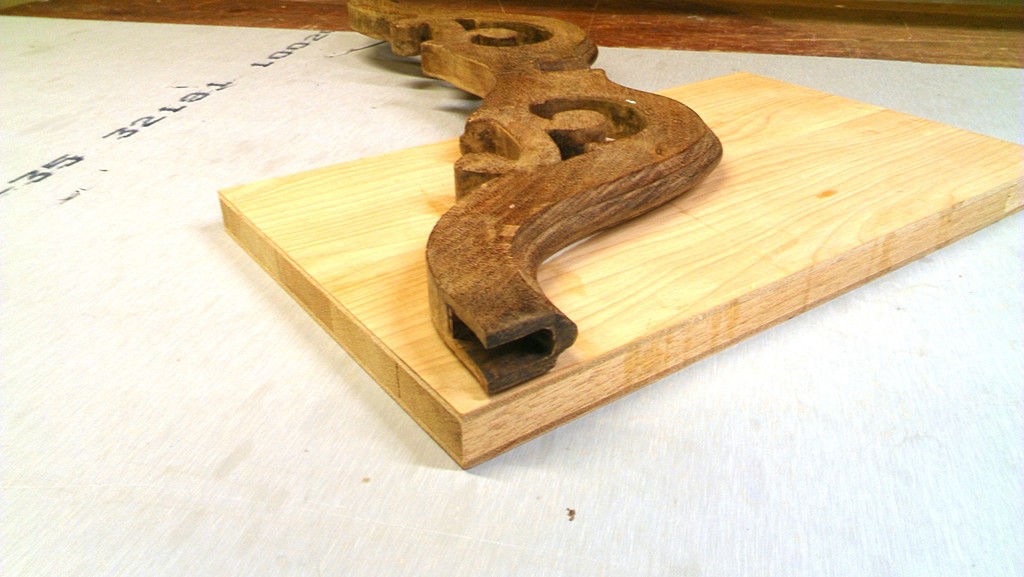
The replacement tenon slot
A replacement tenon was created from a piece of scrap wood of the same species (walnut) as the leg assembly. It was machined to fit snugly into the slot, glued in place, and trimmed to match the dimensions of the original tenon. I actually made the replacement tenon slightly thicker than the original one and shaved it down by hand to get a nice snug fit in the mortise. (The mortises were a bit worn).
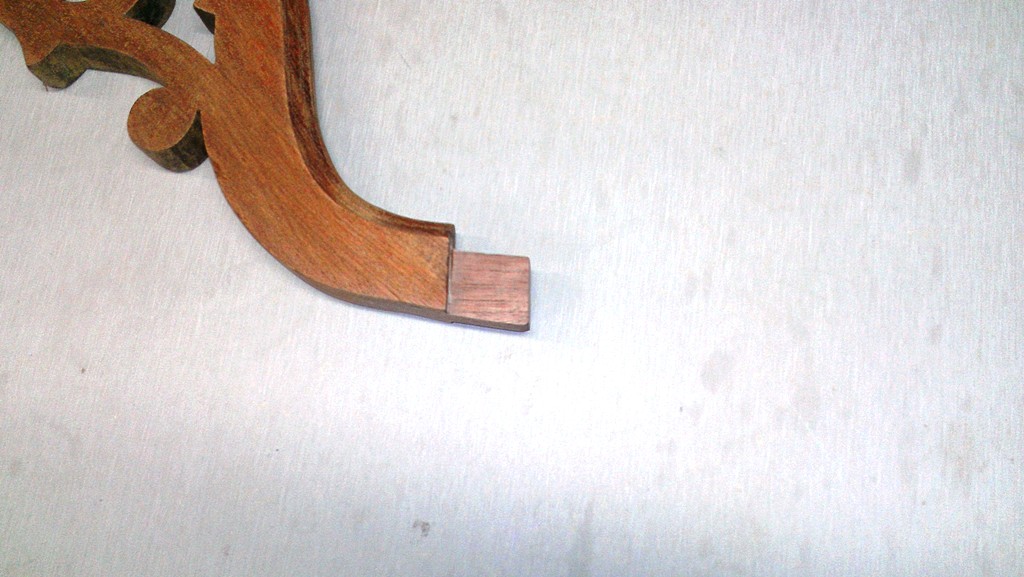
Replacement tenon ready for assembly
To facilitate any future repair tasks – which hopefully won’t be for another 100 years – I reglued the mortise and tenon joints using hide glue. I’m happy to report that the the replacement tenons are working well and the reassembled table is rock solid.