
I came across this turtle top table while cleaning out the attic in the home where I grew up. I remember my mom working on the table many years ago – she had partially stripped off the finish as the first step in reviving the table but didn’t get around to finishing the job. Eventually, the table got moved to the attic where it had been collecting dust for over 25 years until I rediscovered it. It was rickety and badly in need of a new finish. I decided it would make a good restoration project. The table is a Victorian style turtle top parlor table made from black walnut. It measures 23″ wide by 32″ long by 27″ high. According to an antique dealer in Shrewsbury PA that I spoke to, the table dates to somewhere in the late 1800’s. Like other parlor tables of the era, this one had casters, allowing it to be easily rolled out for entertaining purposes and then rolled back into the corner or wherever after the company departed. I’d like to think that this table had been in my mom’s family a long time but I really don’t know for sure.
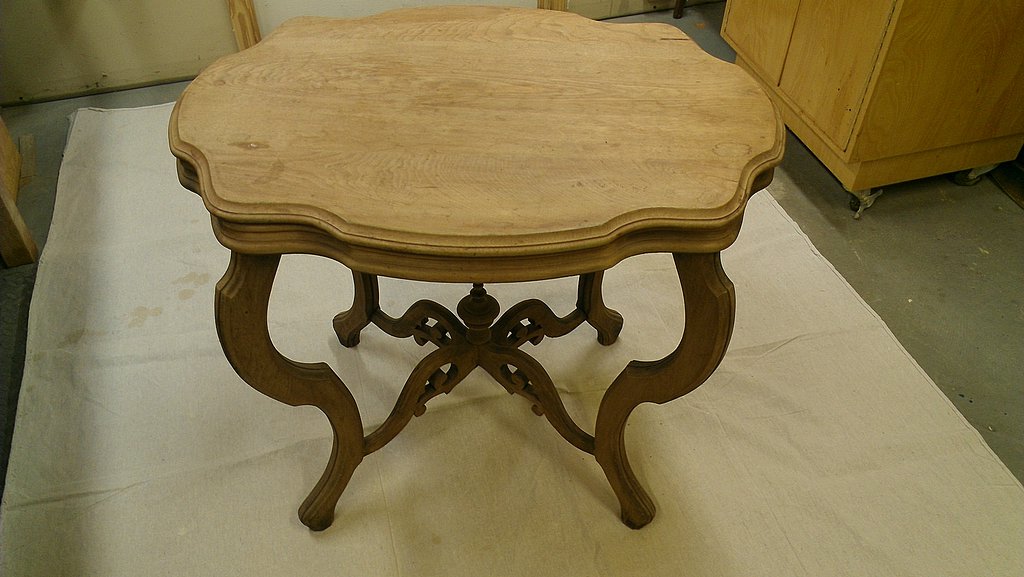
Turtle top table before restoration
The first order of business was to disassemble the table. Some of the joints came apart with minimal effort – a few taps using a leather mallet. Others involved a bit more work – liberally brushing denatured alcohol around the joint to soften up the old hide glue followed by some wiggling and taps with the mallet. The apron was held in place with dowels and all of these joints separated cleanly without damaging the dowels. The mortise and tenon joints used to connect the legs to cross-braces didn’t fare as well: two of the four tenons split apart during removal, making the restoration project considerably more involved than originally anticipated. (In my defense, the tenons split fairly easily so I suspect they were already partially split before I touched the table).
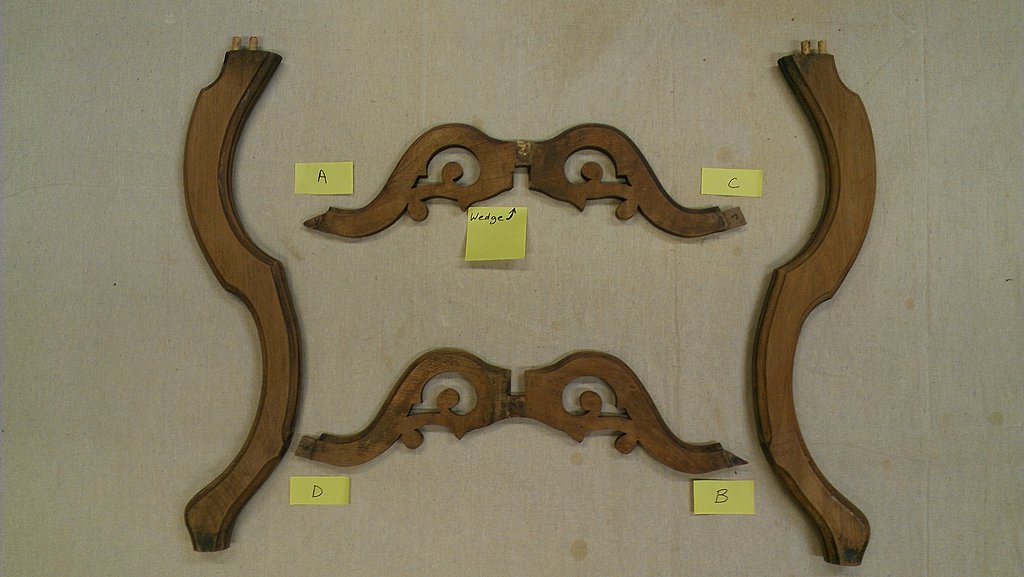
Leg assembly – note broken tenons
With the table disassembled, the next order of business was to strip off the remaining finish. This was the most time-consuming and tedious part of the whole job. It involved brushing paint stripper on each piece, allowing about 15 minutes for the chemicals to loosen up the old finish, and then removing the old finish using a combination of scrapers and brass brushes. Some of the pieces required multiple applications of stripper. Once the finish was removed, any remaining finish or stripper residue was cleaned off using mineral spirits applied with a brush.
Another time-consuming aspect of the restoration was repairing the broken joinery. This included the split tenons mentioned earlier as well as a dowel joint used to connect one of the legs to the apron. In the case of the dowel joint, the dowel hole had become elongated over time, allowing the leg to move around and become rickety. Repairing this joint involved gluing a piece of wood into the dowel hole and redrilling the hole. Repairing the broken tenons was more difficult. This job involved cutting off the old tenon and building a new one by inserting an appropriately sized piece of wood into a recess routered into the tenon member (the horizontal leg support). In addition to the tenon replacement, the mortises required a bit of refitting using wood epoxy to fill in worn-out areas followed by careful chiseling to accommodate the new tenons.
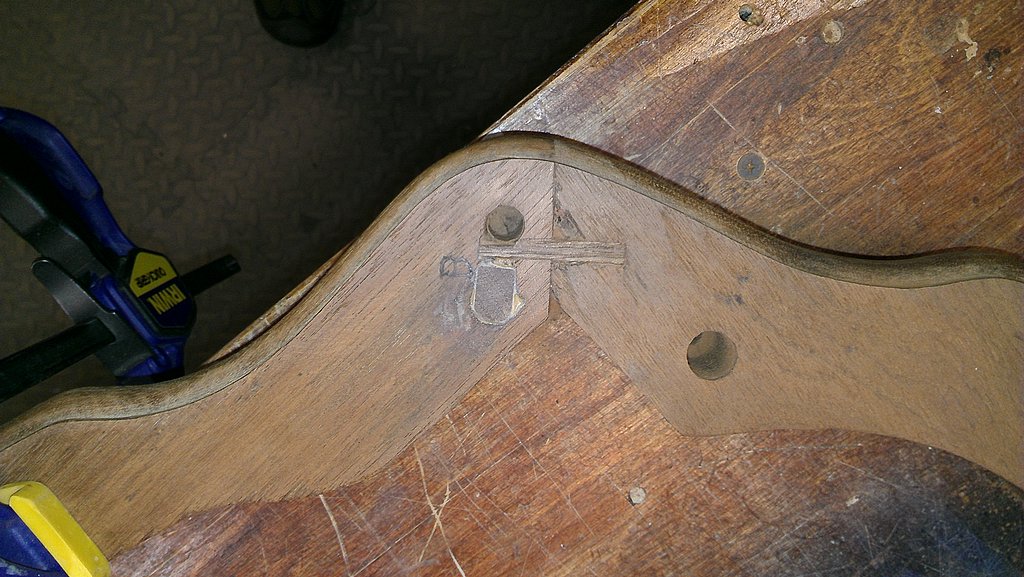
Wood plug used to repair worn out dowel hole
Once the joinery was repaired, all the pieces were lightly sanded and vacuumed off to remove sawdust and any remaining traces of old finish/stripper gunk. Then it was onto re-assembly. After dry-fitting all joints to make sure they fit snugly, I brushed liquid hide glue onto the mating surfaces of each joint, assembled the pieces, and applied clamps to hold the pieces in place until the hide glue set. I opted to use hide glue to retain some of the authenticity of the table since hide glue was used on pretty much all furniture prior to the mid 1940’s. It’s also much easier to “de-activate” than modern PVA-type glues which will simplify things for the person that restores the table next time in 200 years or so.
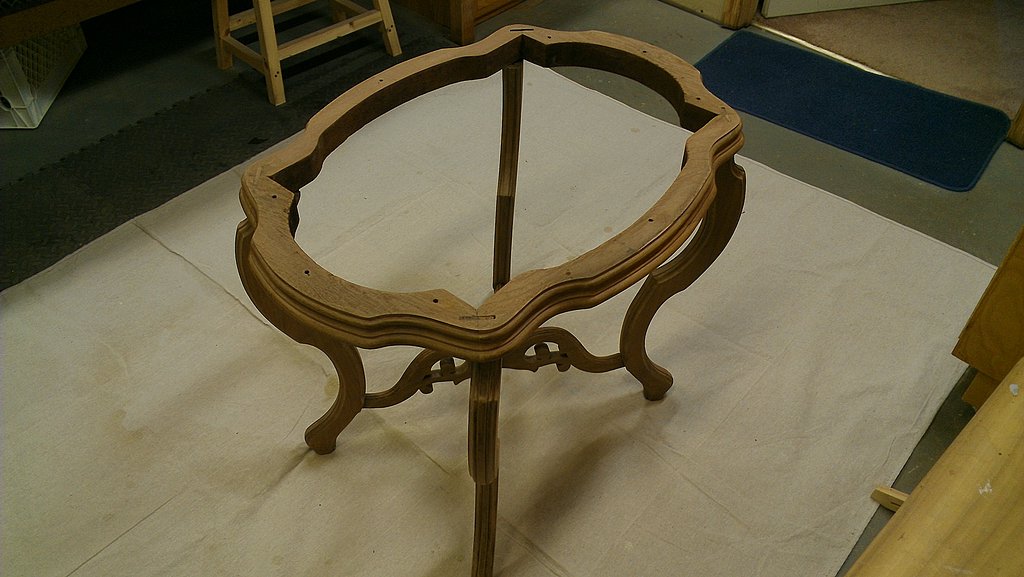
Table base with repaired joinery
The turtle-shaped table top was attached to the base via screws that passed through the apron into holes drilled in the underside of the table. There was a total of eight screw holes but I could only get about three of them to line up. This was somewhat puzzling but was likely related to seasonal wood movement – perhaps more would have lined up if the top was attached at a different time of the year. In any case, I enlarged some of the holes in the apron so I could get four equally-spaced screws installed. Eight screws seemed liked overkill to me plus using that many would increase the chances of the top splitting due to seasonal movement.
One final repair was to fill in a 2″ long crack on the edge of the table top. This was accomplished by pressing epoxy into the crack from both top and bottom. Once dry, it was sanded smooth. [Note: after several years, the crack has not returned].

Split in table top
To finish the table, I applied Minwax red mahogany oil-based pigment stain, allowed it to sit for about 10 minutes, and then wiped off the excess. This restored the darkness of the walnut while adding a hint of red to liven things up. The stain actually came out darker than I preferred – if I did it over again, I would have opted for a lighter stain. No biggie. After the stain dried, I applied three coats of freshly mixed 2-pound cut shellac (again, going for the authentic touch) with a light sanding between coats.
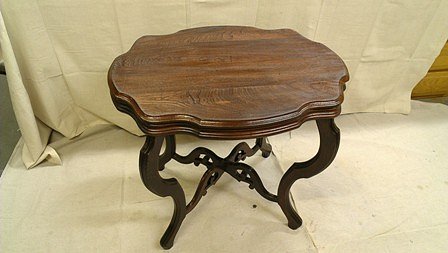
Restored turtle top table
I was quite pleased with the final result. The table still has some defects – notably some deep scratches and dents in the top, which I decided not to to remove in order to lend some of that 100+ year old character – yet it is a vast improvement over the washed out, rickety carcass that I pulled out of the attic.