
After discovering an old dilapidated Singer sewing machine in the upstairs storage area of my dad’s garage, I decided to “repurpose” it as a table. The original wooden work surface of the 100+ year old machine was badly warped and discolored due to water damage so I made an executive decision to replace it with something more aesthetically pleasing. I originally considered just replacing it with a basic rectangular-shaped piece of wood but after mulling it over a bit, I decided something a bit more ornamental was called for: a top with scalloped corners. That is, a top with indented corners formed by two intersecting curves. I’m not sure “scalloped” is the proper terminology here – maybe it should be called “double curve corner” or “recessed corner” or something along those lines, but the basic idea was to create a decorative top to complement the decorative metal work of the sewing machine’s base.
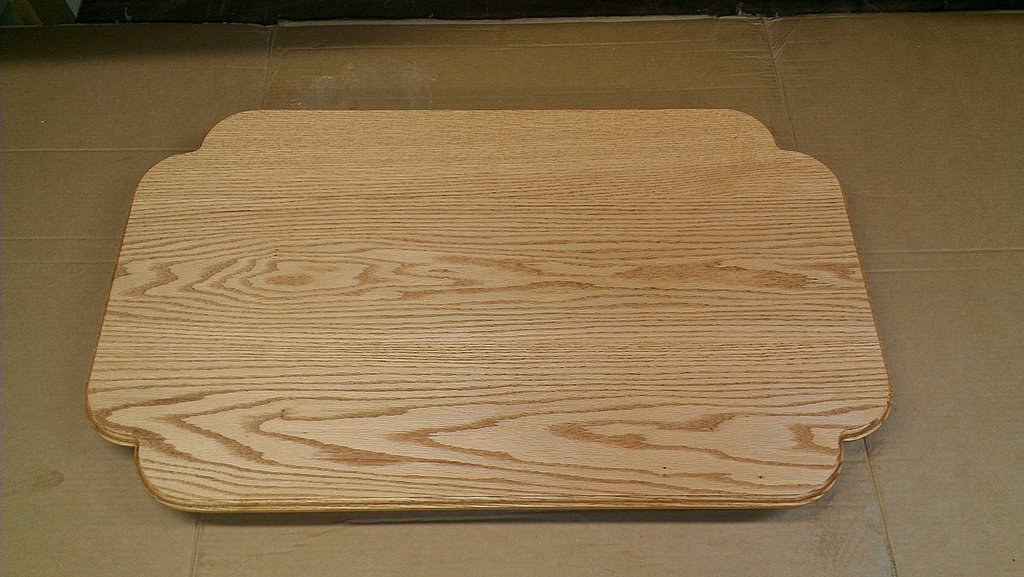
Oak table top with scalloped corners
The corners consist of two overlapping arcs that are set back an equal distance from the corner. The arcs represent portions of circles of a fixed radius. In this case, I opted for a radius of 2-1/2 inches. The first step is to lightly draw two lines 2-1/2 inches from each edge, paralleling the edges. The intersection of these two lines is the point where the two arcs intersect. With the compass pencil at the point of intersection, the compass needle is positioned back 2-1/2 inches along one of the lines, and the compass is swung to draw an arc from the point of intersection to the edge of the board. The process is repeated for the other edge. The resulting curved line forms the cut line for the scalloped corner.
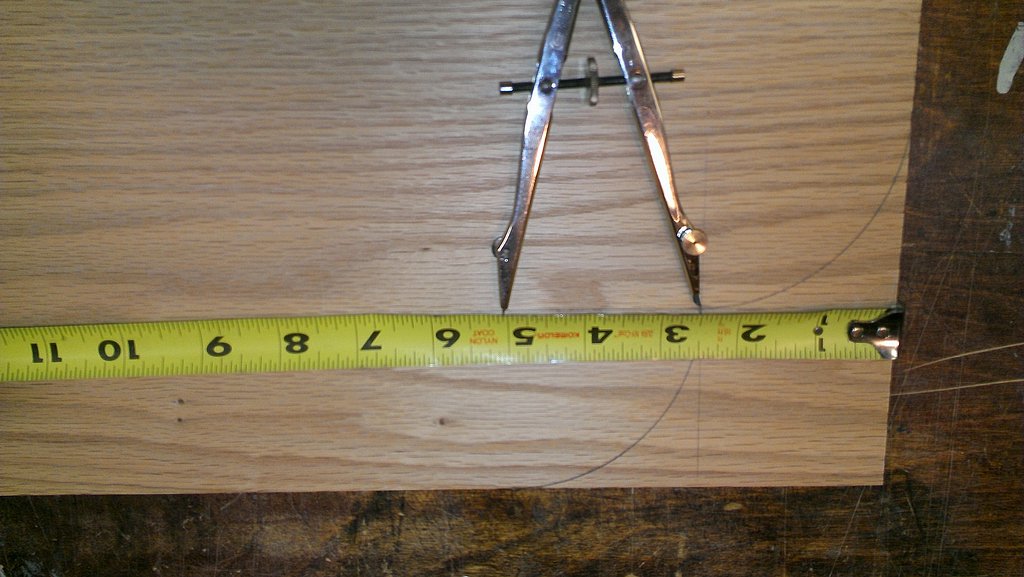
Lay out overlapping arcs to form scallops
Once all the arc lines were laid out, the next step was to cut along these lines to form the scalloped corners. I used the scroll saw for this task. Unfortunately, the blade kept burning the wood (must have been really hard oak) which necessitated extra sanding with the palm sander to remove the burn marks. I cut just slightly proud of the layout lines and sanded to the lines to minimize any unevenness. I actually cut into the layout line in several instances but the palm sander does a good job of smoothing out these areas as long as you use a fluid pivoting motion while sanding.
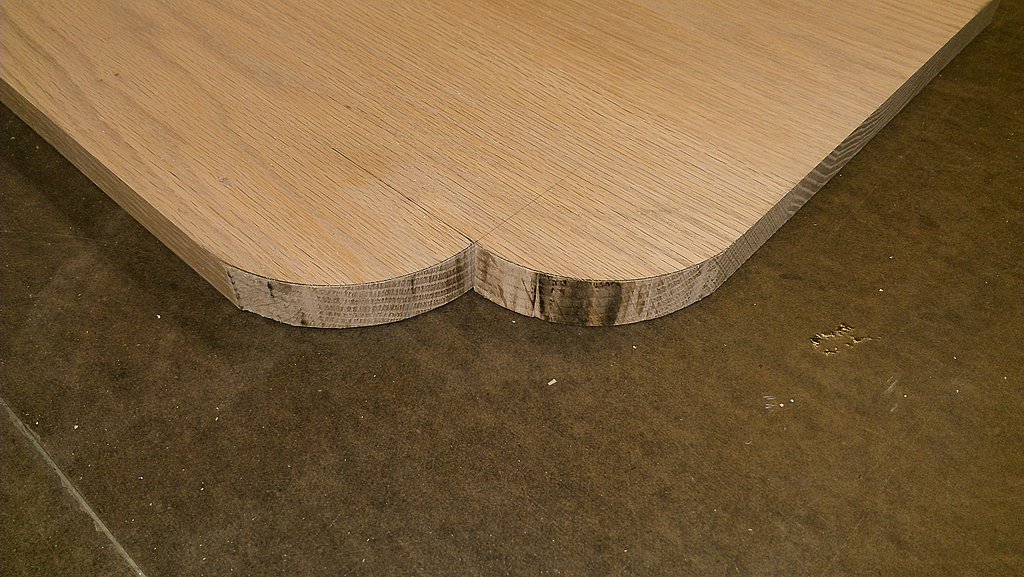
Scallops cut with scroll saw
After smoothing the corners and removing the burn marks, I used a roman ogee router bit to add a decorative profile to the table top. The finishing touch as it were. The only challenge here was to keep the bit moving to prevent burning, especially at the recess where the arcs intersect. This was followed with a final sanding with 150 grit sandpaper. For the finish, I applied Valspar Golden Pecan oil stain and after allowing it to dry for a day or so, I sprayed on a couple coats of semi-gloss polyurethane.
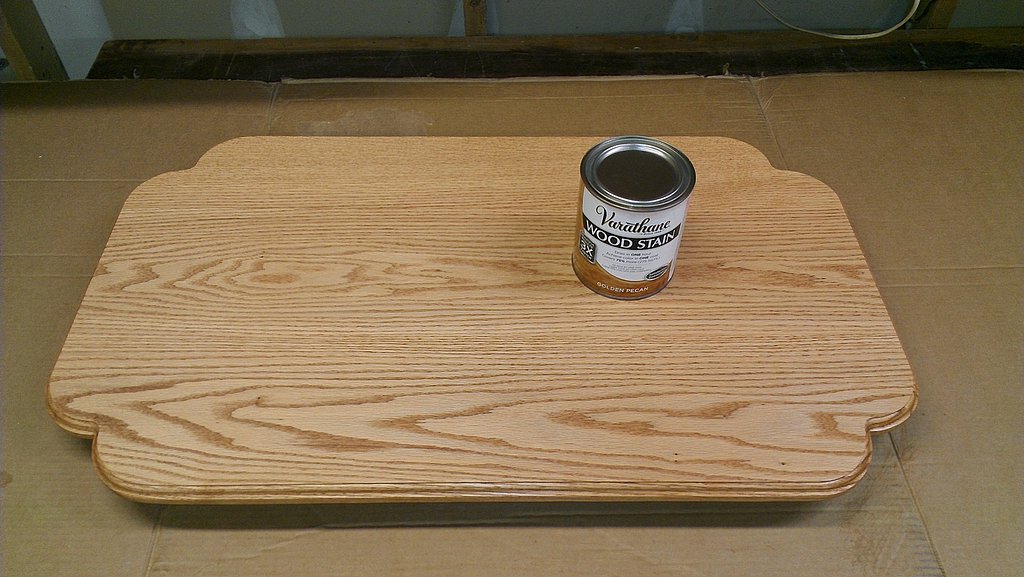
Scalloped corners ready for stain
I’m happy to report that the dilapidated old sewing machine is now a functional and elegant table with eye-catching scalloped corners.