
This step stool was built to replace an older model that was starting to show its age. It’s made from yellow poplar and features retractable anti-tip bars that slide out when needed and slide back in for more compact storage. The basic design of the stool came from a plan that is available as a free download from FurniturePlans.com. Compared to their design, I made this stool slightly larger in all dimensions. It measures 17″ high, 15″ deep and 21″ wide. I also added anti-tip bars because a tall stool like this has a tendency to tip over if your weight is not balanced properly on the top step. When extended, the anti-tip bars add 3″ to the depth of the stool.
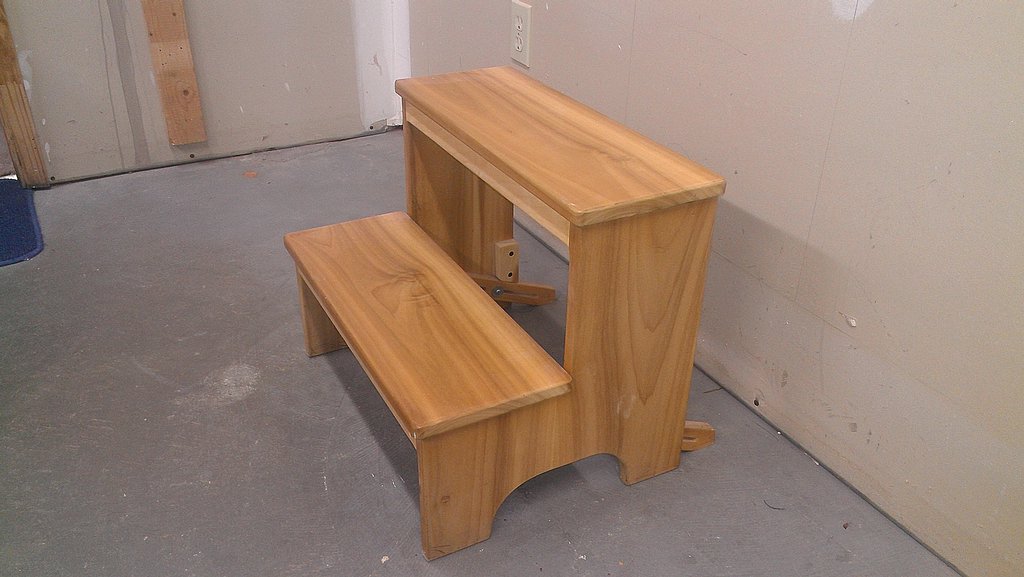
Poplar step stool with anti-tip bars
The stool was laid out from a single piece of 4/4 yellow poplar that was 9″ wide by 10 feet long. I opted for poplar because it’s lightweight, relatively strong and has an interesting green-brown-white grain pattern. The fact that there was a conveniently sized piece lying around the shop may also have played a role in the decision to go with poplar.
The stool treads are supported by rectangular frames made from 1-1/2″ wide boards. These frames are glued and screwed to the insides of the stool sides. A slight allowance was made for seasonal wood movement by only applying glue between the two screws that secure the frame to the side pieces. One of the screw holes was also made slightly oversize. Similar measures were taken for attaching the treads to the framework. Because the stool does not require any mortise and tenon joinery, it goes together very quickly. The tread frames attach to the stool sides and the treads attach to the frames via 2-1/2″ screws inserted from the underside of the frames. No fancy equipment required here. Most of the time was spent gluing up the side pieces and making the cut-outs to form the stool legs.
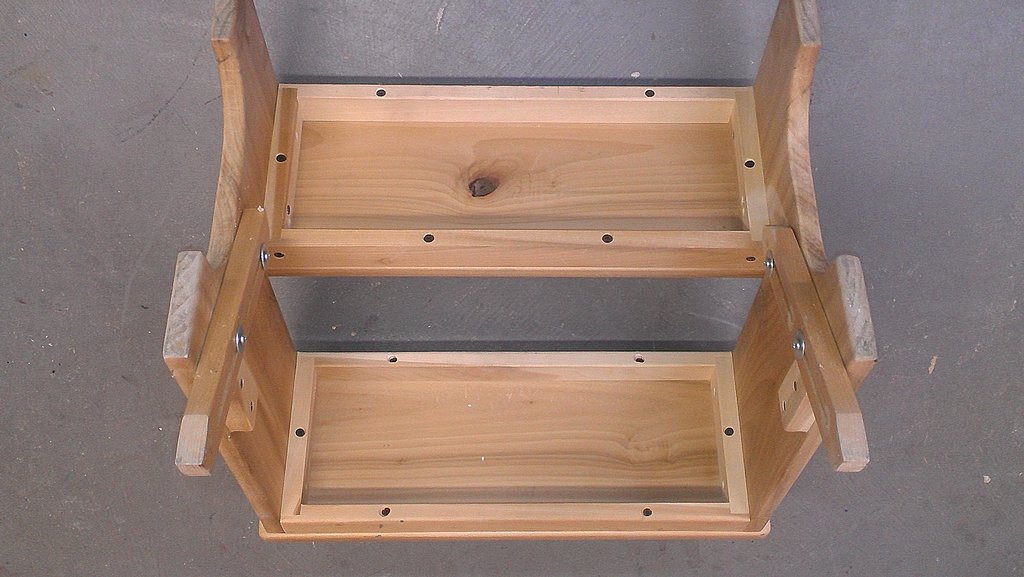
Step stool framework
To make the curved cut-outs in the stool sides, the two pieces were taped together with double-sided tape and then both cut simultaneously on the band saw. After that, it was off to the spindle sander to smooth out things by sanding to the line. I made the cut-outs 3″ deep, slightly more than the 2-1/2″ specified in the plans. A handy 2-1/2 pound circular weight from a barbell set was used to layout the curved portion of the cut-outs.
Anti-tip bars were added to the base of the stool to reduce its tendency to tip forward if a person’s weight is shifted too far forward on the top step. Each bar consists of a piece of 3/4″ thick poplar that is 1-1/2″ wide by 11″ long with two 3-1/4″ long slots. The bar is attached to the inside of the stool side via two #10 screws that fit into the slots. The slots enable the bar to slide back and forth. When the bar is fully extended, the innermost screw slips into a recess at the end of the slot, locking the bar into position.
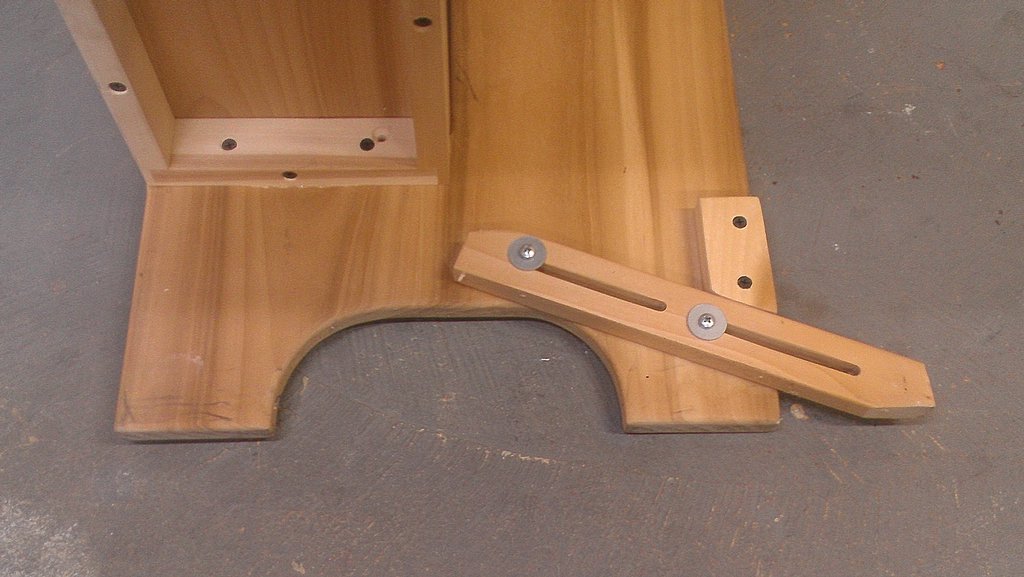
Anti-tip bar extended
The weight on the stool coupled with the slot recess holds the bar securely in place during use. Retracting the bar is a simple matter of lifting the back edge of the stool, pushing down on the bar to unlock it from the recess, and sliding the bar forward. I suppose another recess could be used to lock the bar into the retracted position but I found that the friction of the bar against the stool sides was sufficient to keep it in place.
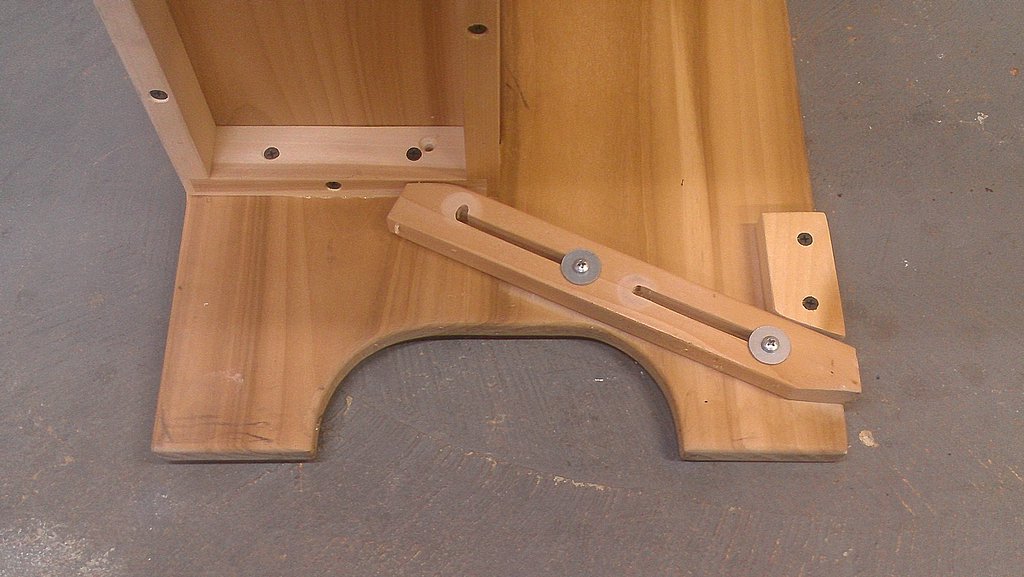
Anti-tip bar retracted