The “Sparky 1”
This dog house features an insulated floor, roof, and walls, a removable roof for ease of cleaning, a cedar deck with roof, and solid construction throughout. It was made from common construction materials – including recycled cedar boards from an old deck, T1-11 exterior grade plywood, and 2″x3″ pine framing lumber. The whole thing cost less than $150. (compare to $500+ for a similarly constructed commercial dog house). The house was built as a gift for a needy local family. That’s their pooch “Nicky” in the picture. He seemed to be right at home as soon as he climbed into the house for the first time.
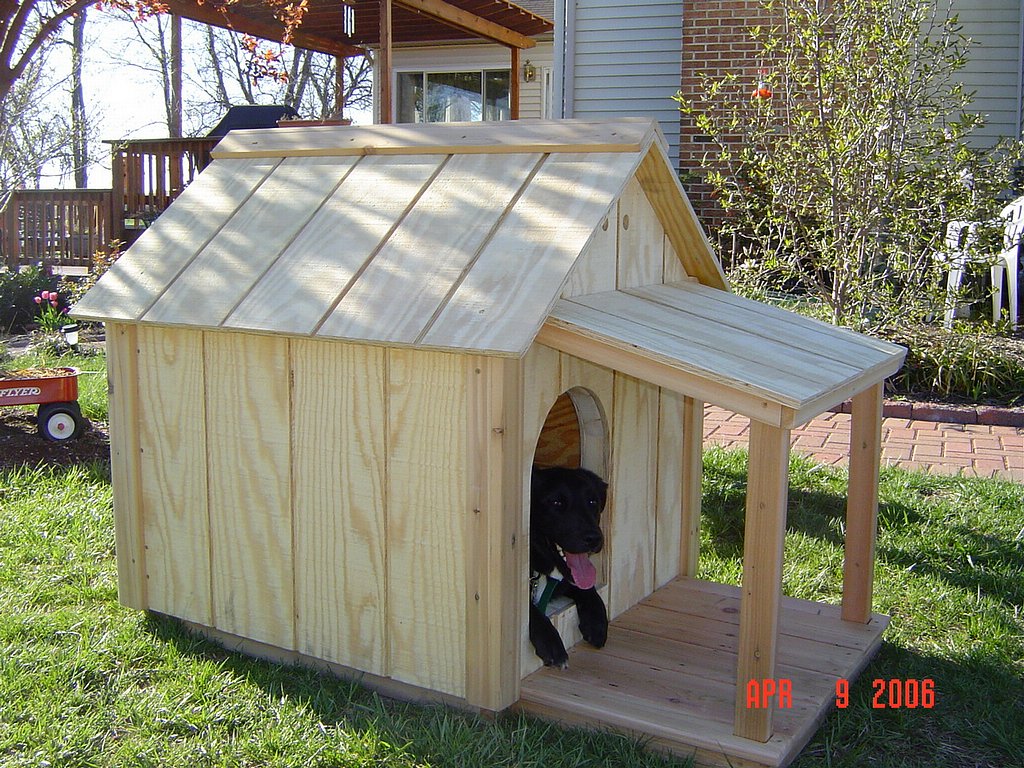
The Sparky 1 dog house
Dimensions: The house was designed for a medium sized dog. It is 30″ wide, 33″ deep, 36″ high. The doorway is 11″ wide and 15″ high. The front deck measures 17-1/2″ by 26-5/16″. The deck roof slightly overhangs the deck. The whole thing weighs about 100 pounds.
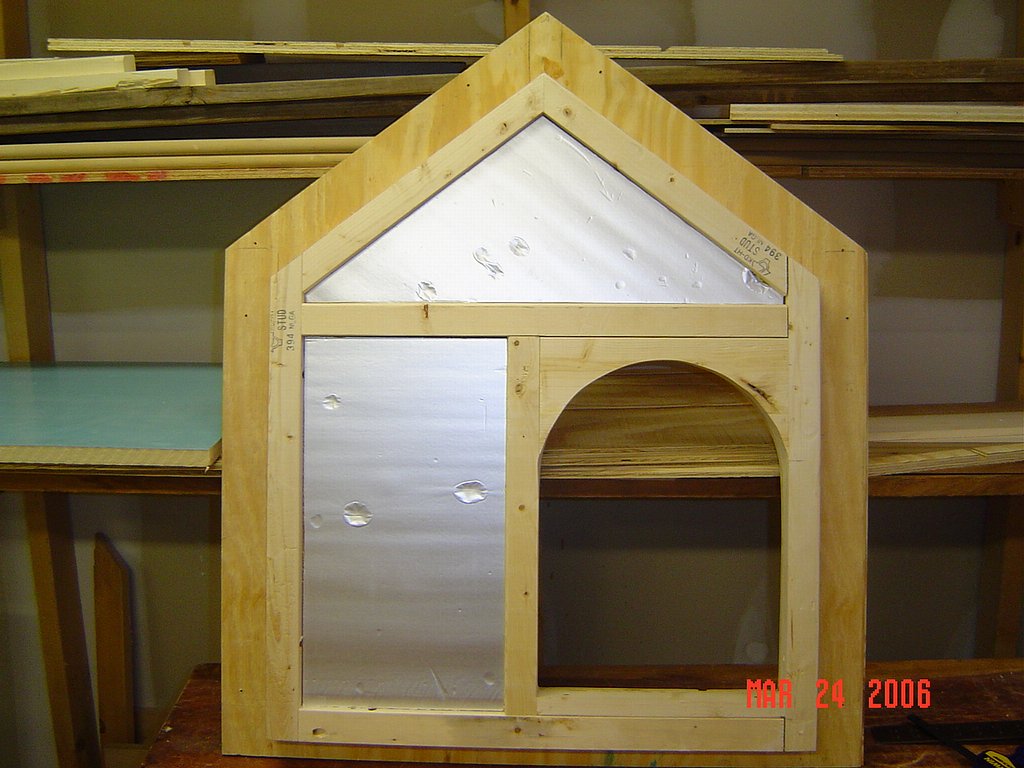
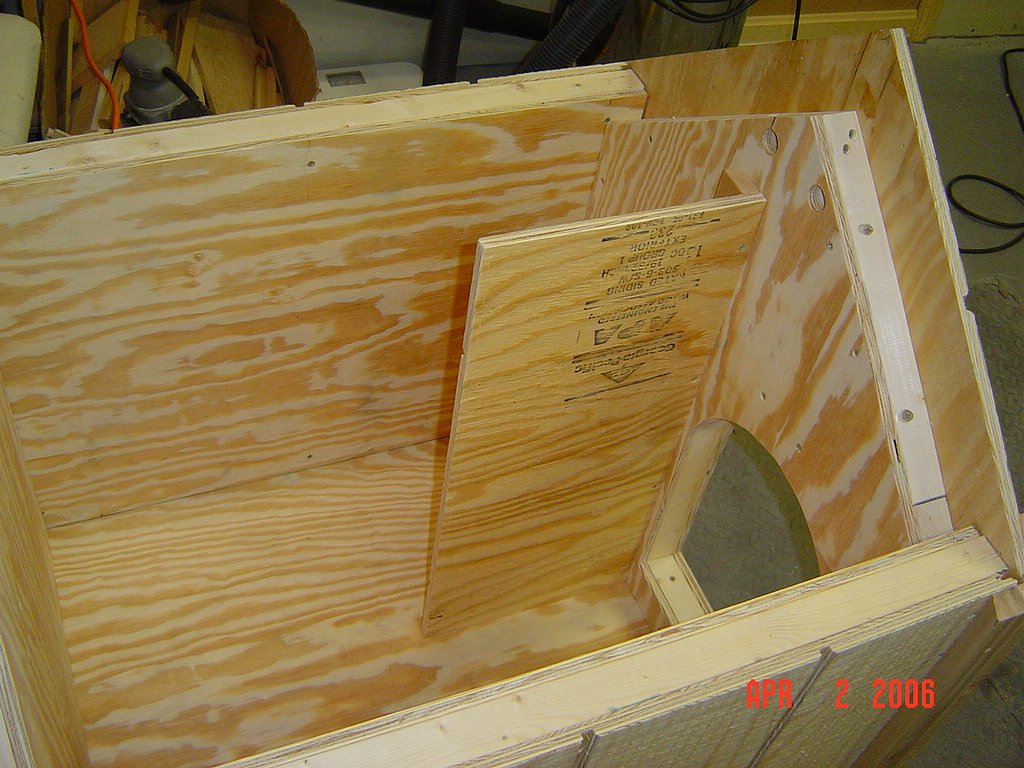
The house consists of six insulated panels. The side and roof panels are made from 2″x3″ framing lumber sandwiched between T1-11 exterior sheathing and sanded plywood interior panels (1/2″ for the walls, 3/16″ for the roof). For insulation, I used 1″ thick foam sheeting. This comes in 4′ x 8′ sheets and is pretty easy to cut to exact size. The floor, which measures 28-3/4″ x 32″, consists of a cedar frame with 1/2″ plywood on top and foam sheet insulation on the underside.
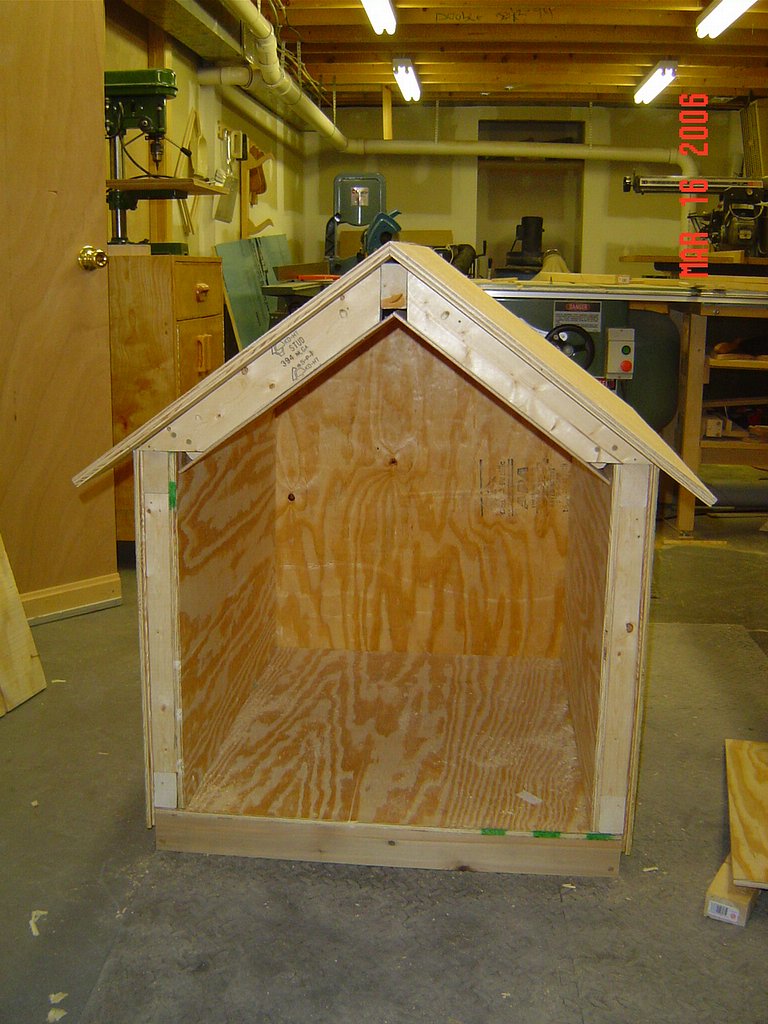
Interior view of dog house
Cedar was used for the floor frame, the deck, roof cap, and trim boards. It was salvaged from 5/4″ decking material that was cleaned and planed down to 4/4″. It almost looked too nice to use for a dog house, but at least it wasn’t being thrown out or left to rot…
The exterior of the house was sheathed with 19/32″ thick T1-11 grooved plywood. I saved myself a bit of work by having Home Depot rip it to rough width. Then it was a matter of using the table saw and circular saw to cut the panels to final size. If I were ever to make dog houses for a living, I would likely tweak the dimensions of the house a little to further maximize the yield from the plywood panels.
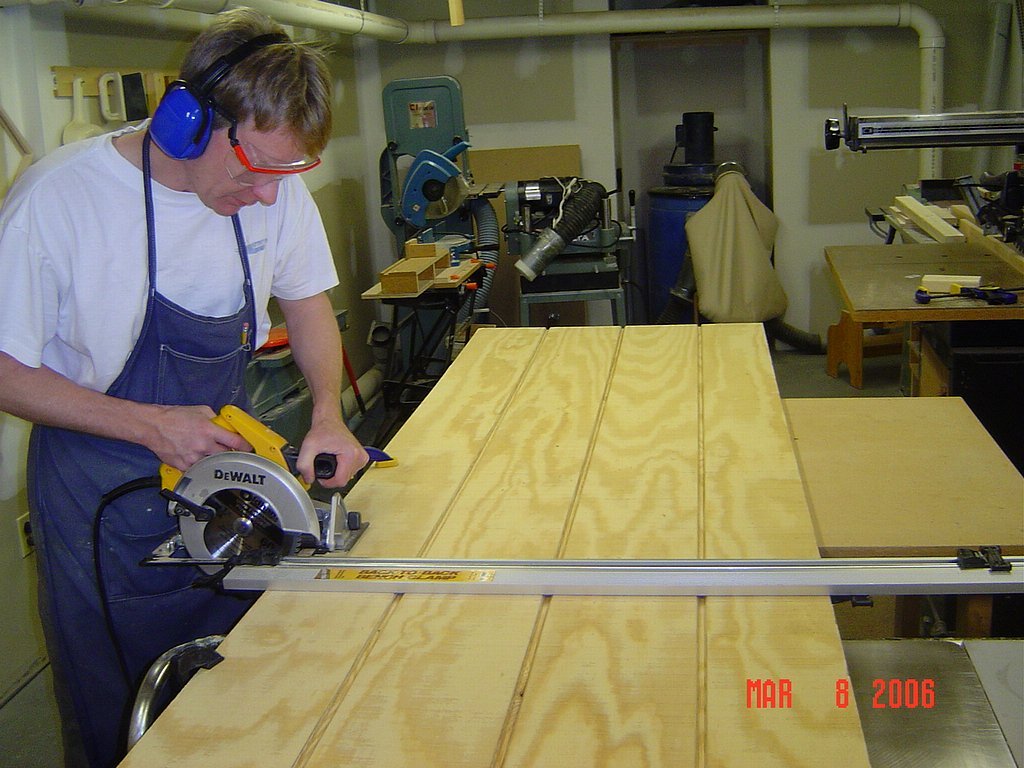
Cutting T1-11 panels to size with circular saw
The trickiest part of the dog house was the roof. Because it was intended to be removable, it had to be fairly strong and rigid without being too heavy. It also had to fit snugly atop the rest of the house so the angles had to be just right. This picture shows the underside of the roof. Note the angled cuts on the four outer support pieces – this is where the roof rested atop the side walls. To keep the weight down, I covered the inside of the roof with 3/16″ luan plywood rather than 1/2″ thick plywood used elsewhere.
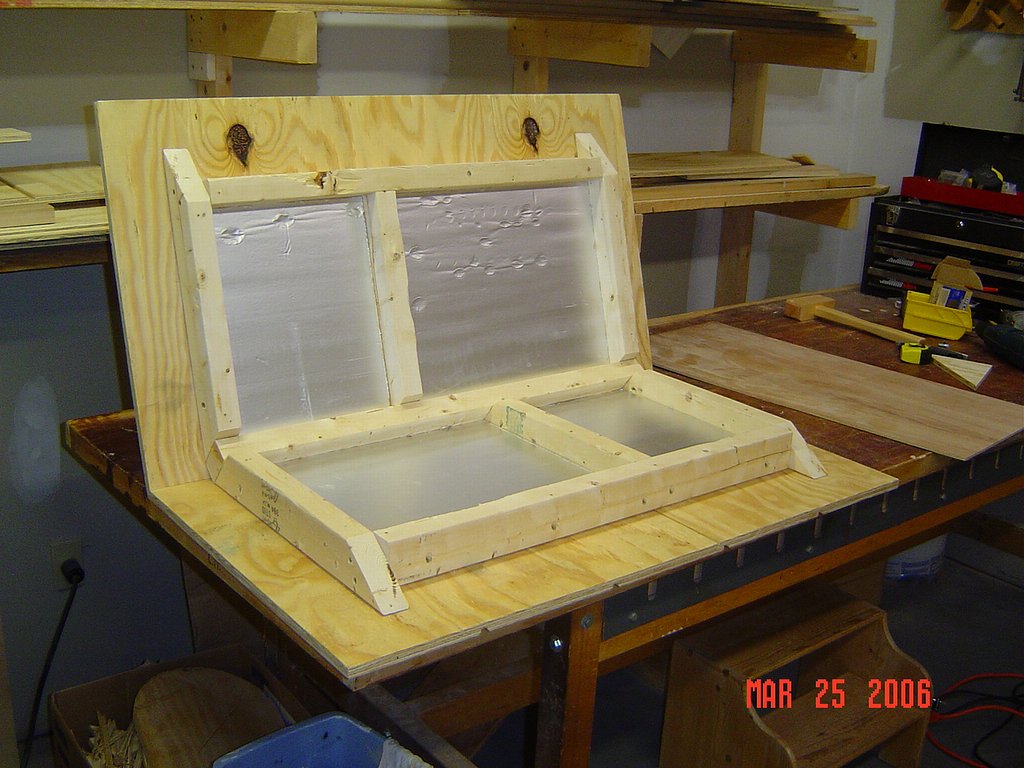
Roof insulation panels
The doorway of the house was offset to minimize exposure to the outdoor elements and to provide extra privacy space inside the house for a dog to hang out. An off center doorway also provides extra space to insert an interior wind deflection panel to further enhance the warmth and coziness of the house. This particular house may be a bit cramped inside for such a panel (especially if the dog is large) but the panel can be easily removed by taking out a few screws.
Front wall insulation
I didn’t get around to adding a vinyl door flap but it would be a simple matter to attach one to the inside of the doorway. Such flaps do a good job of retaining heat in the winter, keeping out rain and wind, and also allow the canine to see what’s going on outside.
Interior wind deflection panel
Speaking of screws, the entire structure was held together with epoxy coated deck screws. Although more expensive than nails, these screws make it easier to disassemble the house to move it or to make repairs. They also look nice and don’t rust. As it turned out, we had to remove some of the corner trim boards in order to fit the house through the doorway of our house. Fortunately, it didn’t take long to reattach the boards.
The ridge cap for the roof was made from two pieces of 1″x4″ cedar that were screwed together after making angled edge cuts to accommodate the pitch of the roof. Aluminum flashing was positioned along the peak of the roof and the cap was then placed on top of the flashing and screwed in place. At some point, the roof may need to be covered with asphalt or wood shingles but the T1-11 plywood should hold up for several years – especially if it’s given a finish coating.
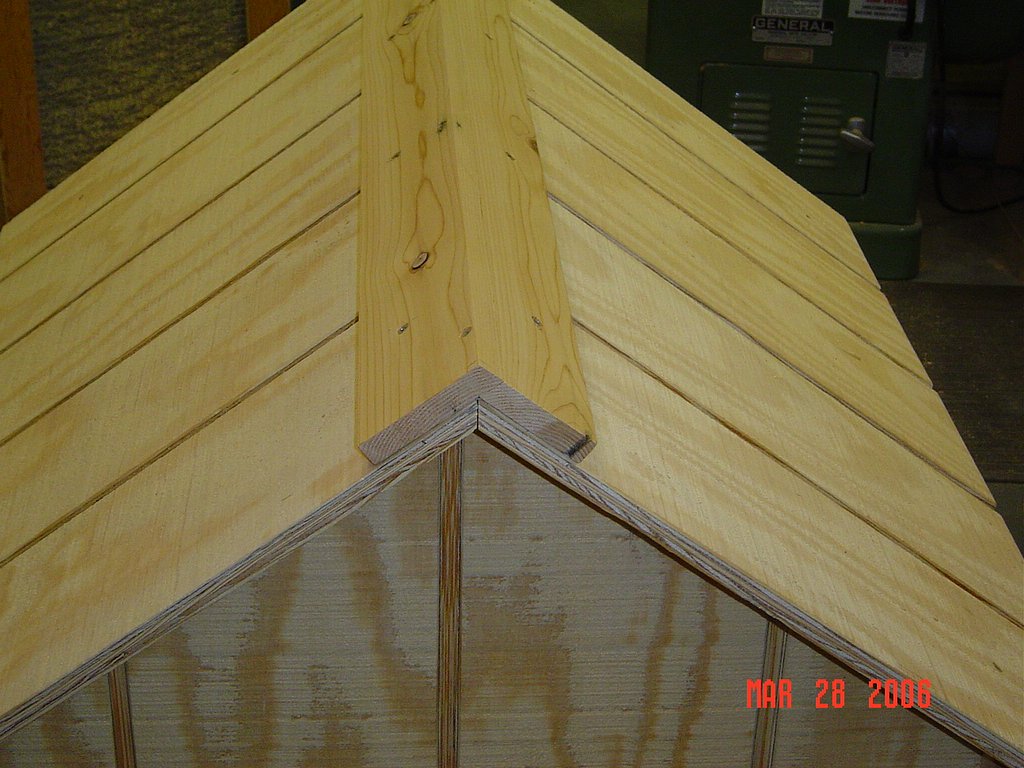
Dog house roof ridge cap
Hey, what’s the cat doing in there? The two holes just below the peak of the roof are intended to provide additional ventilation. They allow warm air to vent out during hot weather but also help to prevent excessive moisture build-up during the winter months when the doorway may be covered with a vinyl flap. You don’t want your pet sleeping in a frosty box.
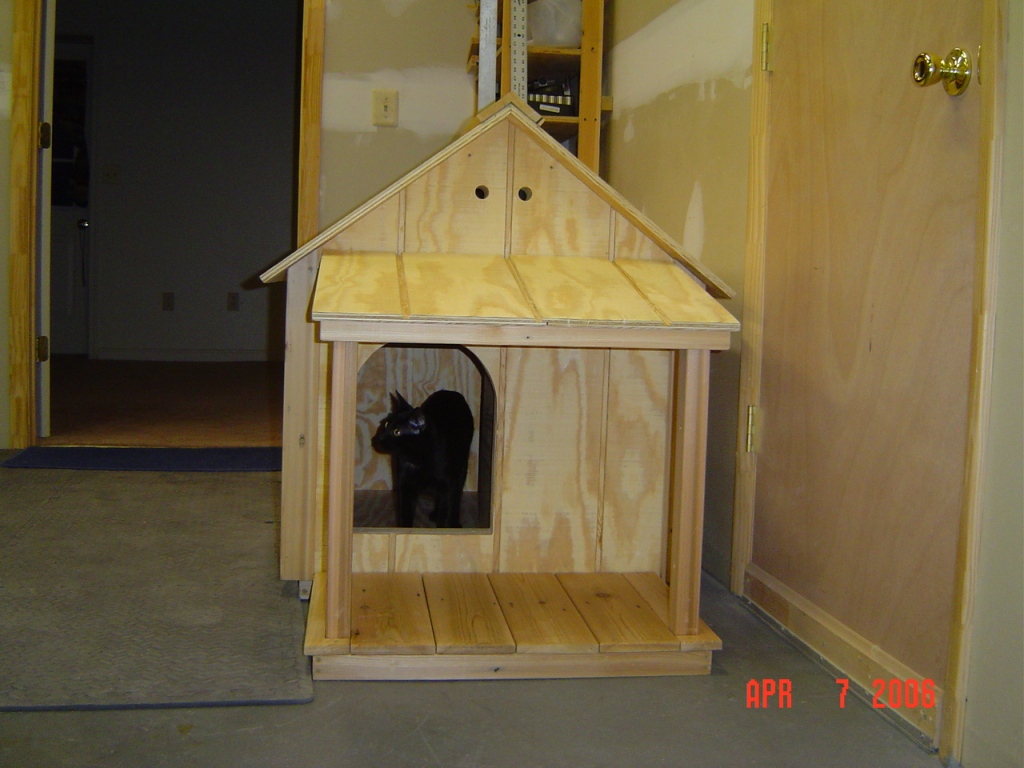
Family cat inspecting the dog house
Here’s the Sparky 1 being hauled off to its new home. I hope to get a status report in a year or so to find out how well it held up and whether the dog actually liked staying in it (a fairly common problem with dog houses). The new owner was planning to stain the exterior and perhaps add a water repellant clear finish such as spar varnish. Certainly good ideas…
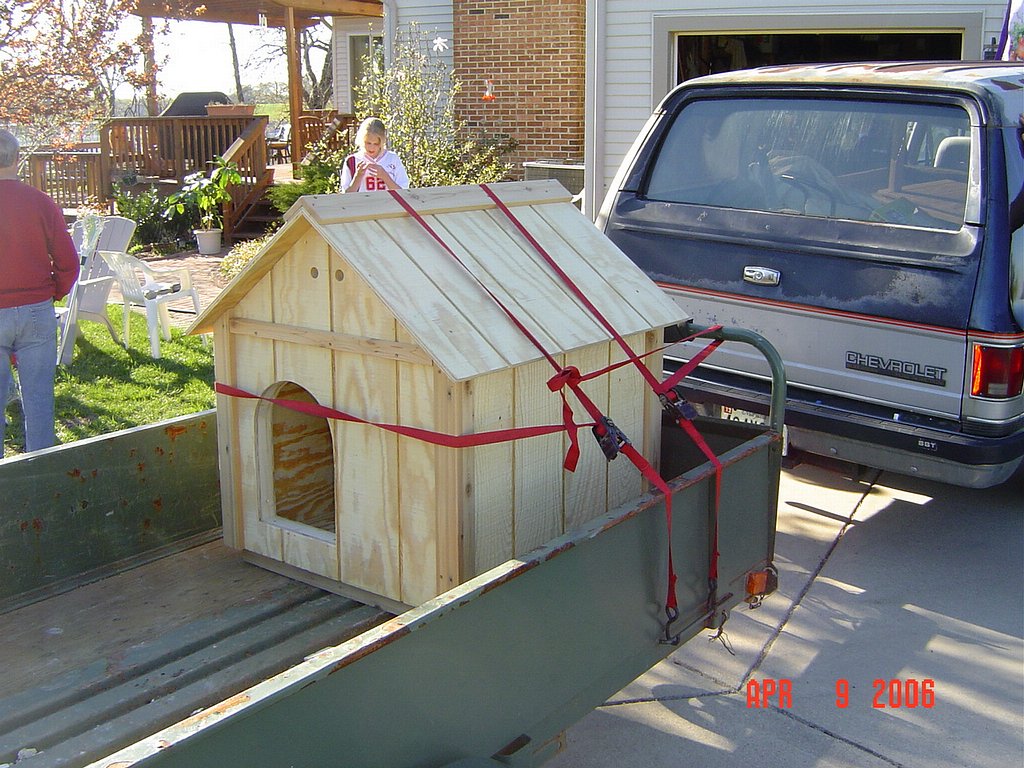
Dog house headed off to a new home
hi ive been trying to find someone that can build a doghouse made out of plywood for my dog for the winter i need something cheap, at the moment im on maternty leave and my dogs box fell apart. the only thing i can afford is $100 but i dont want to buy the same product i bought before it didnt last long and i need it to last longer than 4 months.
Just curious of what state you purchase the materials?in California I priced it out around $240.00 for materials?
The materials were purchased in MD. Most of the expense was the T1-11 panels.
Hi I would pay someone to build me a dog house just like this one. Who’s interrested?