What to do when you need to level a woodshop table but don’t have any levelers handy? You make them from scratch. That was the situation I found myself in when I built a new outfeed table for my table saw. Because my shop floor was not quite level (are they ever?), I needed a way to independently adjust the height of each of the two support legs. I didn’t have any pre-built leg levelers on hand and I wasn’t inclined to go out and buy any – the immediate gratification thing – so I went ahead and knocked out a couple from hardware and wood scraps that I already had in my shop.
These DIY levelers cost less than a $1 each. Each leveler is made from a 2″ x 2″ piece of 3/4″ plywood, a 3″ long 5/16″ diameter carriage bolt with washer and nut, and a pronged T-nut. Any half-decent hardware store will carry the requisite hardware, including the T-nuts. You can also pick up a package of 8 T-nuts from Rockler for about $3.
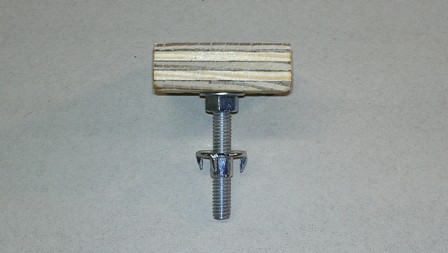
Homemade leg leveler
The T-nut is tapped into a hole that is slightly larger than the bolt. The biggest challenge here is drilling the hole straight into the bottom of the leg. I suppose one could create a jig such as a wood block with a pilot hole to keep the drill bit aligned properly but I just free-lanced it, drilling slowly and eye-balling the bit to make sure it appeared to be parallel to the leg when viewed from the top and side. An extra set of eyes makes this task a bit easier.
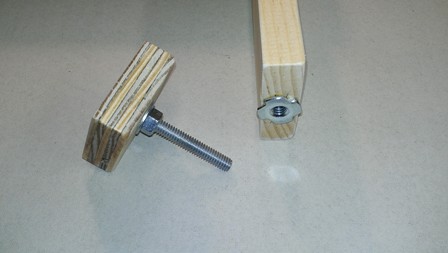
Leg leveler threads into t-nut attached to bottom of leg
The leveler threads into the T-nut. This one came out pretty straight if I must say so myself. Note that the T-nut will pull out of the hole if you tug on the leveler but this won’t be an issue when the leveler is in use because gravity will keep the nut in place. You could also epoxy the nut to better secure it but that’s not really necessary.
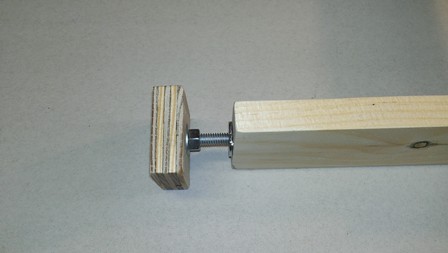
Leg leveler in place
Before drilling the bolt hole, I drilled a 1/4″ deep counterbore with a Forstner bit to accommodate the head of the carriage bolt. The bolt hole can then be drilled exactly in the center of the counterbore thanks to the little conical recess created by the tip of the Forstner bit. It’s then a matter of inserting the carriage bolt and tightening the nut with a wrench. As the nut tightens, the square part of the carriage bolt firmly seats itself in the plywood.
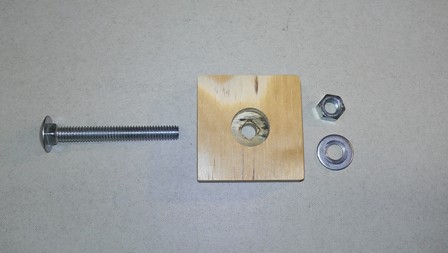
Exploded view of leg leveler bottom piece
The leg levelers in action. They may not be pretty but they get the job done. I recommend sanding down the corners of the levelers to make them more finger-friendly.
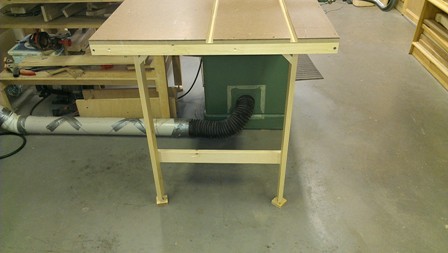
Leg levelers on table saw out-feed table