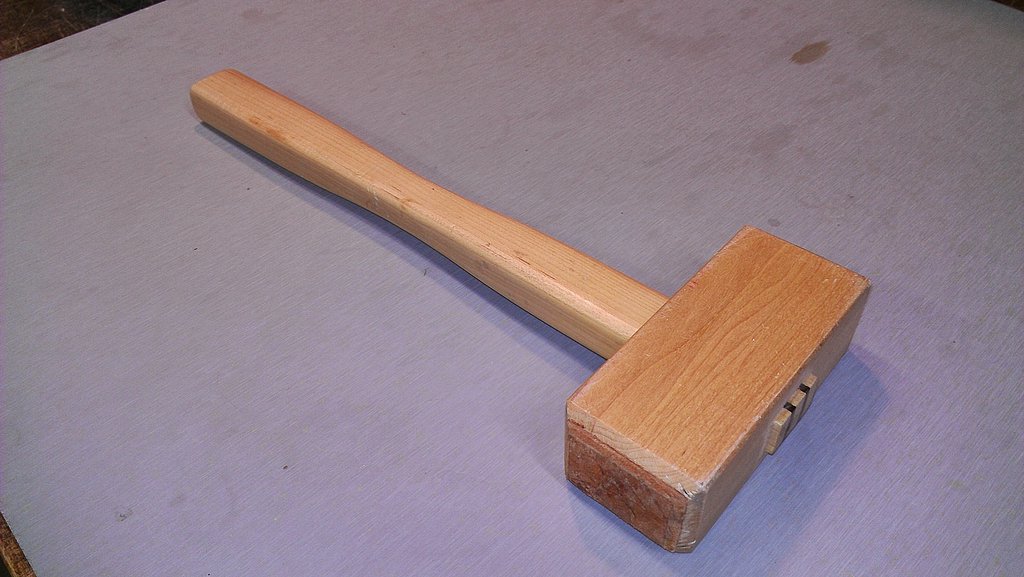
A wooden joiner’s mallet is a very useful shop tool for project assembly, chiseling, inserting dowels, and general purpose pounding operations. Compared to a conventional metal hammer, it is less damaging to wood or metal surfaces, especially if the faces of the mallet are covered with leather. The relatively large face of a typical wooden mallet spreads the force over a larger area, making dents and dings less likely to occur. The large face also makes it easier to strike the end of a chisel when your eyes are focused on what the business end of the chisel is doing. That means fewer mashed fingers. And there’s no denying that a well crafted wooden mallet looks good hanging on the wall. It tells the world you’re a serious woodworker! Keep a wooden mallet near your workbench and I guarantee you’ll find yourself reaching for it all the time. That has certainly been my experience.
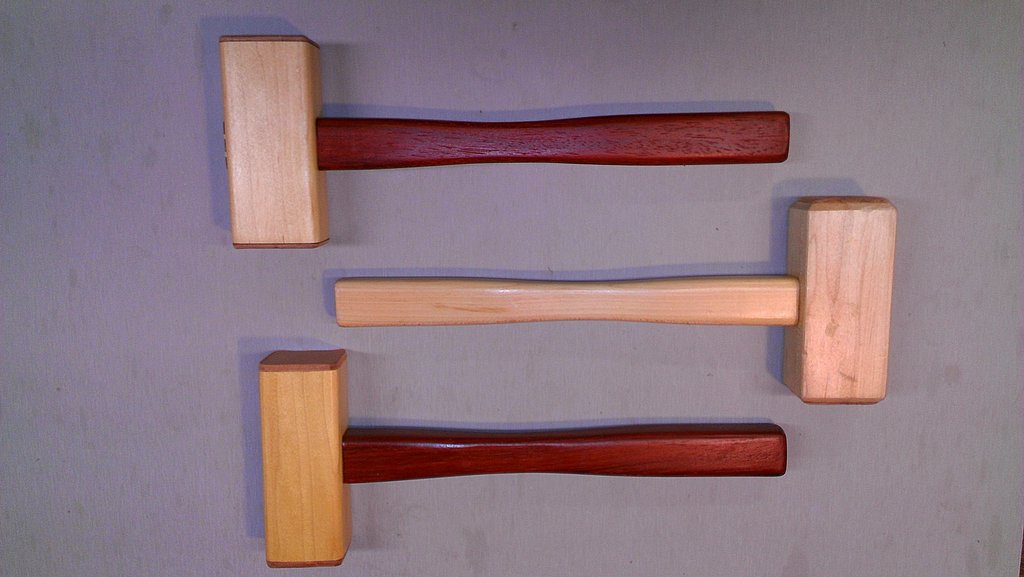
Trio of mallets made from maple and padauk
I built several joiner’s mallets based on plans in Issue #2 of Shop Notes. The mallet heads are made from three pieces of laminated maple with a rectangular hole left in the middle for the handle. For extra heft, steel rod 5/8″ dia. by 2″ long is glued into holes drilled in the faces of the head. I used two pieces of rod for some mallets and four pieces for other ones. You could also use 1/2″ dia. rod. The rough sketch below depicts the basic layout and dimensions of the weighted mallet heads.
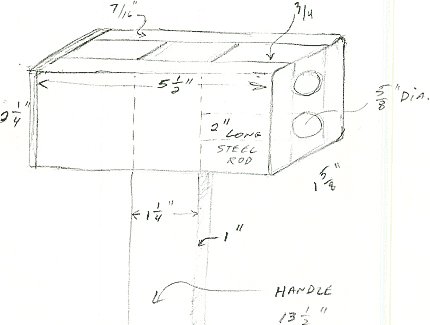
Rough sketch of mallet head design
The handle is secured to the mallet head via a wedged mortise and tenon joint. This involves cutting two slots into the end of the handle, sliding the handle into the slot in the mallet head, and then driving in the wedges from the top until the handle is tightly secured. Of course, glue is applied to the wedges and mating handle/head surfaces before assembly. The Shop Notes plans contain lots of useful tips such as how to accurately cut the wedges that secure the handle into the mallet head. The plans also contain a full-size template for the handles. I made these handles slightly longer than the specs as that seemed to make for a more balanced feel. I used hard maple, cherry, and padauk for my mallet handles.
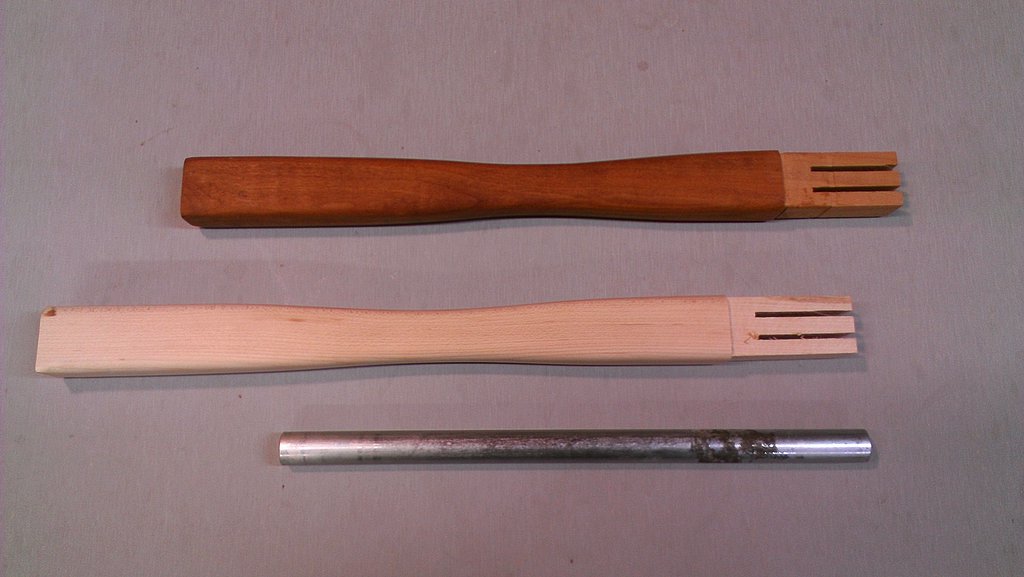
Mallet handle blanks with slots for wedges
Once the glue was dry, I trimmed the wedged end of the handle to the desired height. For most of the mallets, I opted to have the top of the handle protrude slightly above the mallet head. I also made a couple where the handle was flush with the top surface of the mallet head.
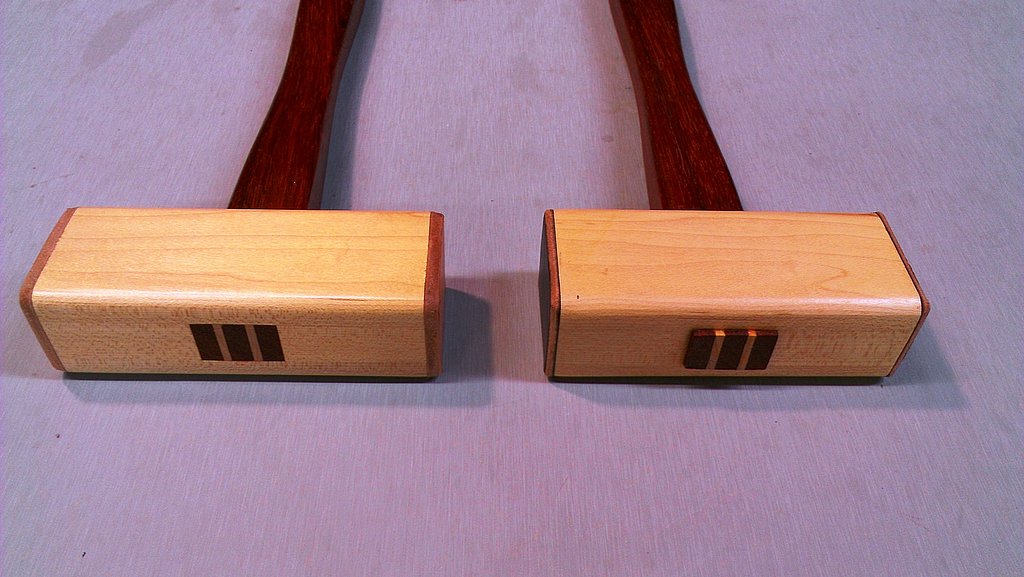
Mallets handles secured with wedges of contrasting color
I made two different styles of mallets: flat head and beveled head. Both perform equally well,although I prefer the beveled edge look over the non-beveled. The leather facing was glued on using contact cement. In the case of the beveled head, the bevel was cut after the cement dried, producing nicely aligned cut lines along both the wood and the edge of the leather. The leather on the flat head mallets was trimmed to size with a Stanley knife.
Some of the mallets had a beveled edge
I started to make a “couple” joiners mallets as holiday gifts and got a bit carried away… So far, none have been returned and there have been no reports of failures. The mallets I use in my shop on a regular basis have held up well for over 10 years with no splitting or loosening of the handles. Keeping my fingers crossed…
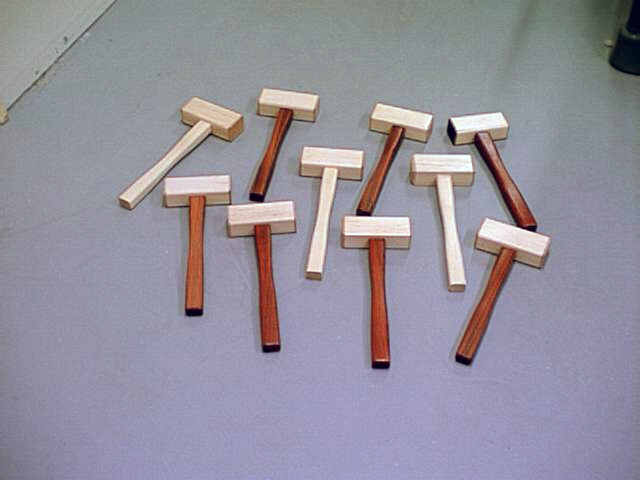
Mallets for the masses!