When I discovered this old rocking chair collecting dust in the attic, unused and forgotten for over 30 years, I instinctively knew it deserved better. I remembered this chair hanging around the house as a kid growing up in small town Pennsylvania. I’m not really sure where it came from – it may have been in my mom’s family but that’s just speculation. What I do know is that my brothers and I treated the chair as more of a play piece rather than a piece of fine furniture so it acquired more than its fair share of dents and scratches. At some point, the worn-out chair was relegated to the attic where it patiently waited, as rocking chairs often do, for someone to come along and put it back in service.
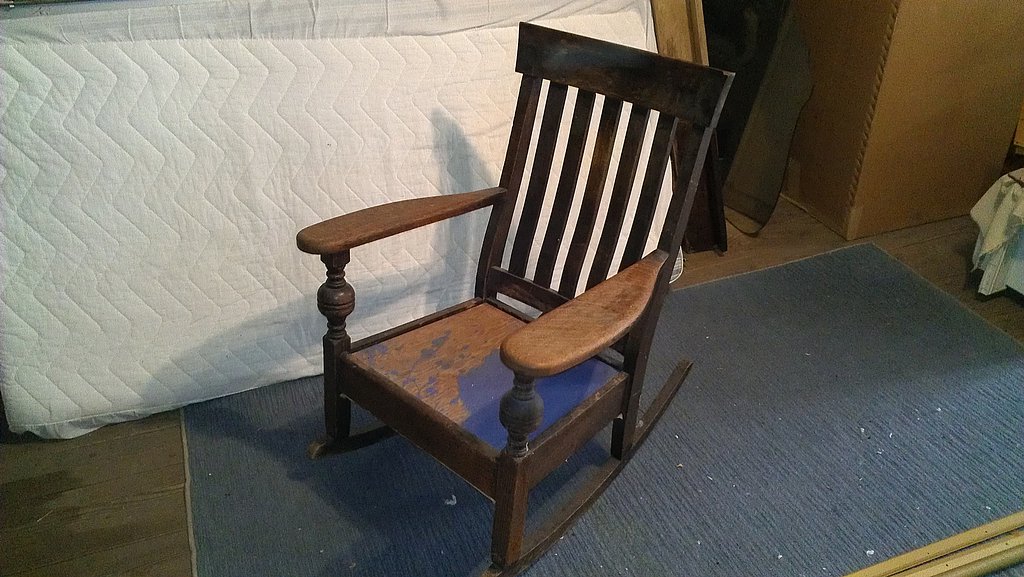
Mission style rocking chair pre-restoration
This rocking chair is made from white oak and generally conforms to the Mission style (some would say Arts and Crafts), although the turned front legs impart a certain ornateness that is not characteristic of Mission style furniture. According to a couple antique dealers that I spoke with, the chair dates to the early 1900’s, perhaps 1920 at the latest. The dealers told me the chair wasn’t worth much – perhaps $100 to $150 at most. But to me, it had sentimental value and I liked the way it sat – the perfect chair for the man cave. All it needed was a little restorative TLC. Fortunately, the basic structure of the chair was sound and the damage was mostly superficial – just the afore-mentioned dents and scratches. The heart and soul of the chair was intact. I had a vision for this chair…
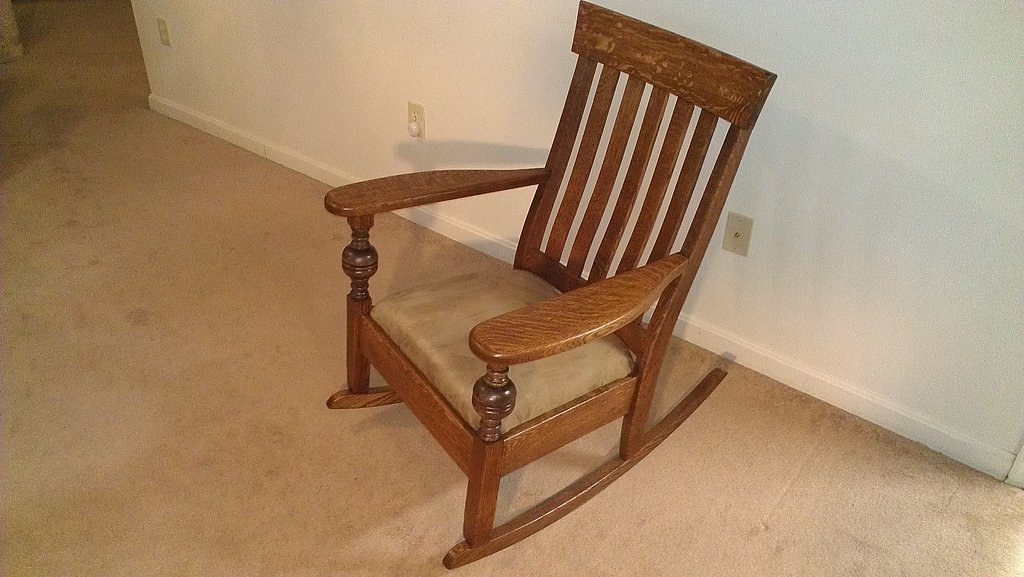
Fully restored Mission style rocking chair
The finish on the chair had darkened considerably over the years which is fairly typical for old furniture. But, there was no blistering, water damage, etc. Not too surprisingly, most of the damage was confined to the rockers although this damage was primarily scratches and dings. No splits or missing chunks of wood. The underside of the seat was covered with a piece of cloth that had become stained over the years, especially around the rusty nails holding the cloth in place.
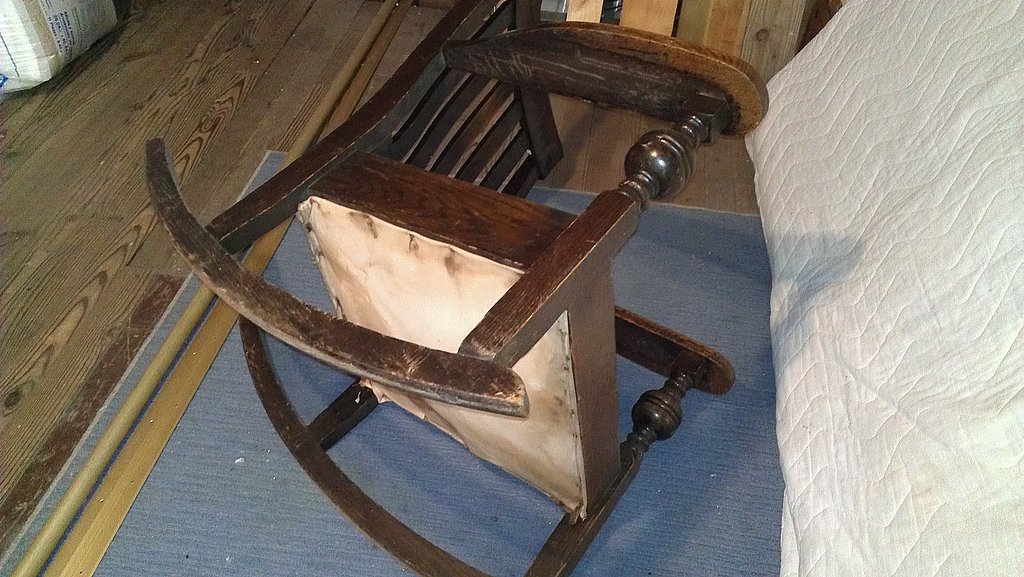
Side view of chair showing beat-up rockers
The first job was to disassemble the chair. Surprisingly, many of the joints were held together with old fashioned slotted wood screws so they came apart quickly and easily. This included the runners, the back of the arms, and the top rail. These joints were still tight and showed no signs of wear. The seat framework was held together with double dowel joints which necessitated a bit more effort to dissemble. This task involved liberal applications of denatured alcohol to dissolve the old hide glue, followed by well placed taps with a leather-faced mallet. To my relief, all of the joints came apart cleanly and none of the dowels was damaged.
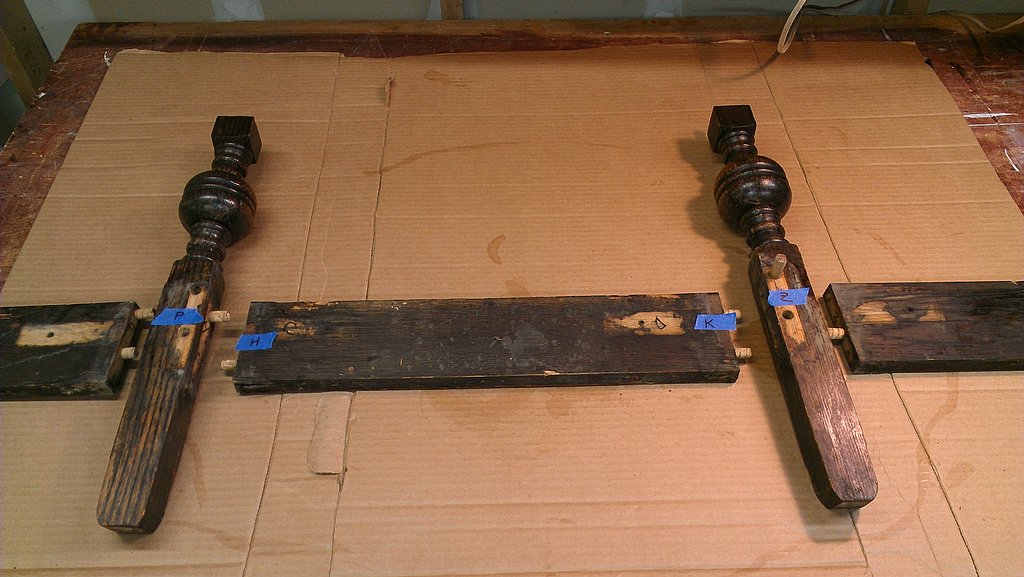
Rocking chair held together with hide-glue dowel joints
The biggest part of this restoration job was stripping off the remaining old finish. Except for areas like the arms where the finish was worn off, most of the grain was obscured by a dark, walnut-like coating. I suspect the original finish was fairly dark to begin with and that it got darker and darker over time. Some areas were so dark, it almost looked like a coat of black paint was applied somewhere along the way.
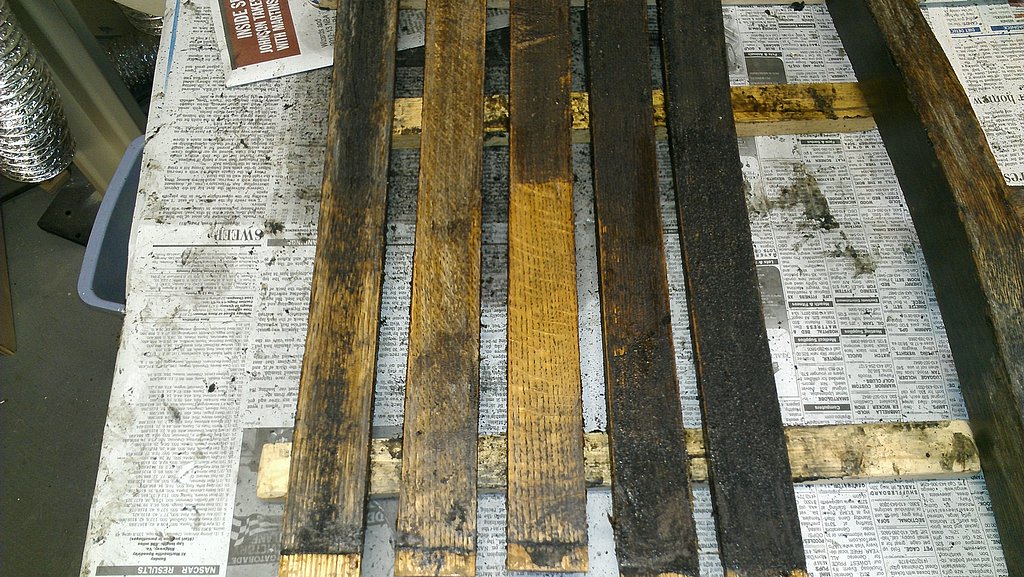
Removing old darkened finish
To remove the old finish, I used a chemical paint stripper that came in gel form. This involved several iterations of applying stripper, waiting 15 minutes or so for it to dissolve the finish, and removing the dissolved finish via a combination of brass brushes, scrapers, and rags. The stripped wood was wiped down with a rag soaked in paint thinner to remove any remaining traces of the stripping chemical. This was followed by a regimen of sanding to remove any remaining finish as well as dings and scratches. I didn’t attempt to sand out the really deep dings – that was too much work and besides, I figured they would lend more character to the chair.

The finish on the chair had darkened considerably over the years
With all the parts cleaned and sanded, it didn’t take long to reassemble the chair. I reglued the dowel joints seat assembly using liquid hide glue. This will simplify any future repairs since hide glue is much easier to dissolve and remove than conventional wood glue. It also provides a slightly longer set time which makes for a less hurried assembly process.

Cleaned chair parts ready for reassembly and refinishing
To finish the rocking chair, I first applied a single coat of Minwax Red Oak stain. I applied the stain with a cloth rag, allowed it to sit for 5-10 minutes and then wiped off the excess. Certain areas, such as the turned part of the front legs, had more exposed end grain and consequently soaked up more stain, making them considerably darker. In retrospect, I probably should have applied a sealer to these areas to prevent them from becoming so dark but that’s water under the bridge. Besides, those areas will likely lighten a bit over time with a little sun exposure. No biggie.
After the stain dried, I brushed on a few coats of 2# shellac. This was followed by a sprayed on light coat of satin polyurethane. The poly provided a couple of benefits: It took away some of the harshness from the glossy shellac finish, creating a more natural hand-rubbed look (yes, I was too lazy to rub out the shellac). It also provided a bit more protection against water and alcohol, especially on the arms of the chair. By applying a dual shellac/polyurethane finish, I feel that I mostly preserved the vintage character of the chair (the shellac) while taking advantage of more modern technology (the polyurethane) to create a more protective finish. That’s my story and I’m sticking to it.
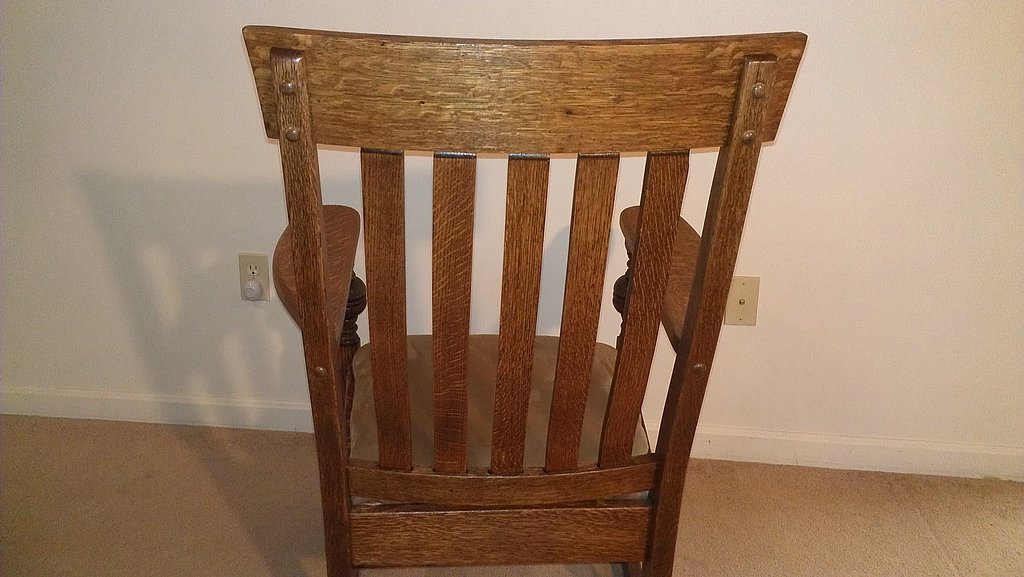
Restored rocking chair back view
The top of the front seat rail (stretcher?) had grooves rubbed into it on both the left and right sides. One groove wasn’t too bad – maybe 1/8″ deep but the other groove was about a 1/4″ deep. I’m not sure how these grooves formed – perhaps a makeshift seat was used at some point that rested on the rail? I do know they were unsightly and needed fixing. I accomplished this by filling in the worn areas with epoxy mixed with a bit of wood dust. After the epoxy dried and the wood was stained, I took a black permanent marker and tried to simulate the wood grain as best I could. Although the fix wasn’t perfect, I thought it came out pretty darn good. It’s not obvious that a repair was made unless you’re looking for it.
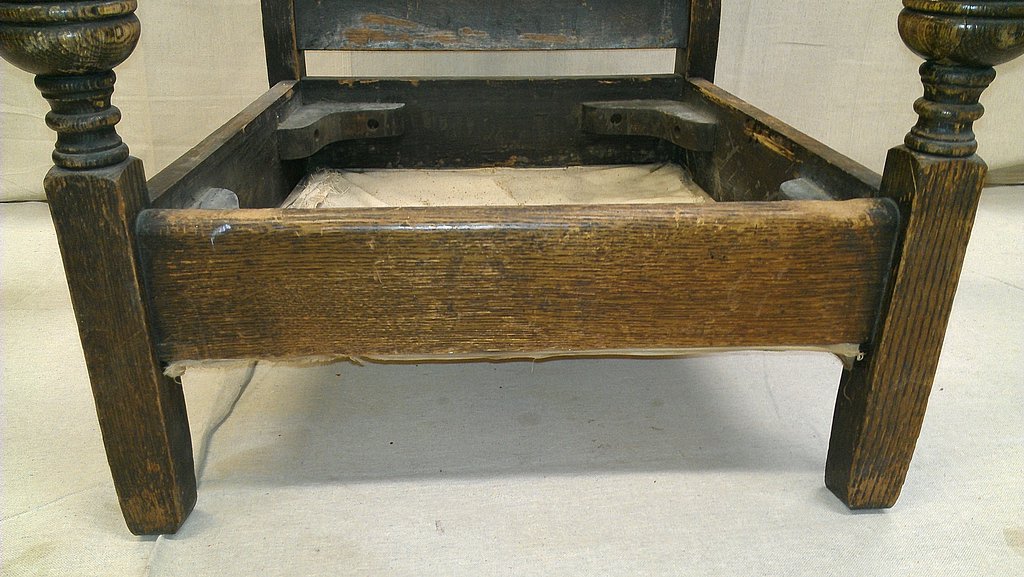
Front view of unrestored rocking chair
The seat on this rocking chair was long gone so I enlisted my wife’s upholstering expertise to create a new one. The seat support consisted of a piece of 5/8″ plywood that was cut to fit inside the seat frame, minus a quarter inch or so. This piece was covered with 2″ foam, followed by batting that covered the top and sides of the foam, followed by a brown, suede-like fabric that gives the seat a faux leather look. The batting and fabric was attached to the underside of the plywood with 1/2″ staples. The chair originally had a piece of cloth nailed to the bottom of the seat frame members (see below) – probably to give the chair a more finished look by covering up the underside of the seat – but I didn’t bother with that. If someone wants to look at the underside of this chair, I got no problem with that.
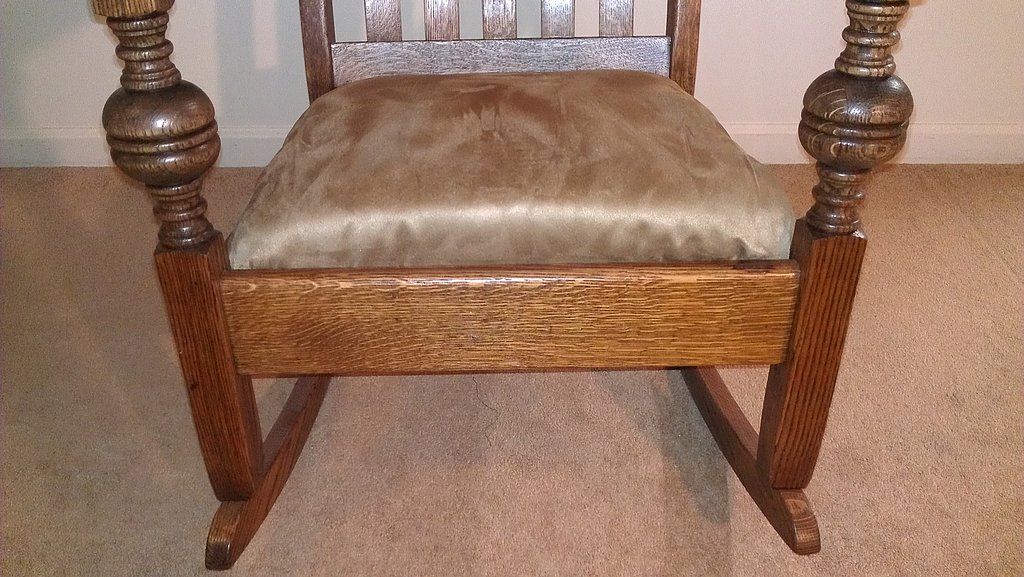
Restored rocking chair front view
This restoration job took about 26 hours, spread out over a few weeks. Total materials cost was under $20 – mostly for the upholstery and the shellac finish. The chair now sits proudly in the man cave. Hopefully, it’s good for another hundred years.
Fully restored Mission style rocking chair