
This simple router circle cutting jig was made from a piece of left-over 7/16″ PVC board that I found in the scrap bin. My impetus for building it was that I needed to cut 6″ wide holes for several corn hole game sets and I decided that the manual scroll saw approach with resultant wavy edges just wasn’t going to cut it (no pun intended). Furthermore, I wanted a quick and easily repeatable system because there were a total of six holes to cut. I considered buying a jig but most cost $40+ for what appeared to be a fairly simple and inexpensive apparatus. Thus I embarked on another DIY jig journey…
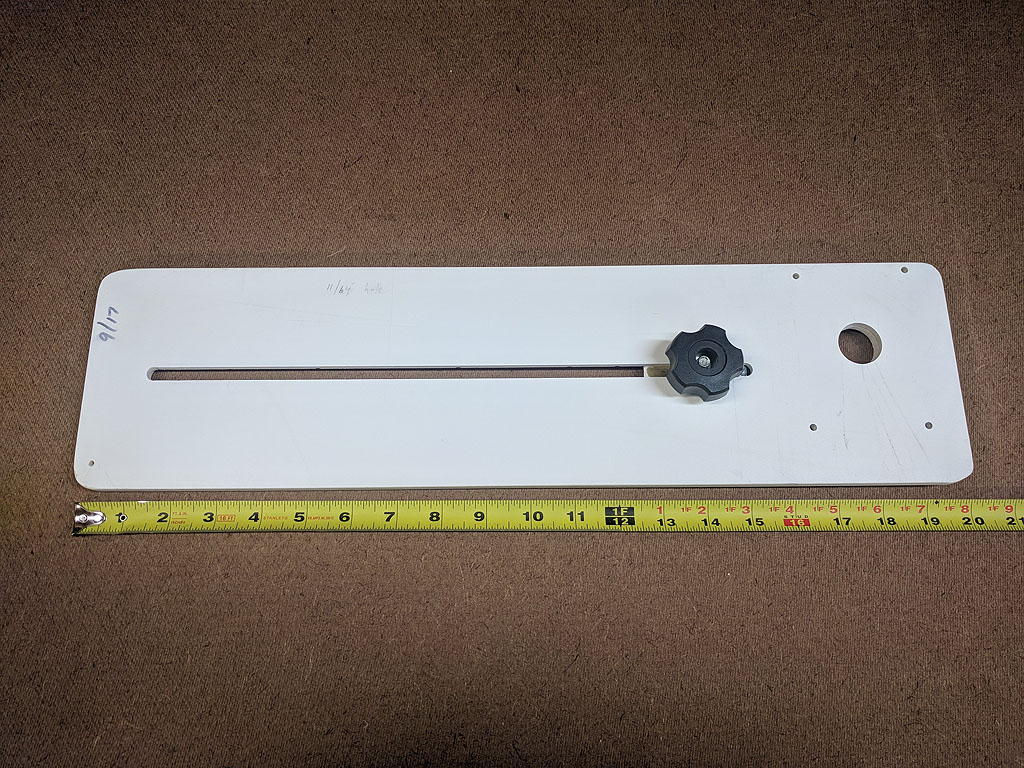
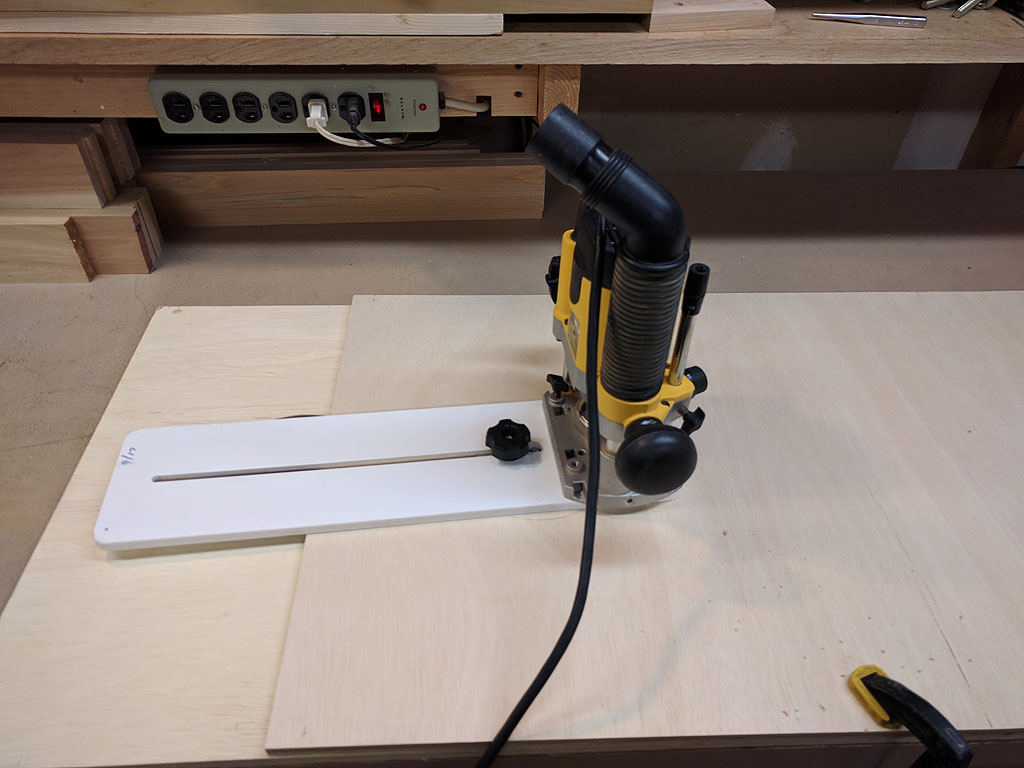
DIY router circle cutting jig made from 7/16″ thick PVC board
The jig is 20″ long and 5-1/4″ wide. It has a 14″ long slot in the middle of the board with about 4-1/2″ of space on one end to mount my Dewalt DW621 router. It will cut circles ranging from 6″ to 32″ in diameter. The slot accommodates a sliding pivot pin that is used to set the circle diameter.
Before cutting the slot, I first routed a 1/2″ wide recessed groove on the underside of the jig that is approximately half the depth of the jig material. The pivot pin slider plate travels in this groove.

The groove for the sliding pivot pin was cut using a 1/2″ straight router bit
With the router edge guide left in place, the inner slot was cut with a 5/16″ router bit. This took almost no time a’tall. I used a small screw to secure the one end of the jig to the work surface because the slot started 1-1/4″ from the end, which didn’t leave any room for a clamp. In retrospect, I should have milled the groove/slot first on a longer piece of material and then cut it to finished length afterwards. Whatever…
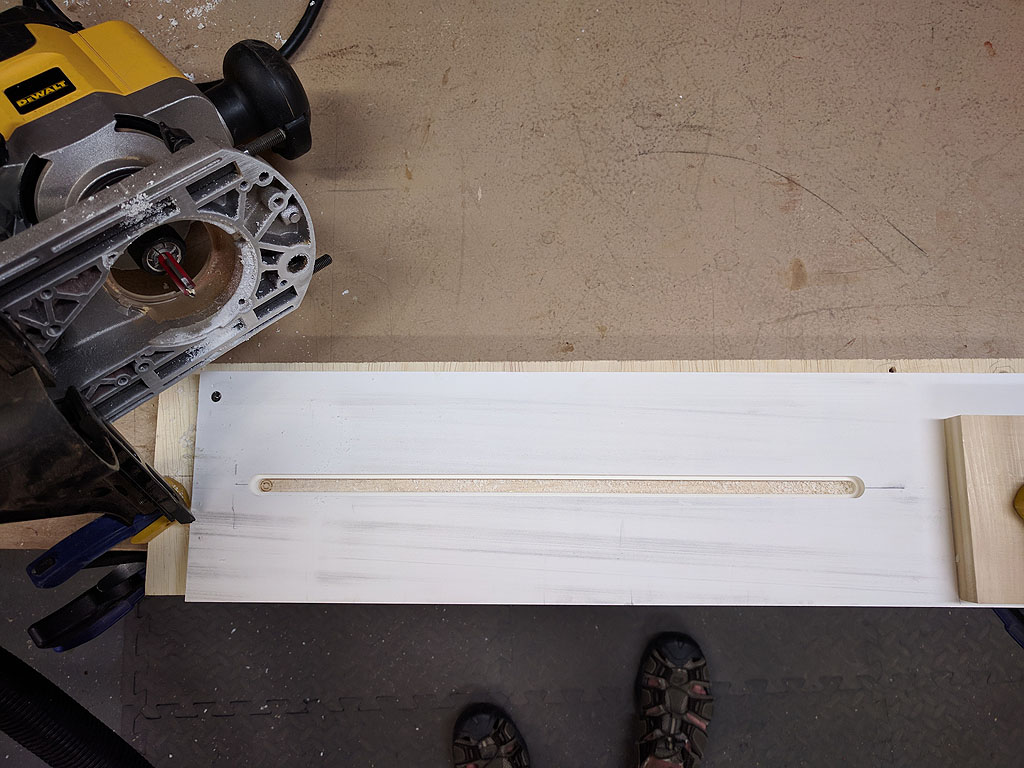
Inner slot cut with a 5/16″ straight router bit after milling the 1/2″ wide outer slot. (Note the OSHA-approved footwear)
I spent a good chunk of time coming up with a satisfactory sliding pivot apparatus. Initially, I drilled and tapped a hole into the top of a hex bolt and threaded a #10 machine screw into the hole. The idea was that the 5/16″ wide hex head would slide back and forth in the groove with the machine screw serving as the pivot pin (after sawing off the screw head). This is what is depicted in the photo below. Well, the problem was that once the hex bolt was tightened, the bolt head dug into the relatively soft PVC material. This made it difficult to make fine adjustments because the bolt wanted to slip back into the recessed area. Rats.
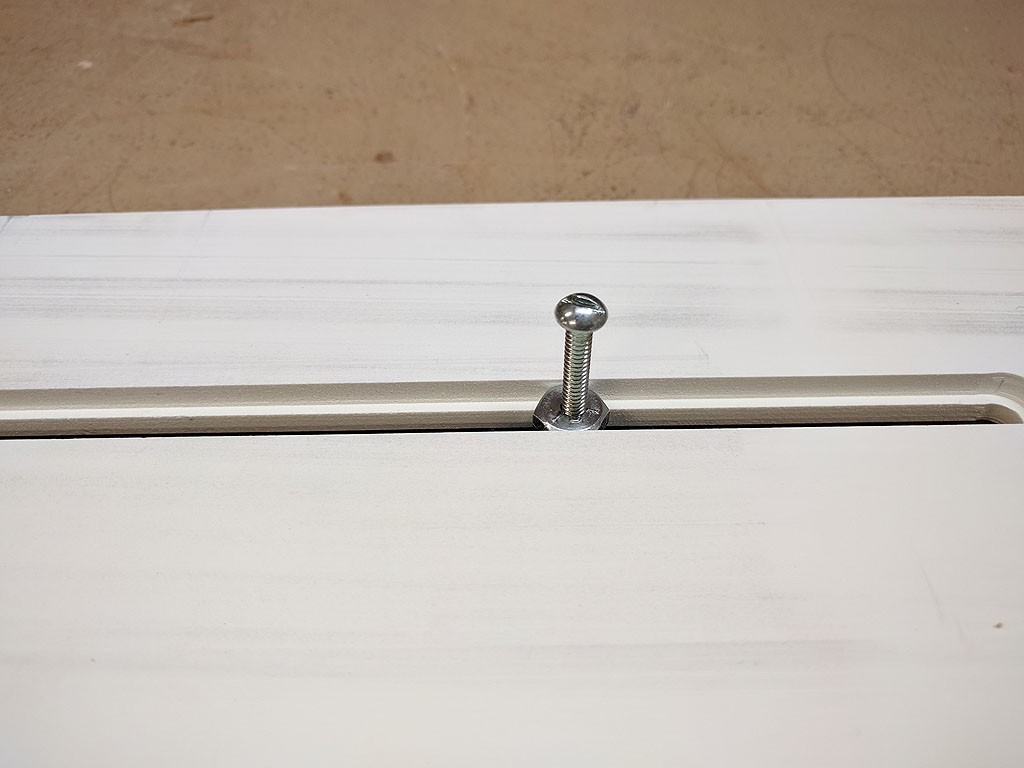
Version 1.0 employed a hex bolt head for the slider (unsuccessfully)
So, I re-engineered the slider using a piece of 1/2″ wide by 2-1/4″ long metal that was cut from an old door hinge. I drilled a hole in the center to accommodate a 5/16″ hex bolt that passes up through the slot. It connects to a threaded knob on the top side of the jig which is used to lock the slider in place. On one end of the metal slider, I drilled and tapped a hole for a #10 machine screw that functions as the pivot pin. The screw is screwed in from the top and can easily be replaced if it were to bend or break.
This slider design worked much better than the version 1.0 hex bolt slider – the metal slid easily back and forth and did not deform the PVC material when the slide bolt was tightened.
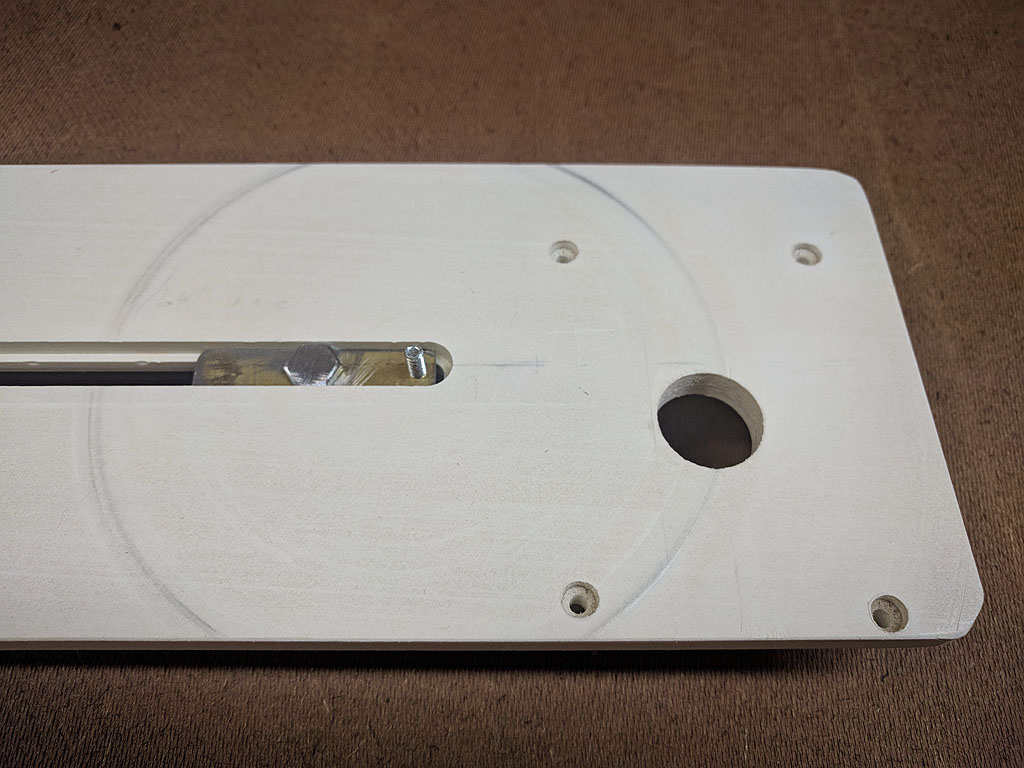
Bottom view showing pivot pin threaded into 1/2″ wide slide plate
I had to drill a 1″ wide hole for the router bit to pass through the jig as well as smaller screw holes to attach the router to the jig. To drill these attachment holes, I used the plastic base plate of the router as a template. I also had to purchase slightly longer mounting screws from the local Ace Hardware store because the jig is thicker than the stock plate. Tip: bring an existing screw with you to the hardware store to make sure you find ones with the same thread pitch and diameter. I purchased M4x16 (metric) screws.
To use the circle cutting jig, I first use a compass to lay out a circle of the desired diameter. Then a 11/64″ hole is drilled in the center of the hole-to-be and the pivot pin is inserted into the hole. Tip: write the drill bit size on the jig for future reference. With a 1/4″ straight carbide router bit in the router, I lower the bit so it’s a hair above the surface of the wood and then gently slide the jig with attached router forward or backward until the outside edge of the bit lines up with the circle line. I then tighten the star knob on top of the jig to lock things down. At this point, it’s a simple matter of milling out the circle with the router, slowly rotating around the pivot pin while making sure the pivot pin stays in place. This really wasn’t an issue for a 6″ diameter hole: for the most part, I could just grip the handles of the router and the pin stayed in place.
The jig in action cutting a 6″ diameter hole
I was quite happy with the quality of the cut. For the 1/2″ thick panels used to make the corn hole boards, I routed out the circles in two passes with my Dewalt DW621 plunge router. It took approximately two minutes per hole (versus five minutes or more using a jig saw). One important thing to remember is to use a sacrificial piece of material under the circle material to prevent chewing up the workbench.
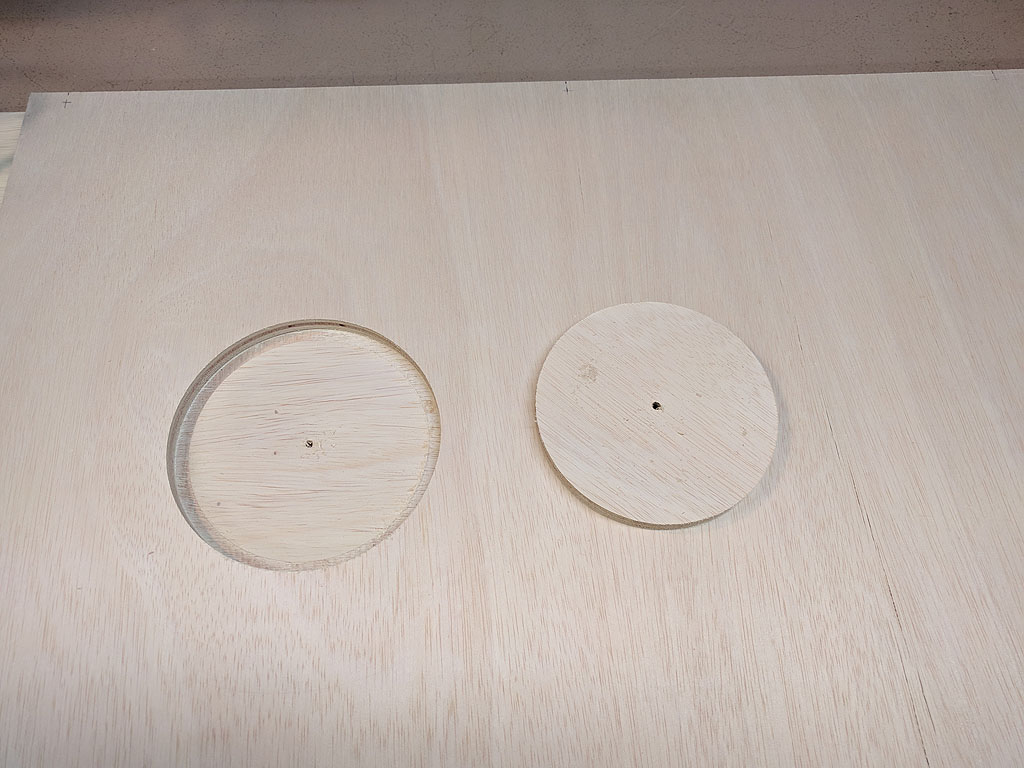
The jig produces perfect circles with nice clean edges
The jig worked just fine but I did notice that the PVC material had a pronounced bow along its length. If I were to build another one I would probably use stiffer material such as Baltic birch plywood or phenolic sheet material.